Estimate Parameters
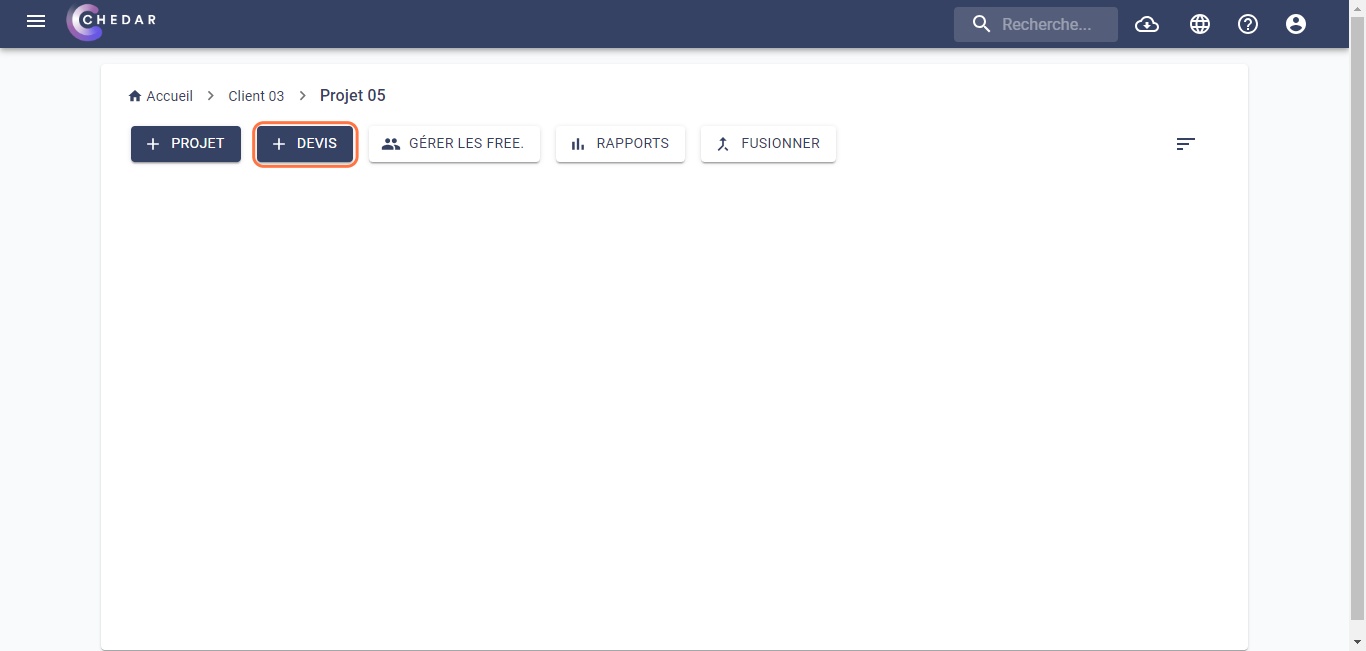
- To create an estimate, go back to the Create an Estimate section or click here to access it.
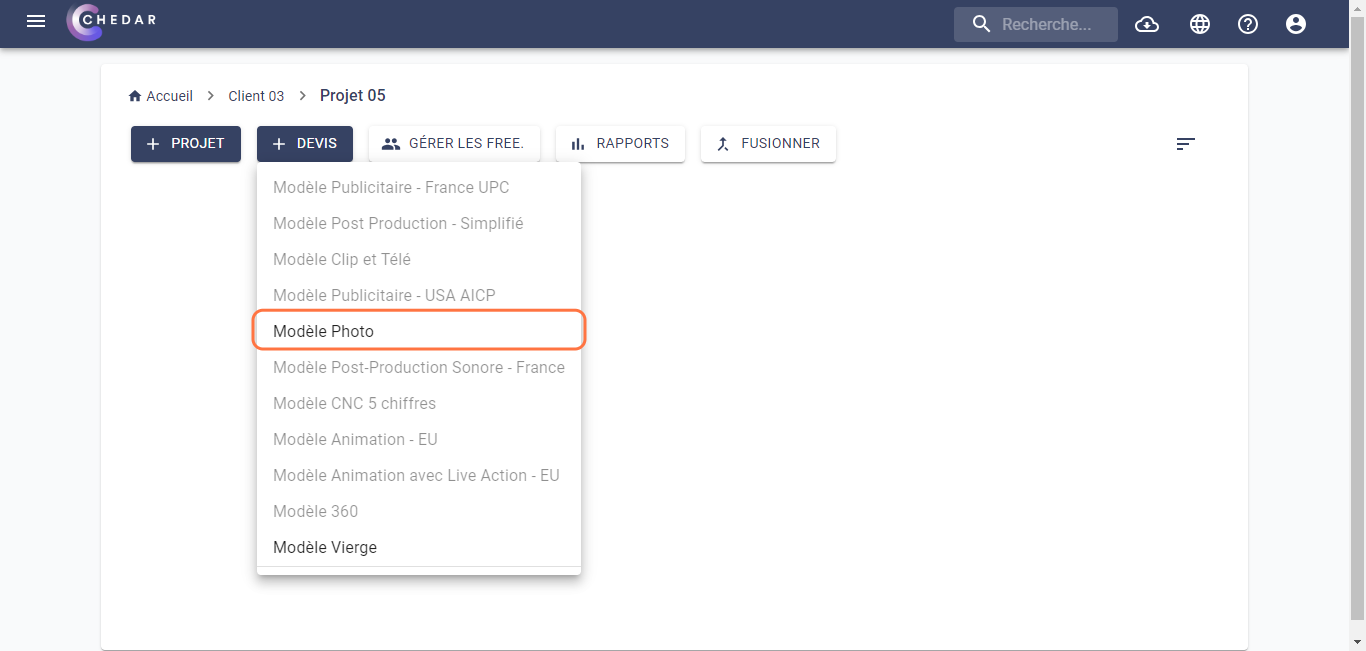
- To set up a Photo estimate, follow the steps below after choosing the estimate template as indicated below:
- In the window dedicated to the estimate header, you must fill in the estimate name, while the rest of the cells presented below are optional:
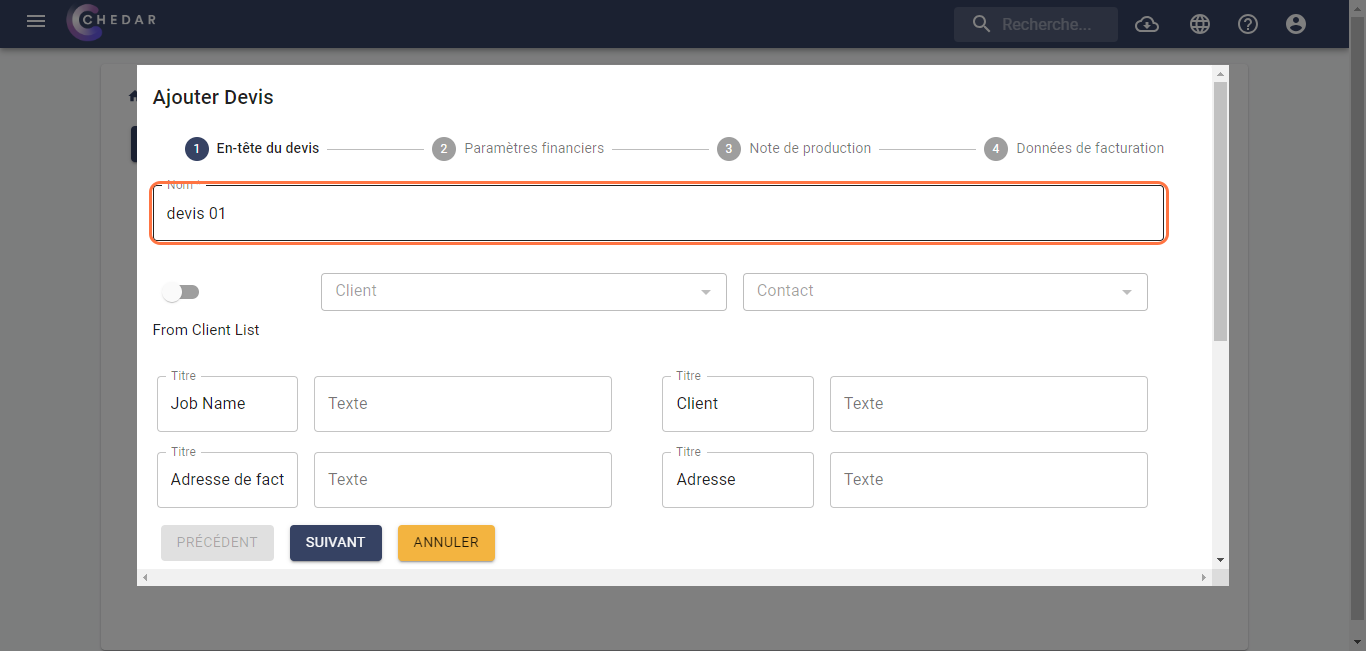
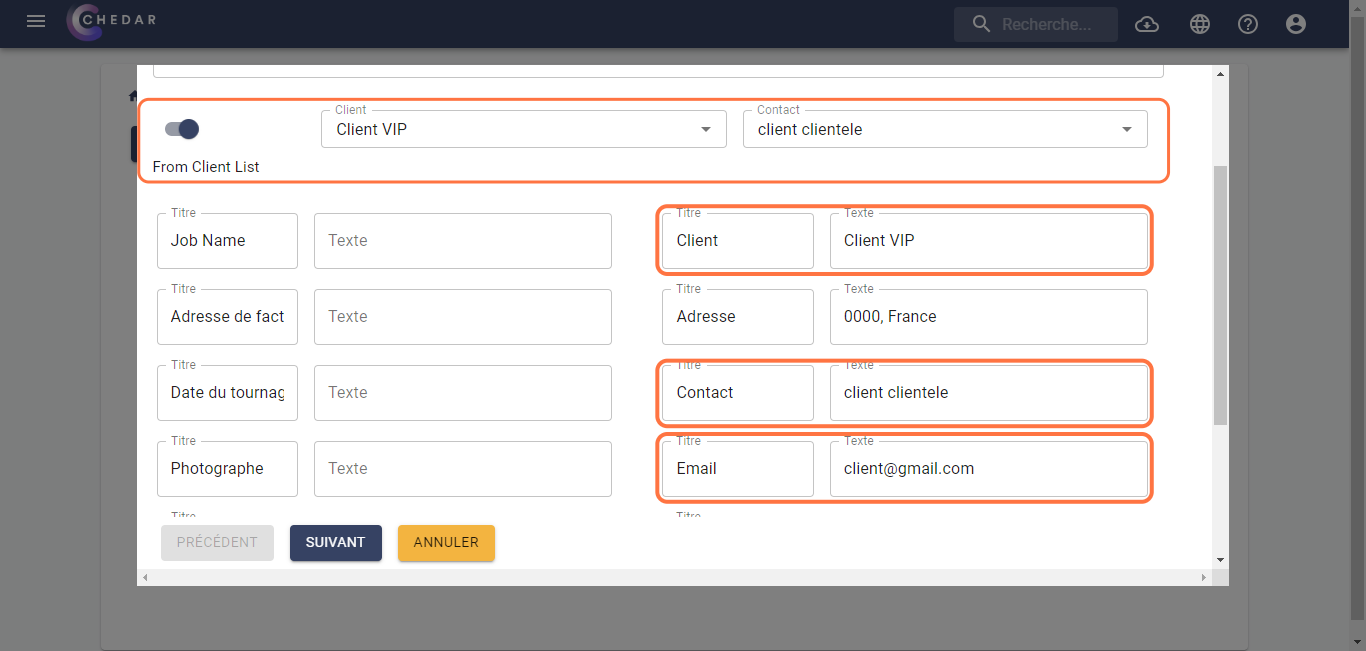
By activating the From Client List toggle, you can fill in the client name and contact details from previously added clients. The necessary information in the lower cells will be filled in automatically, as shown below:
 note
noteTo add a client, go to the Client section or click here to access it.
Fill in the remaining cells according to the specifics of your shoot, as shown below:
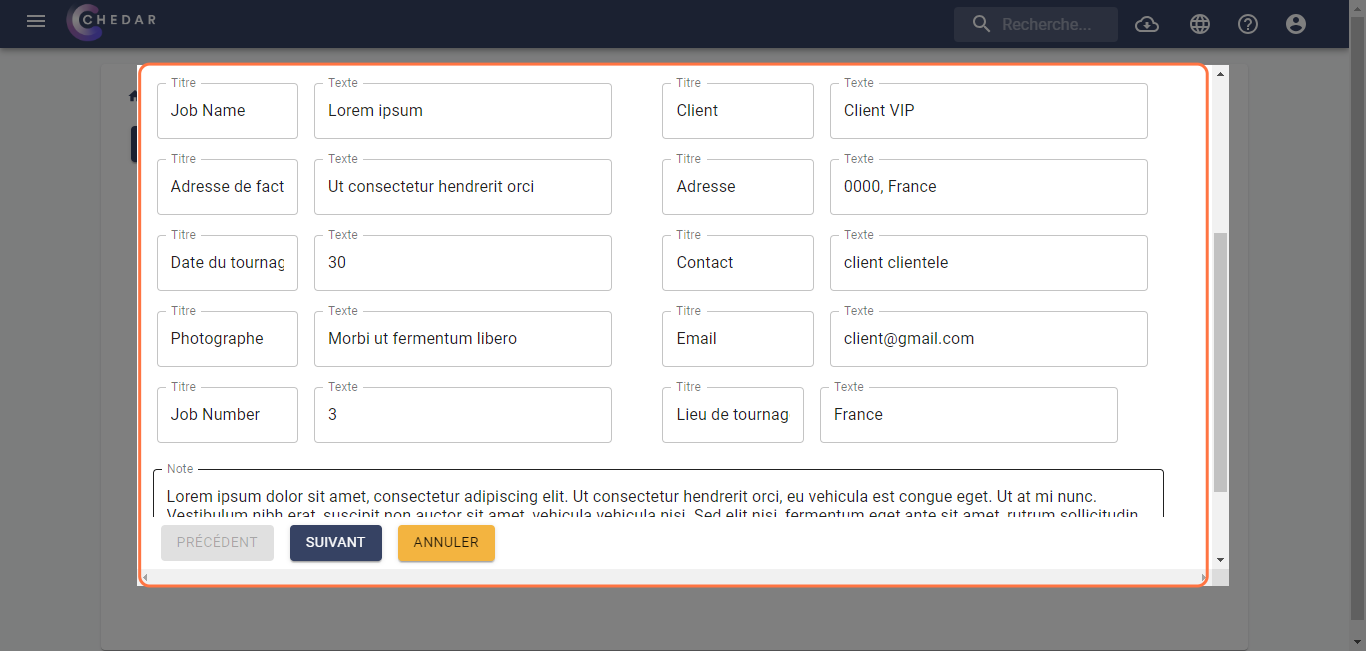
All data entered in the cells, except for the note, will be displayed in the PDF at the top of the page, as illustrated below:

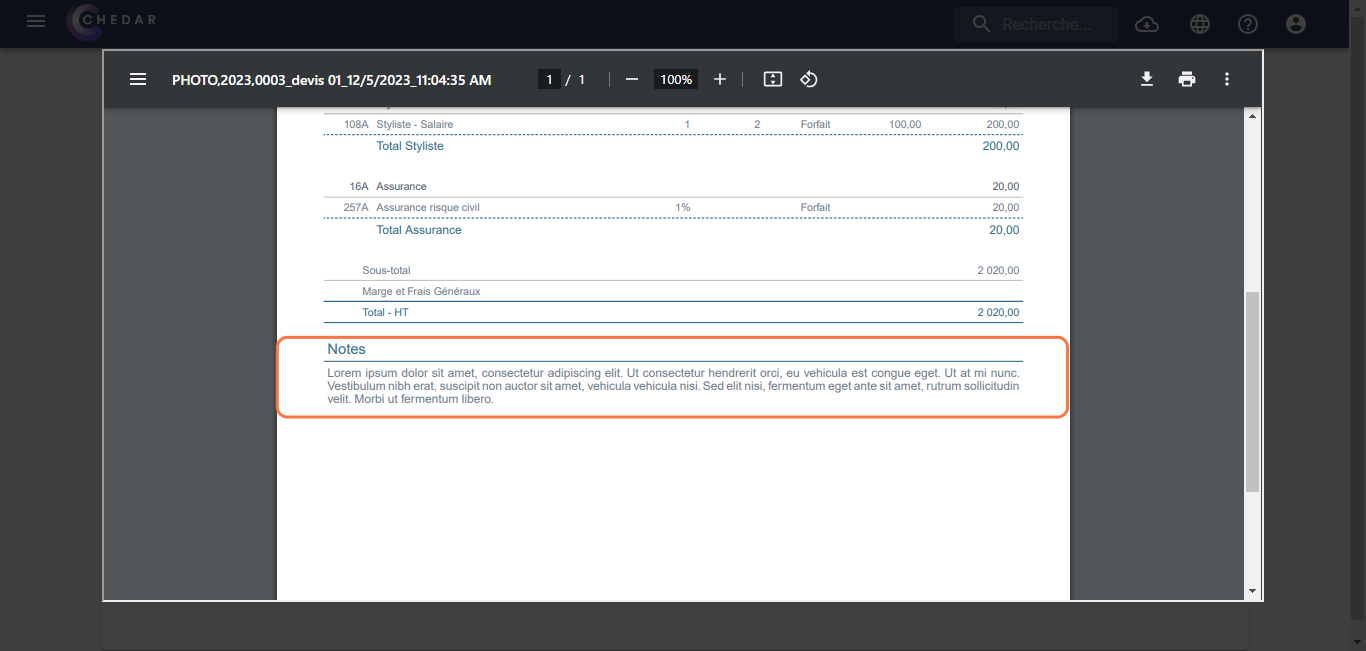
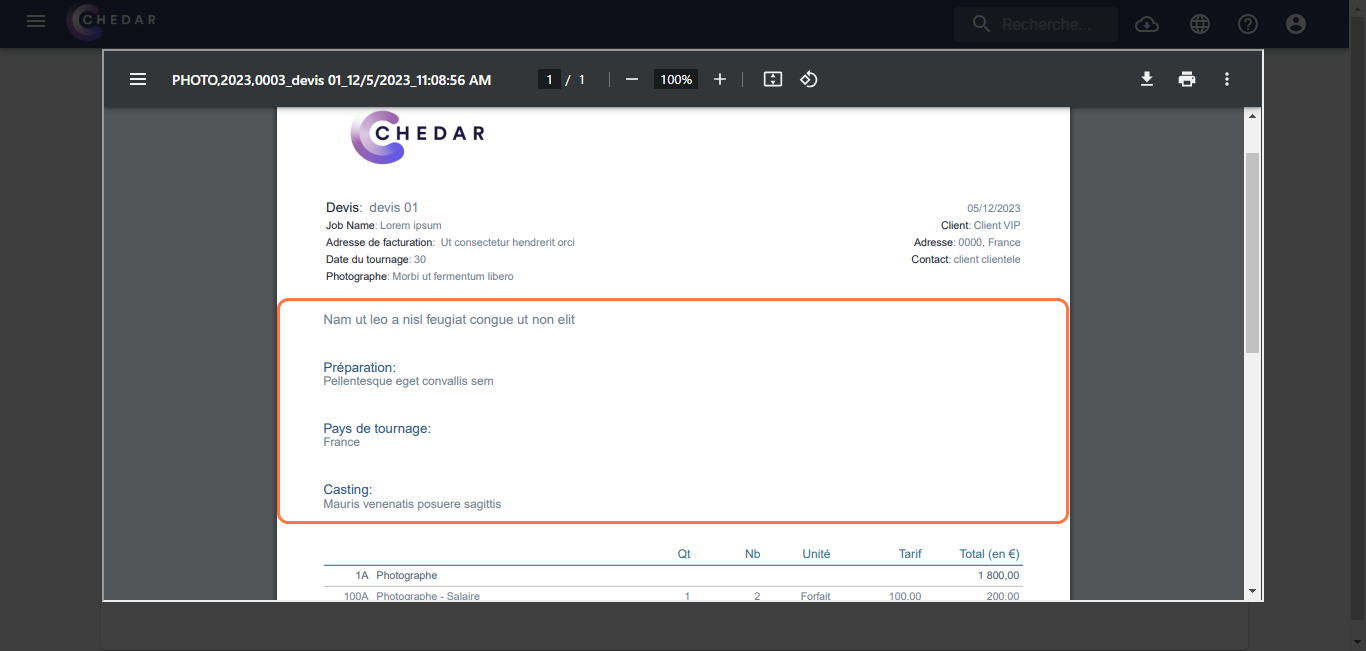
The information written in the Note appears as follows:
Click Next.
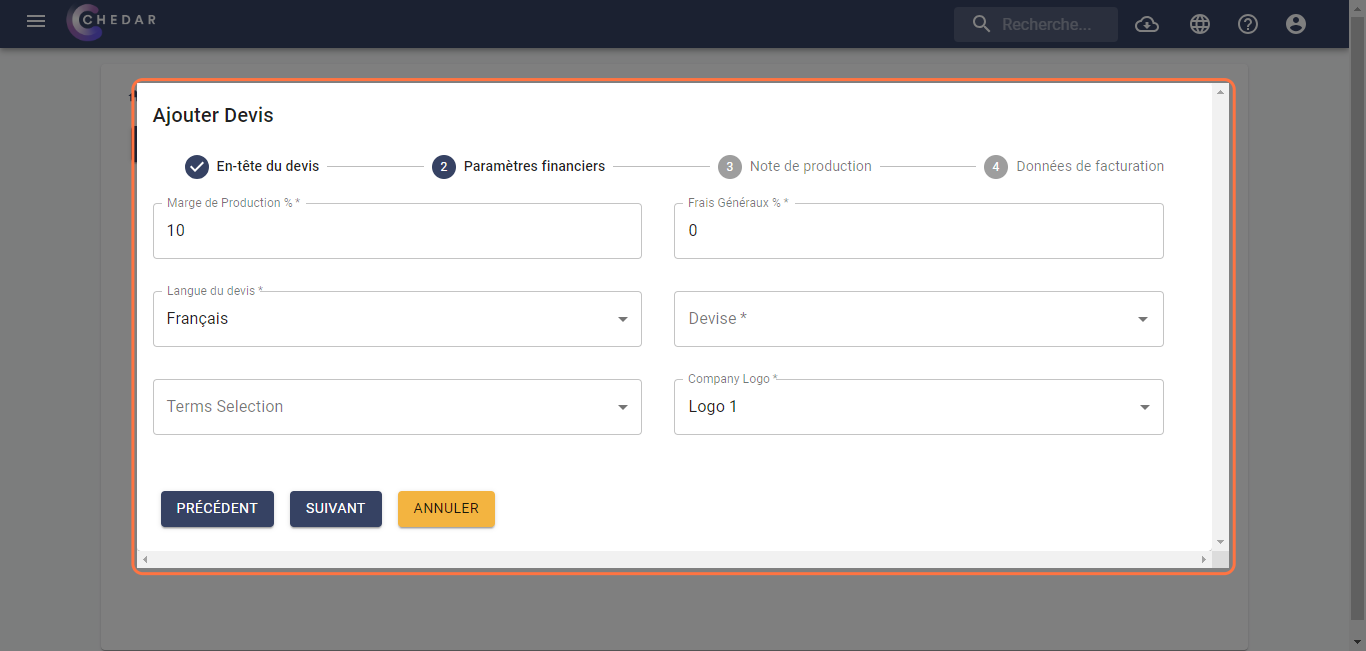
In the window dedicated to financial settings, the percentage for Margin and General Expenses is set by default to 10 and 0, feel free to modify it to match the specifics of your shoot:
In this window, the cells are pre-filled, but you can modify them to match the specifics of your shoot.
The Margin and General Expenses boxes will determine the percentage of these that will be applied to cost lines in most sections, except for certain sections.
noteTo better understand the sections to which the Margin and General Expenses percentages do not apply, refer to the FAQ or click here.
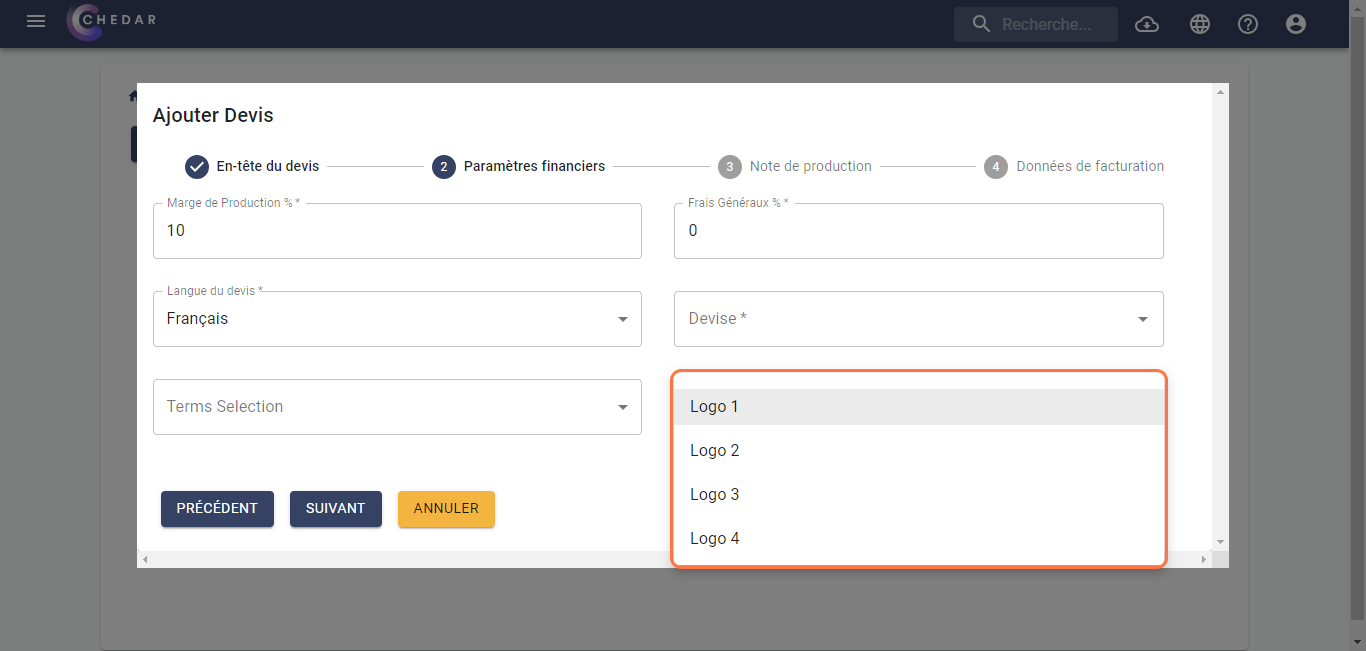
You can choose one of the logos you have already added by clicking on the logo cell; a context menu will appear as shown below:
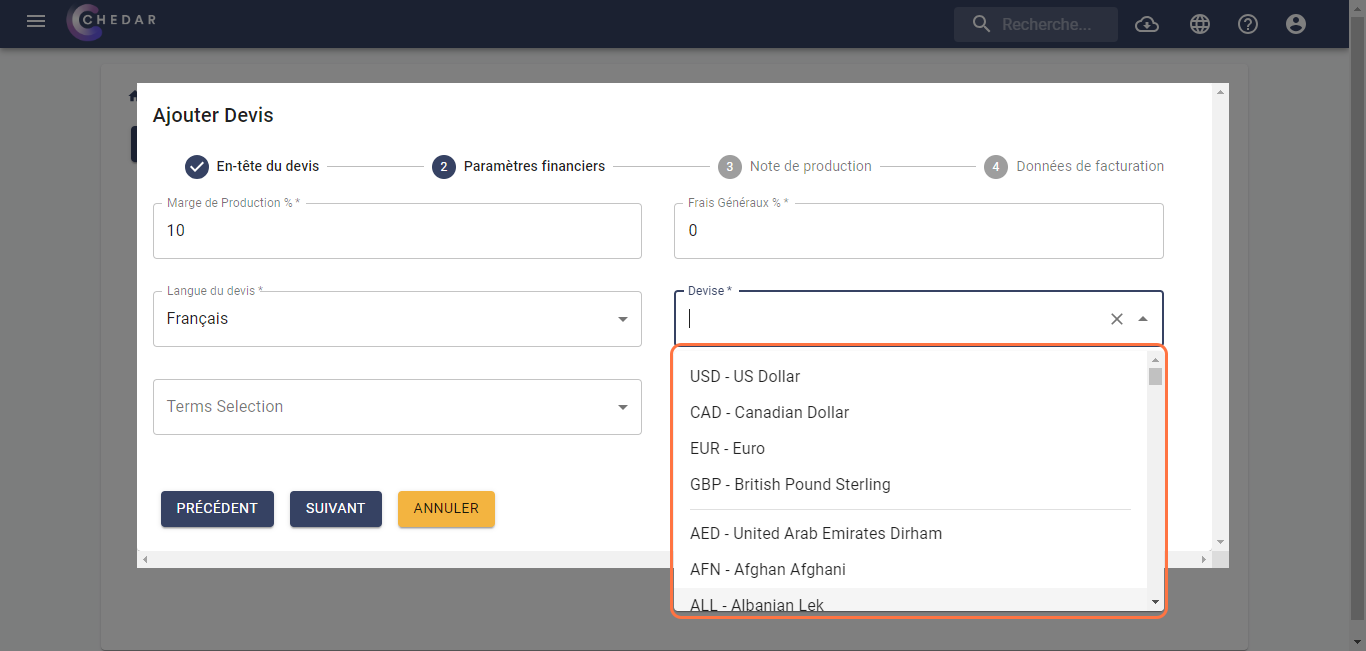
Click on the currency cell, a context menu will appear, where you can choose the currency of your choice, as shown below:
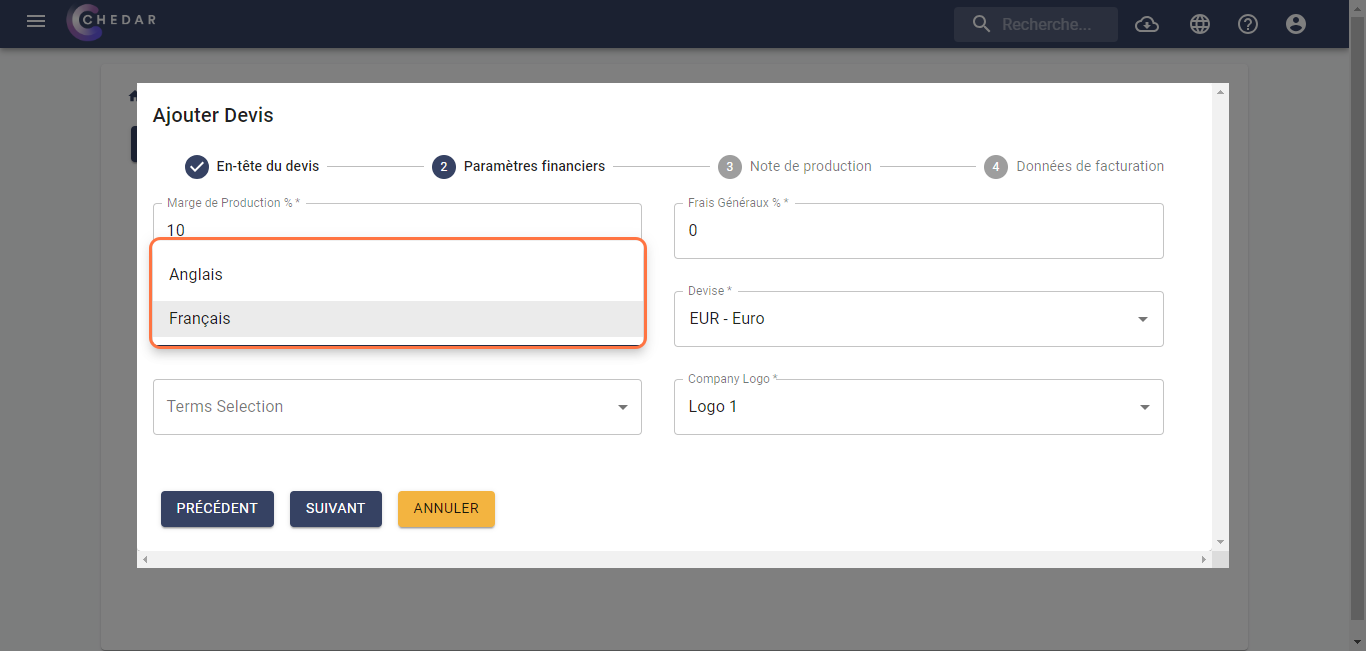
To change the language of the estimate, click on the Estimate Language cell and select the desired language, as shown below:
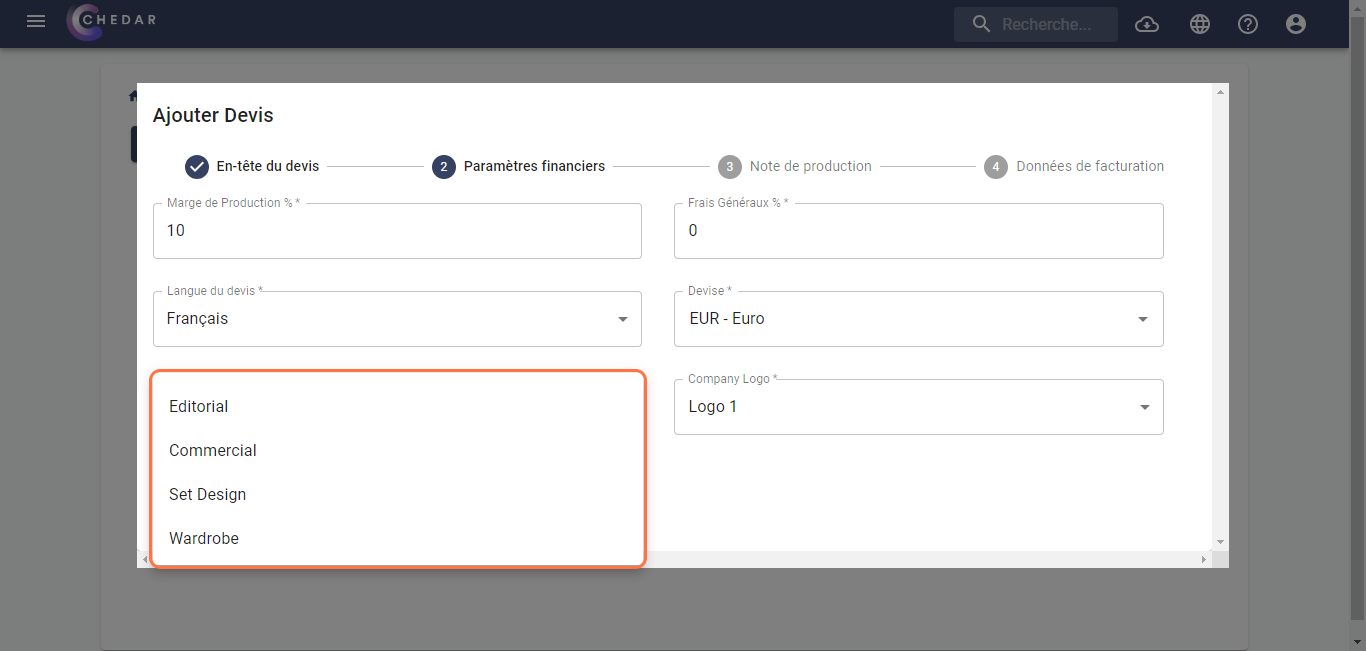
In the financial settings, you can choose which general terms and conditions will apply to your estimate. You have the choice of 4 different general terms and conditions. To choose the type of project, click on Terms Selection, then select the condition you want to use, as shown below:
 note
noteAny changes to the financial settings will be applied to the Budget grid when it is created.
Click Next.
The page dedicated to the production note is optional and appears as shown below:

Fill in the cells with information that corresponds to the specifics of your shoot, as shown below:

In the PDF, the production note appears below the header, as shown below:
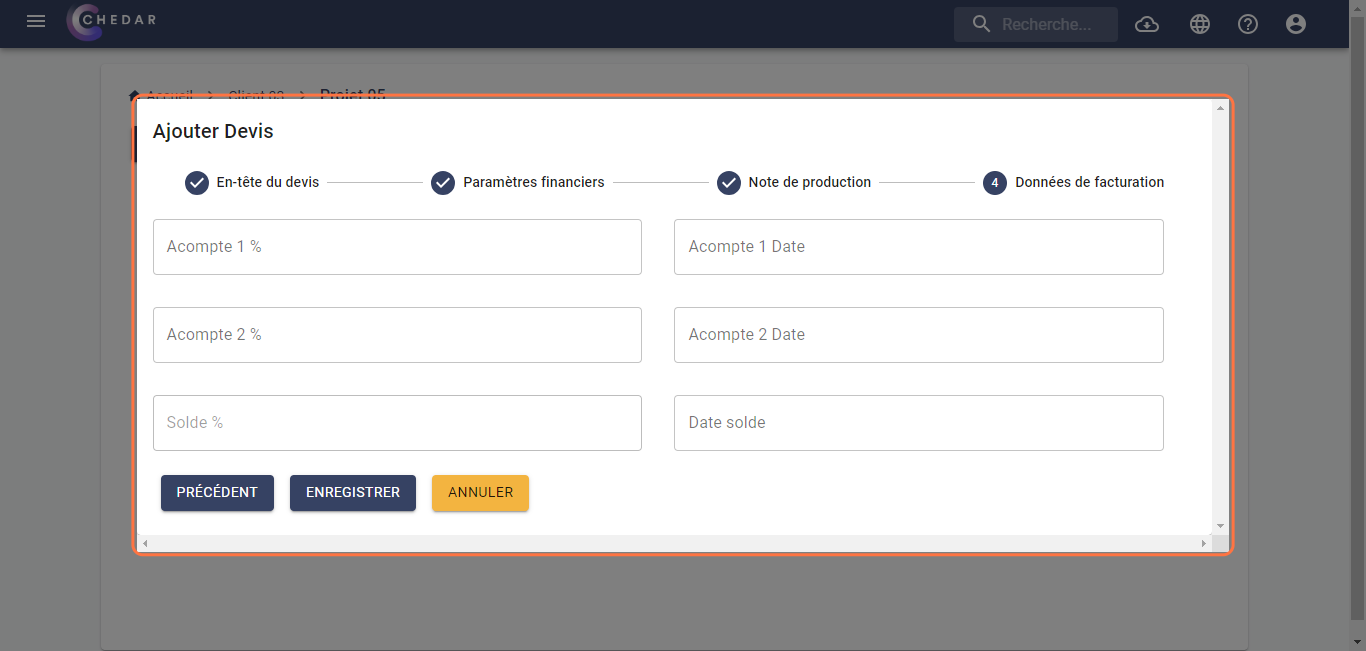
On the billing data page, enter the deposit percentage and the signature, as shown below:
- Click Save.
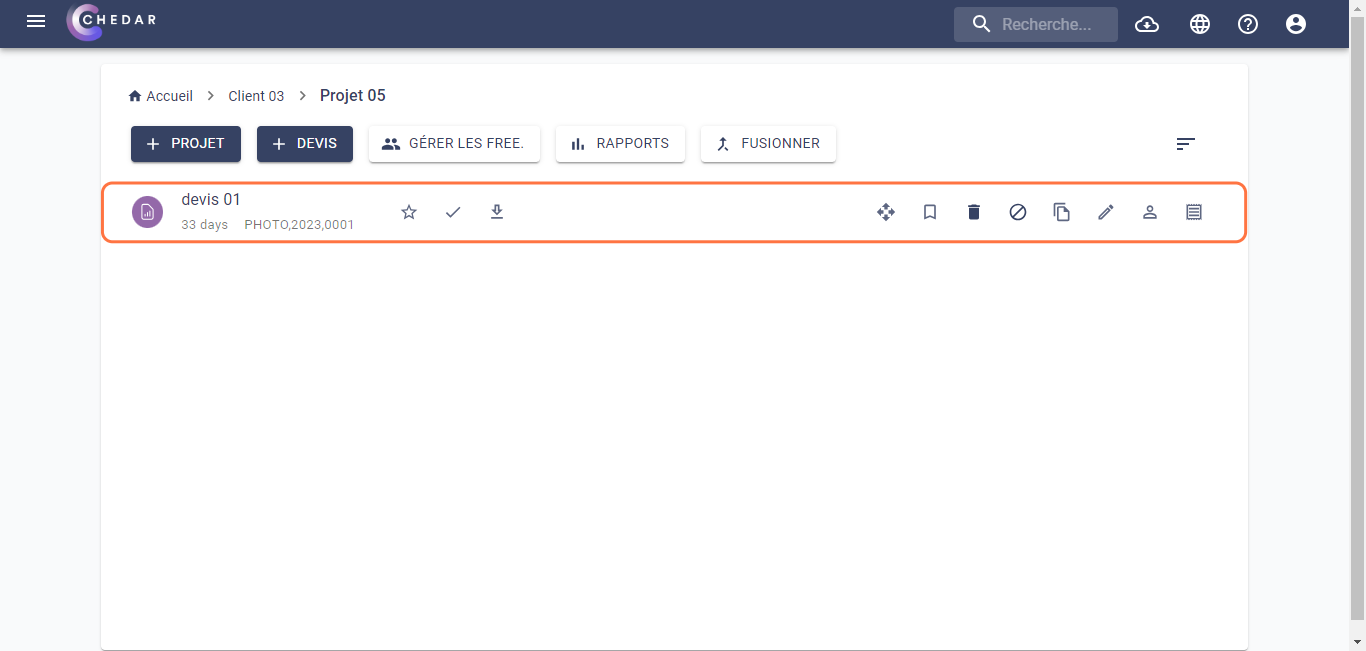
- A success message appears on the right side of the screen. The estimate has been created and appears as shown below: