Add a Client List
To open the customer list, follow these steps:
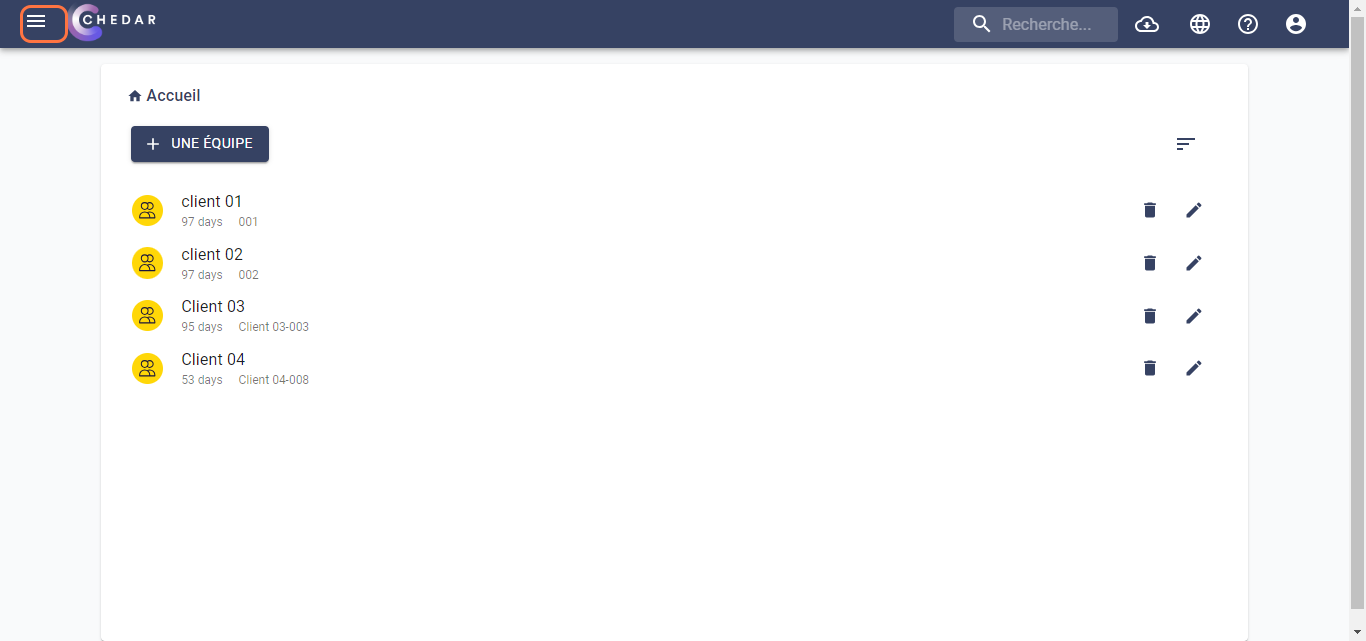
- In the top bar, click on
 .
.
- The menu pane opens, where you click on customers in the Turnover module.
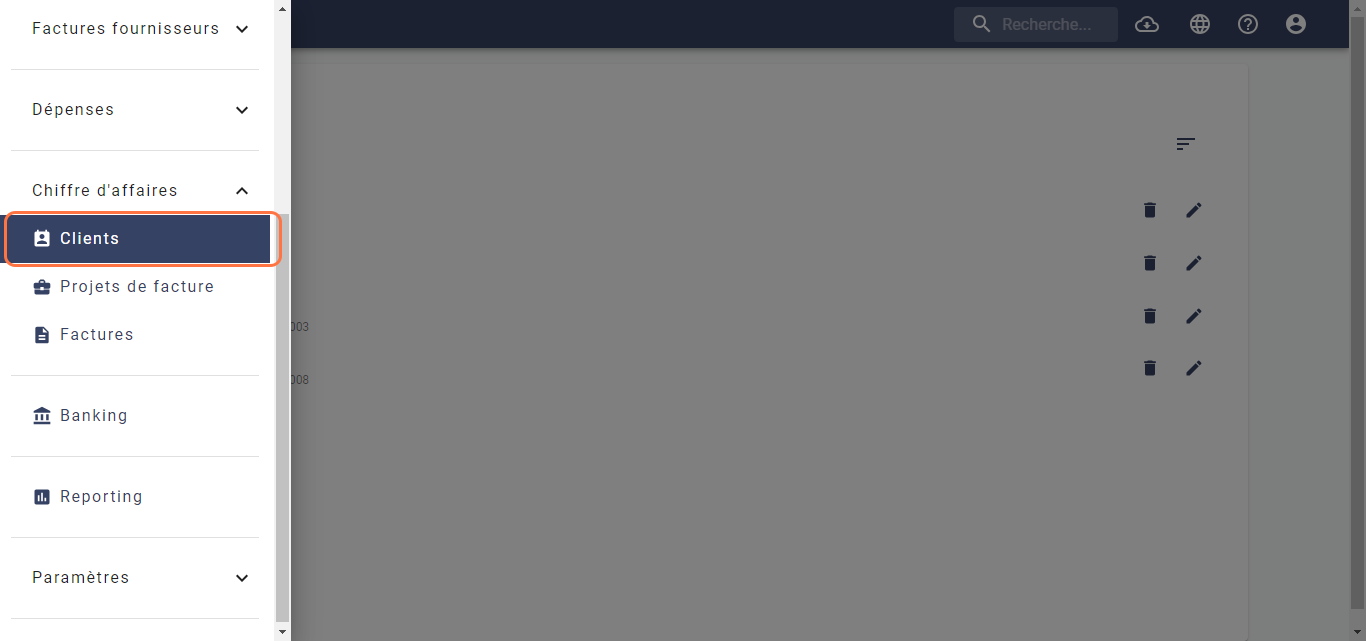
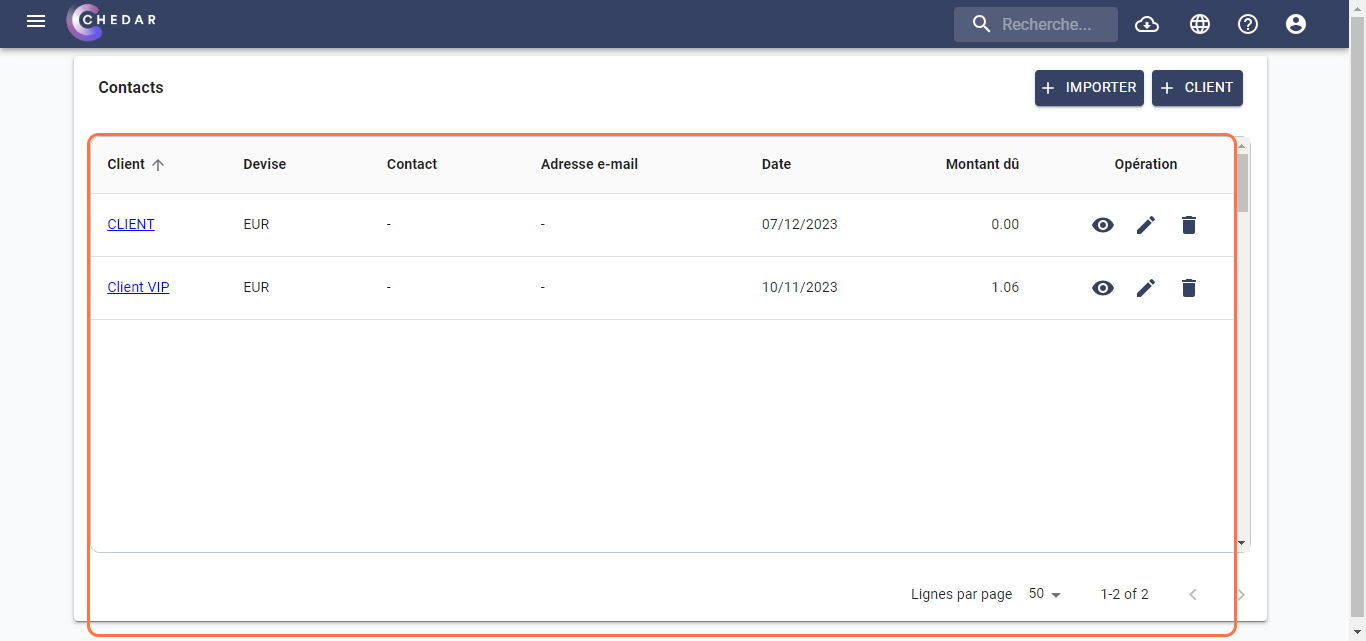
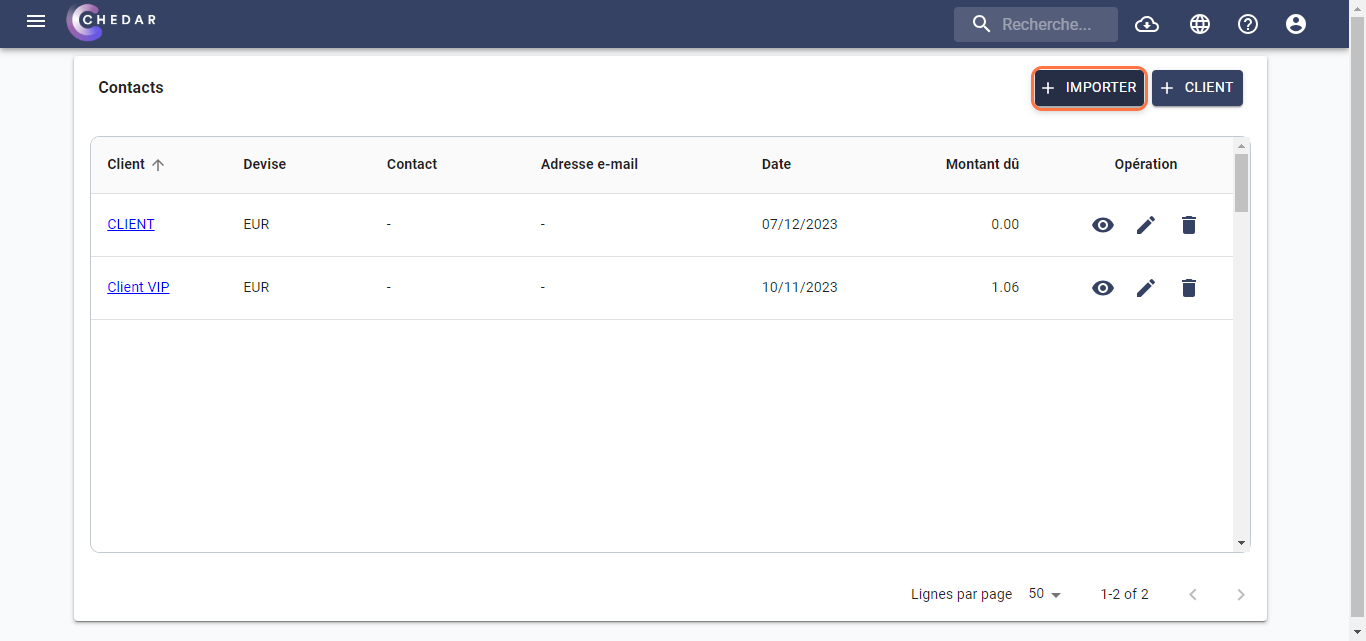
- The customer list appears as follows:
Add a customer
To add a customer, follow these steps:
- Click on
 at the top right to add a customer.
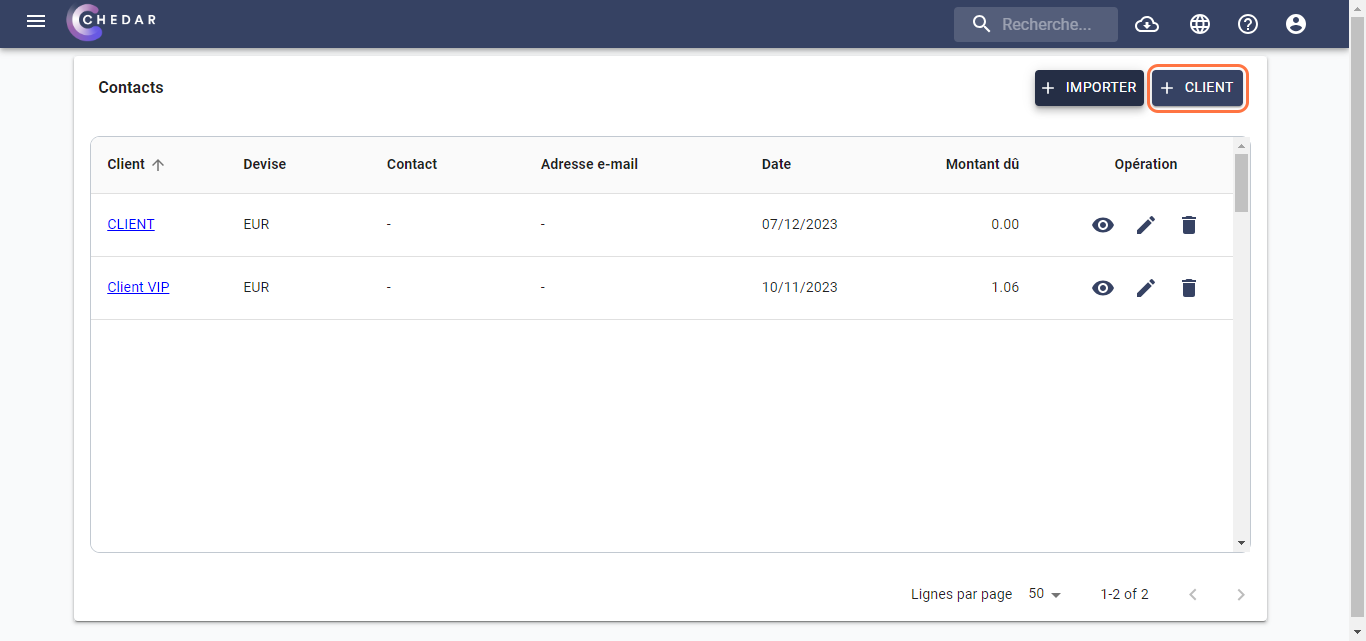
- The window dedicated to adding a client appears.
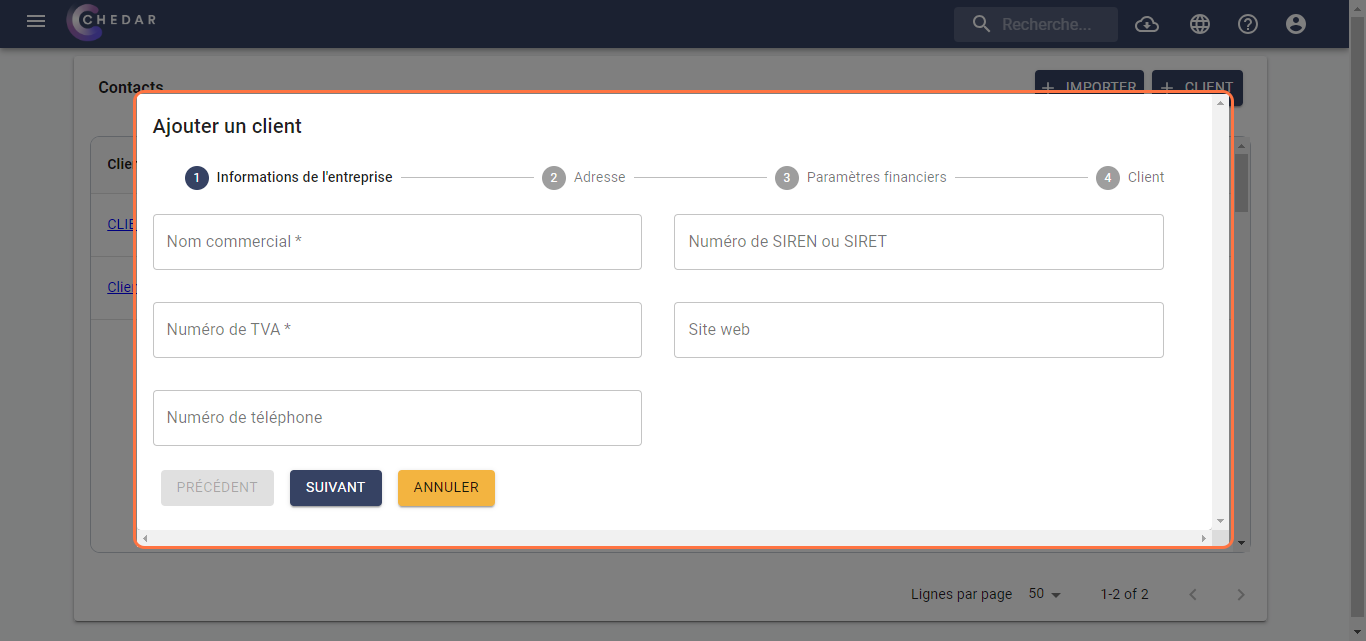
- In the window dedicated to Company information, you must fill in the Trade name and the VAT number while the rest of the cells shown below are optional:

- The rest of the cells are optional. Fill in the SIREN or SIRET number, the website, and the Phone number according to the specifics of your shoot.
- Click on Next.
- The Address window appears as follows:
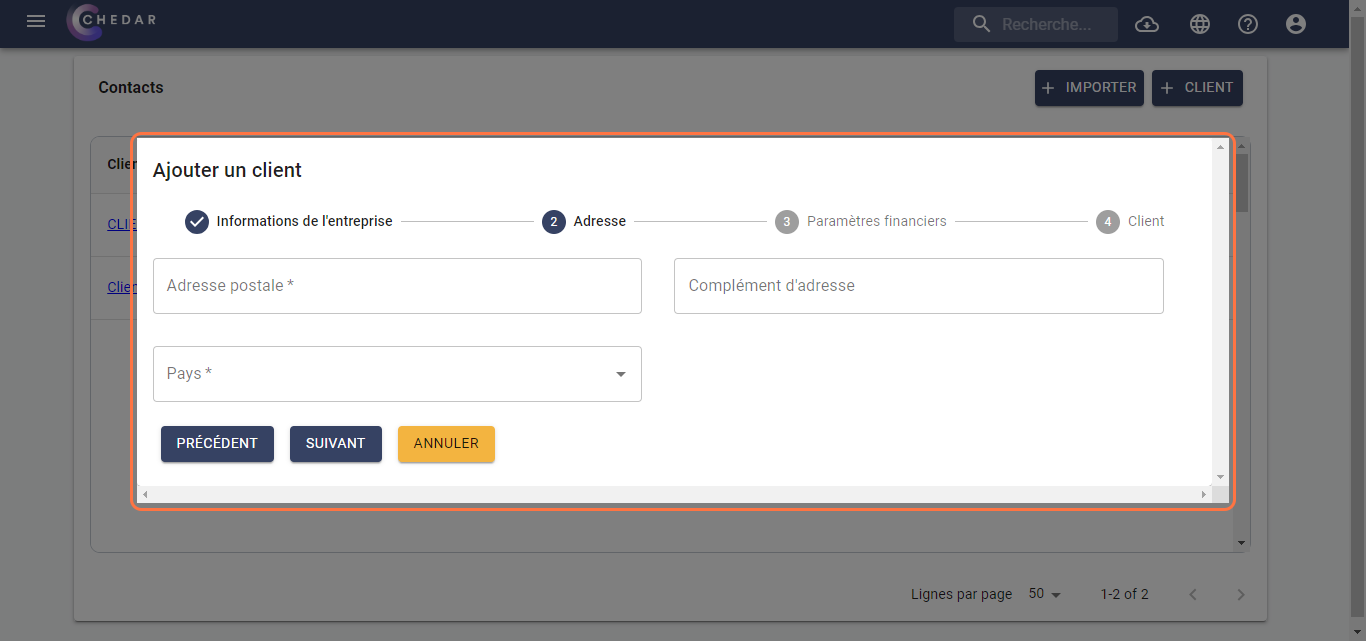
- You must fill in the Postal address.
- The Address supplement cell is optional.
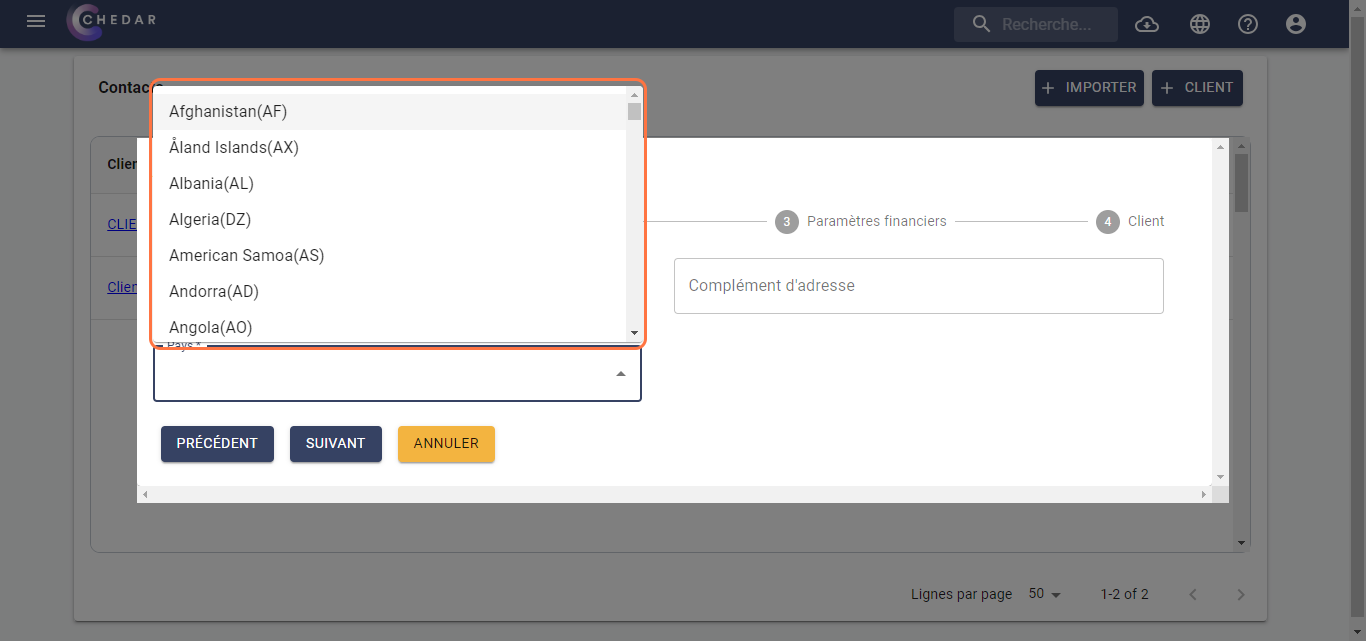
- Click on the Country cell, a context menu appears, where you can choose the country of your shoot:
- Click on Next.
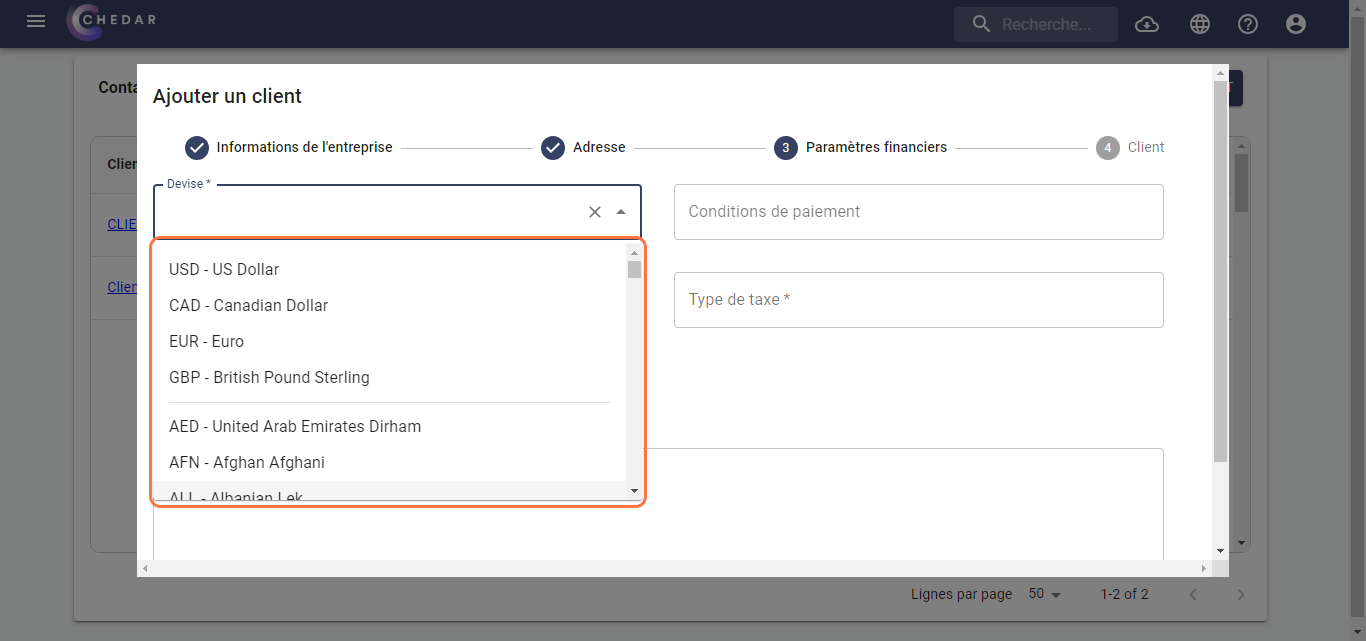
- The Financial settings window appears as shown below:
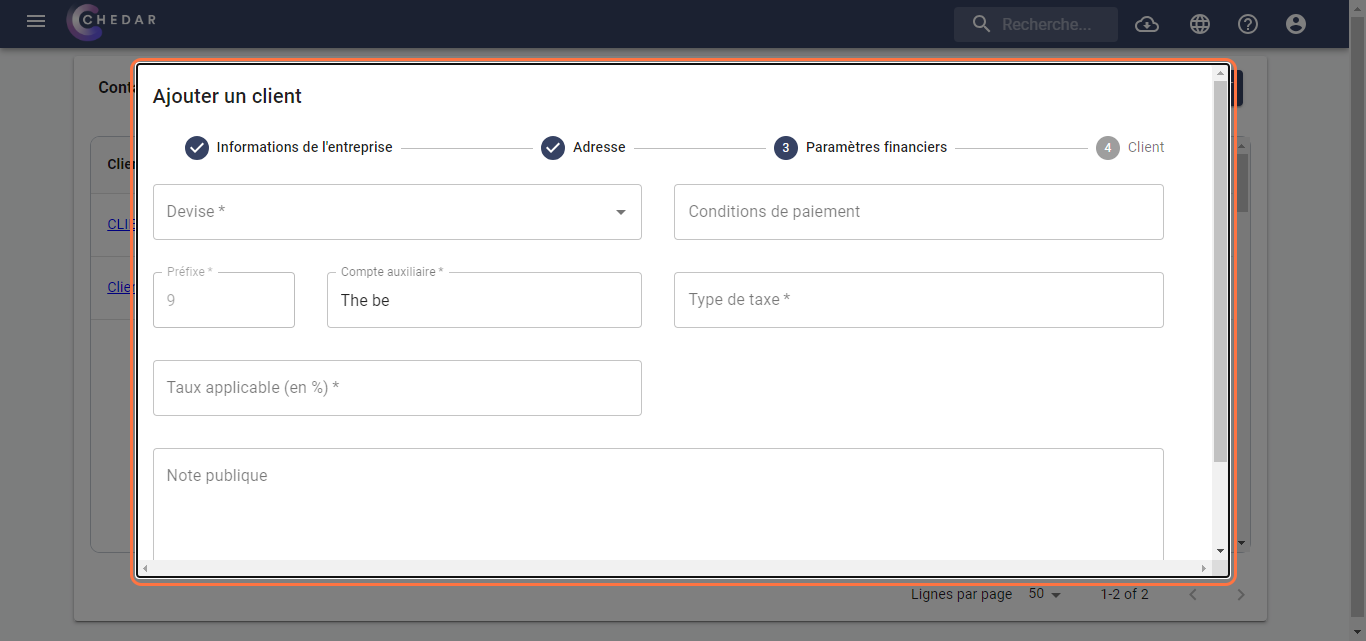
- Click on the Currency cell, a context menu appears, where you can choose the currency of your choice.
The Prefix has already been defined in the Account Settings section. You can change the auxiliary account name that is proposed.
Mandatory information is the Tax type and the Applicable rate (in %).
You have the option to indicate the payment terms and a public note.
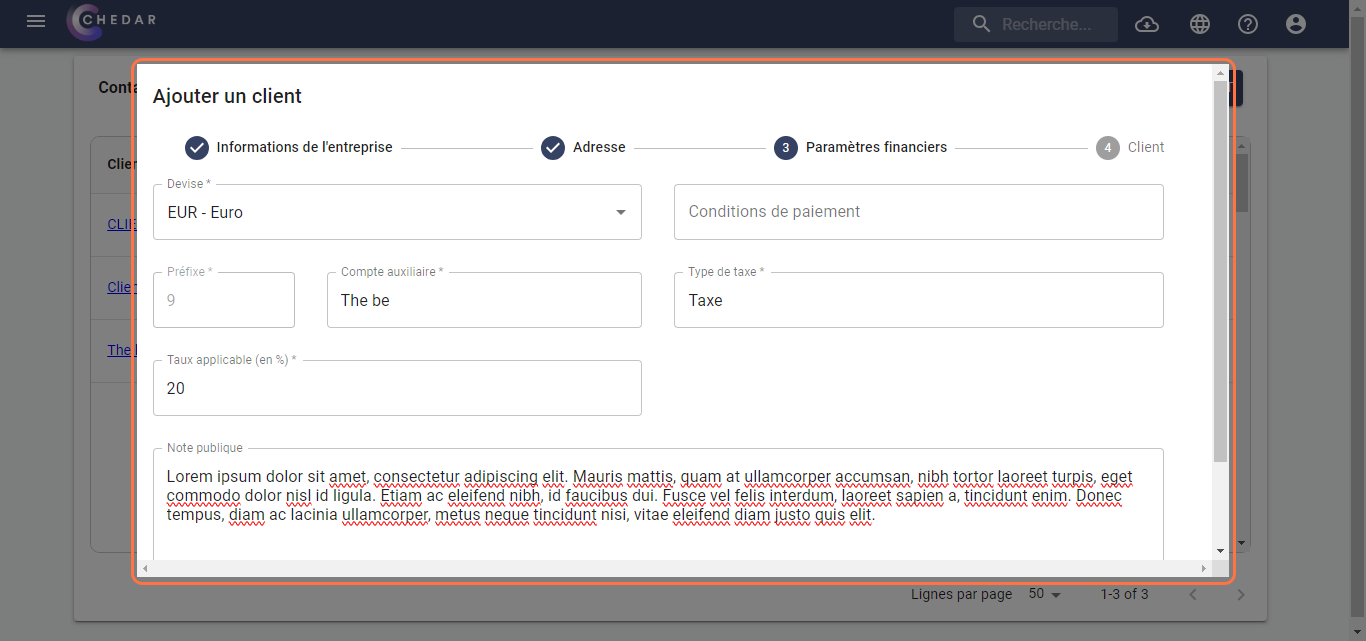
Click on Next.
The window dedicated to the Client appears as shown below:

Indicate your client's personal information such as the Full name, the email address and the phone number.
You can add a new contact for your client by clicking on Add a new contact.
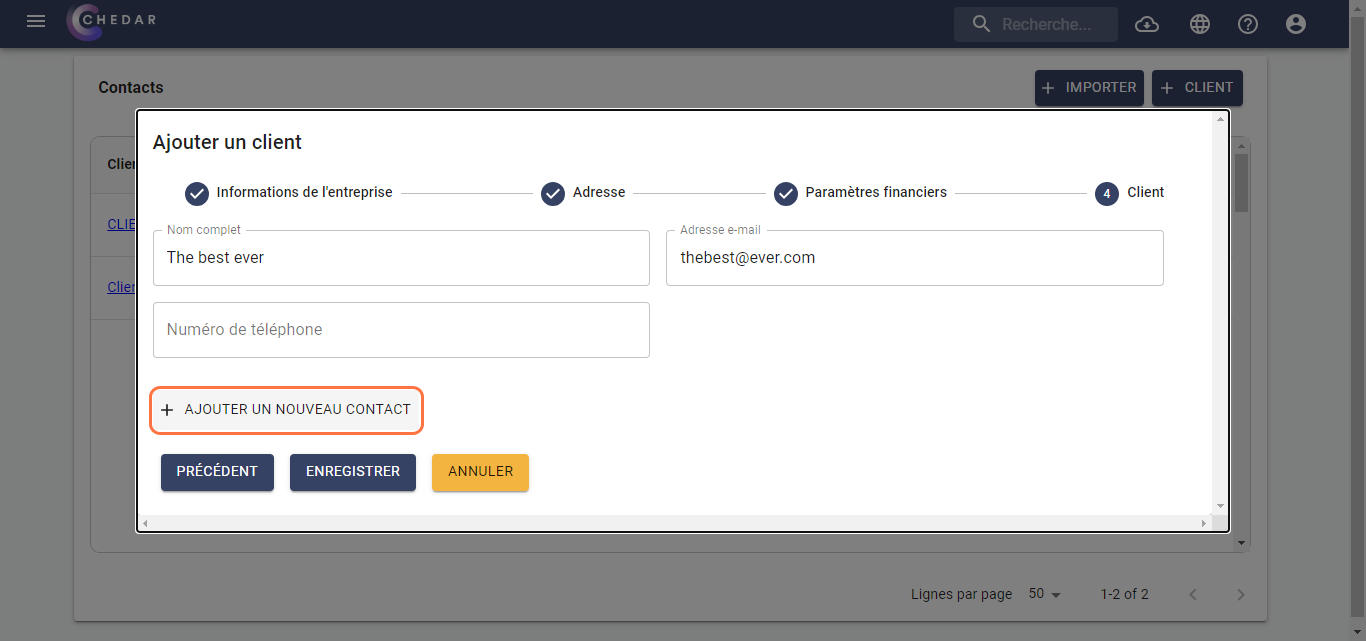
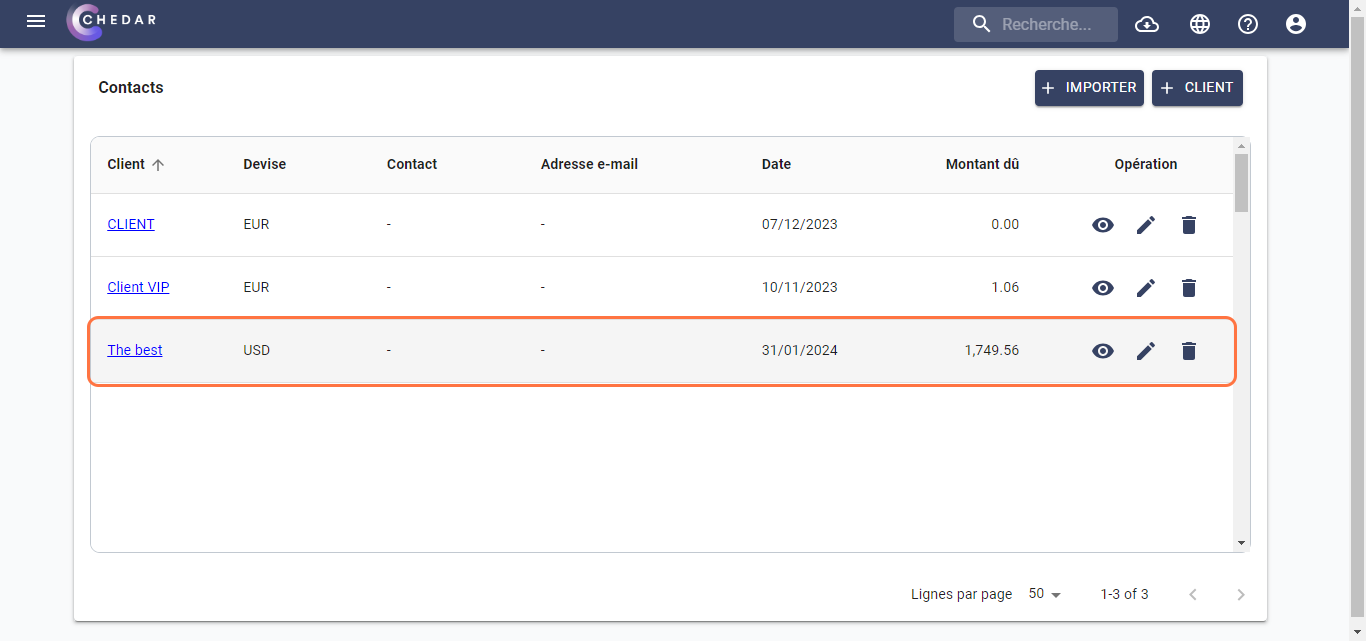
- Click on Save.
- A success message appears on the right of the screen. The client has been added to the list.
Import a client
You can also add a client by importing data from an Excel file in CSV format. To import the data, follow these steps:
- Click on at the top right to import the client data.
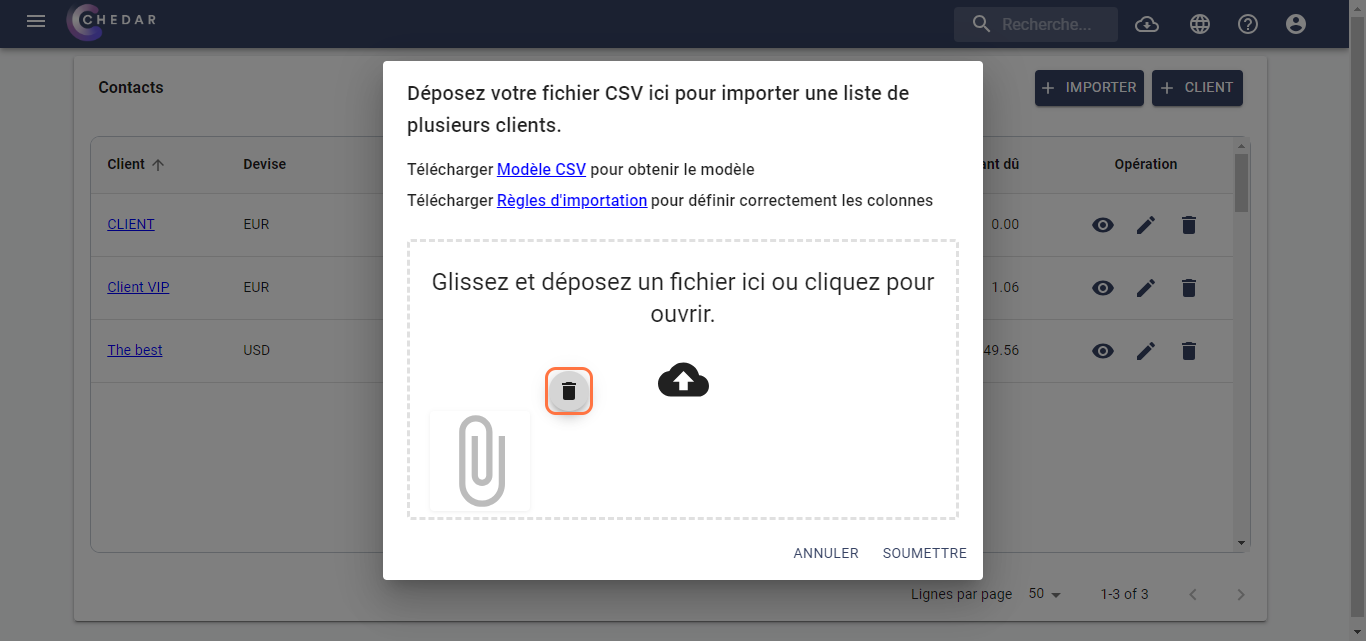
- The window dedicated to importing client data appears.
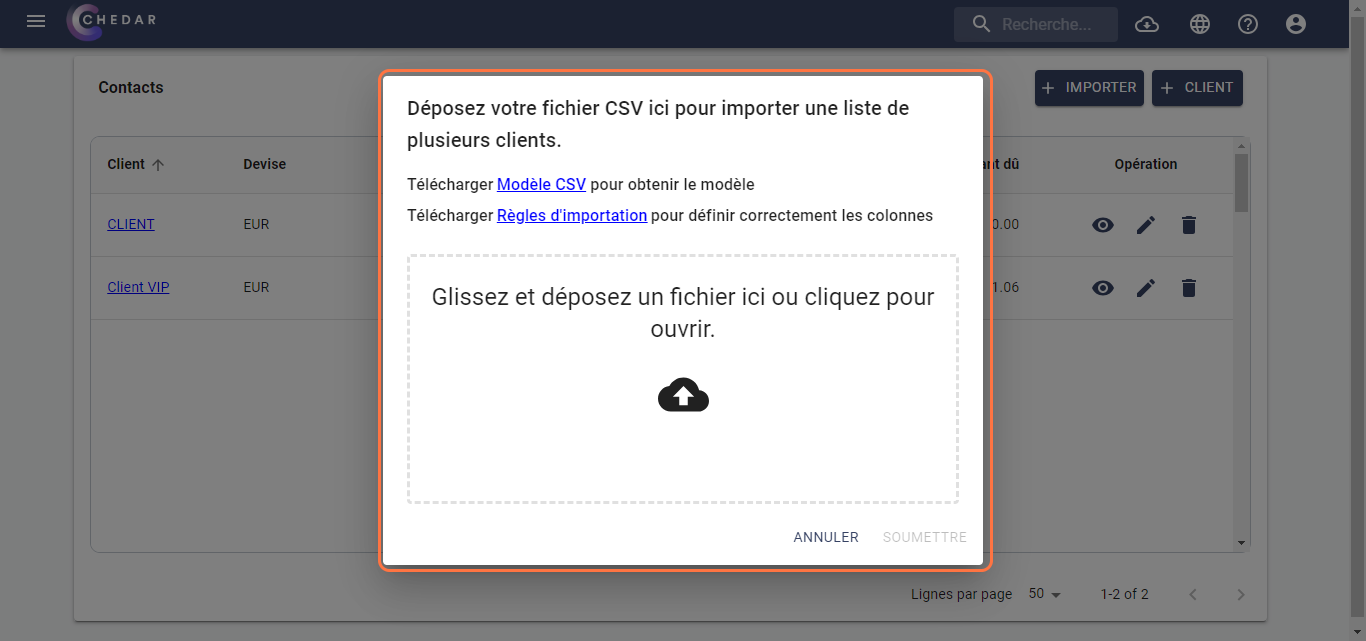
- Chedar offers you to download the CSV template in order to fill it with your customers' data.
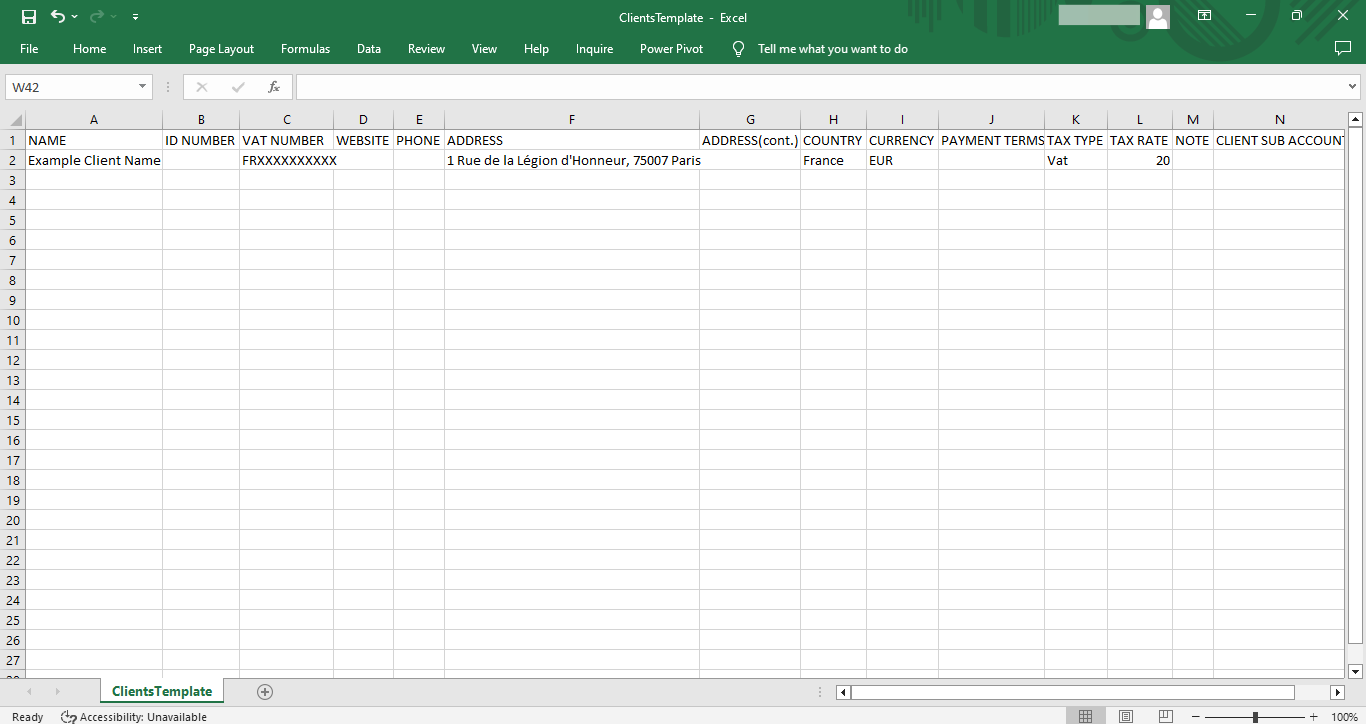
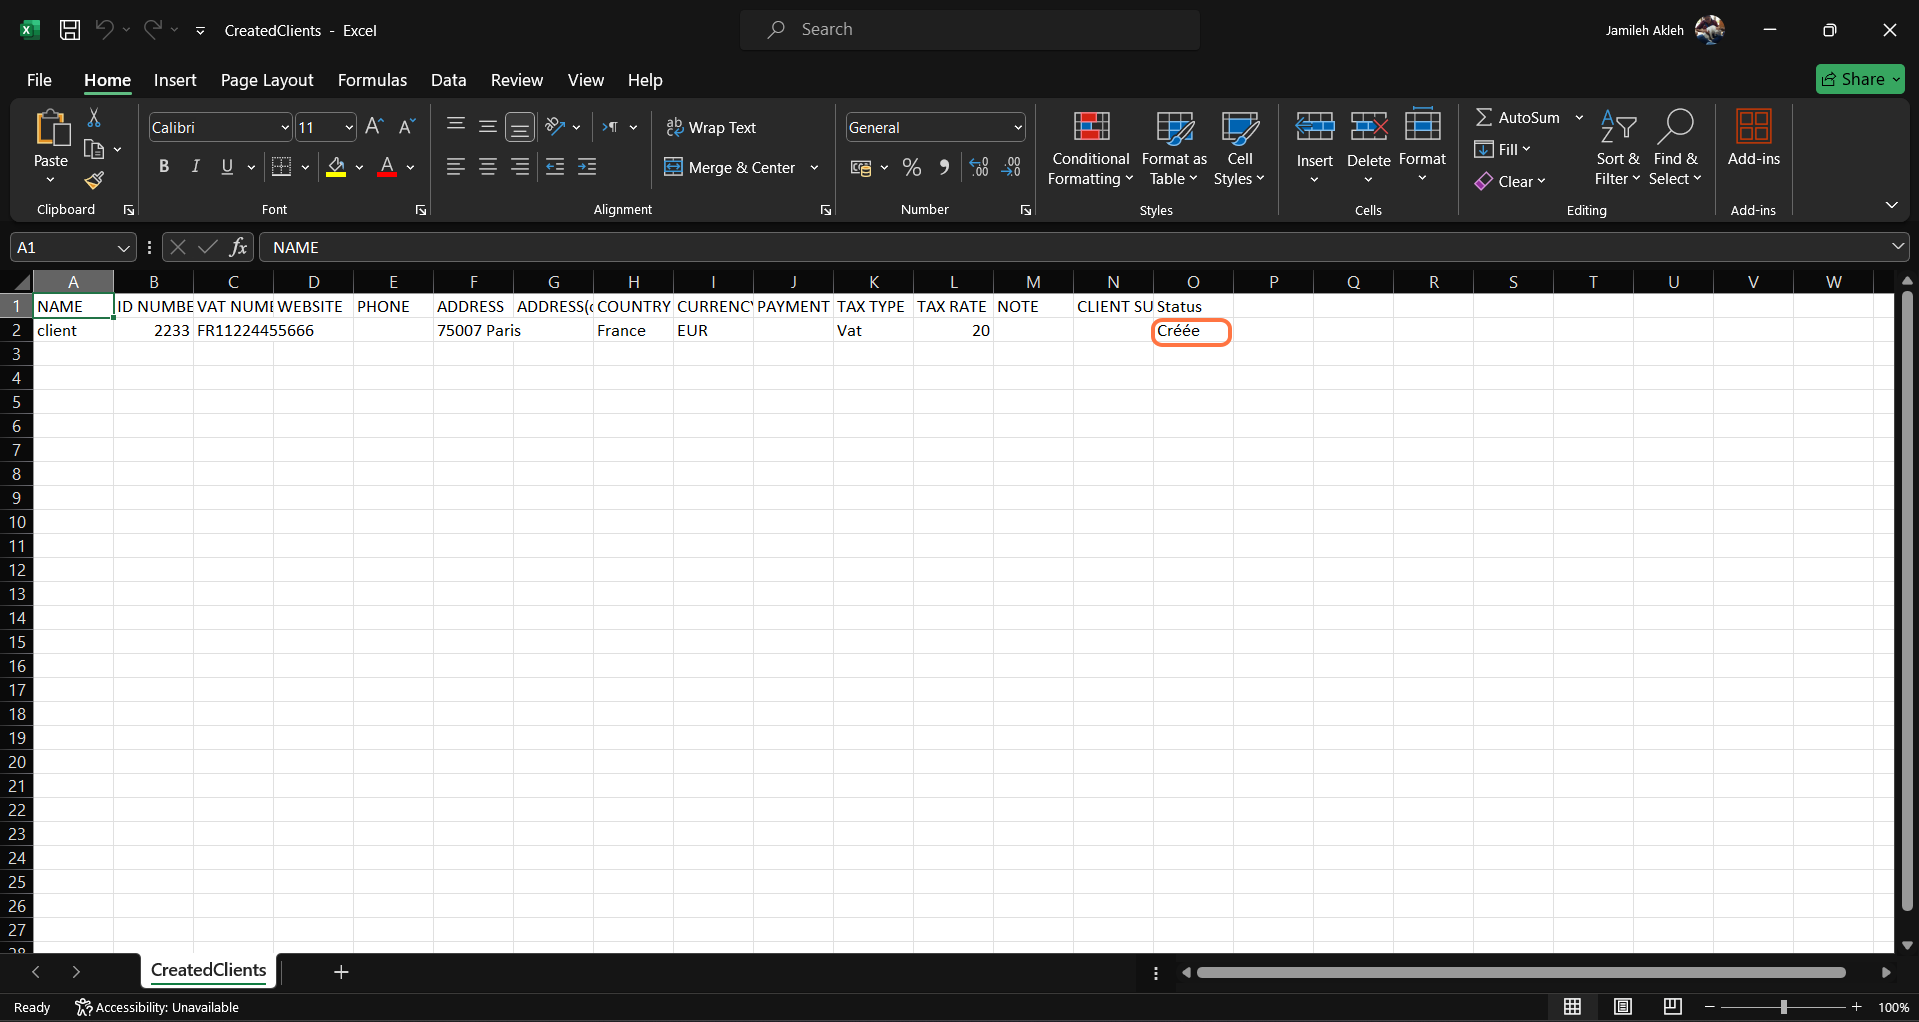
You should not change the name of the columns, modify their order, or add columns to the CSV template.
- Similarly, Chedar offers you to download a guide to correctly define the columns.
- Fill in your customers' information in the CSV template by copying/pasting the data from your prepared file into the corresponding columns.
- To add the name of your customers' subaccount, fill in the number without the prefix in the CLIENT SUB ACCOUNT column.
The prefix is already determined in Prefixes for subaccounts in the Account settings. To edit it according to your need, go to the corresponding section.
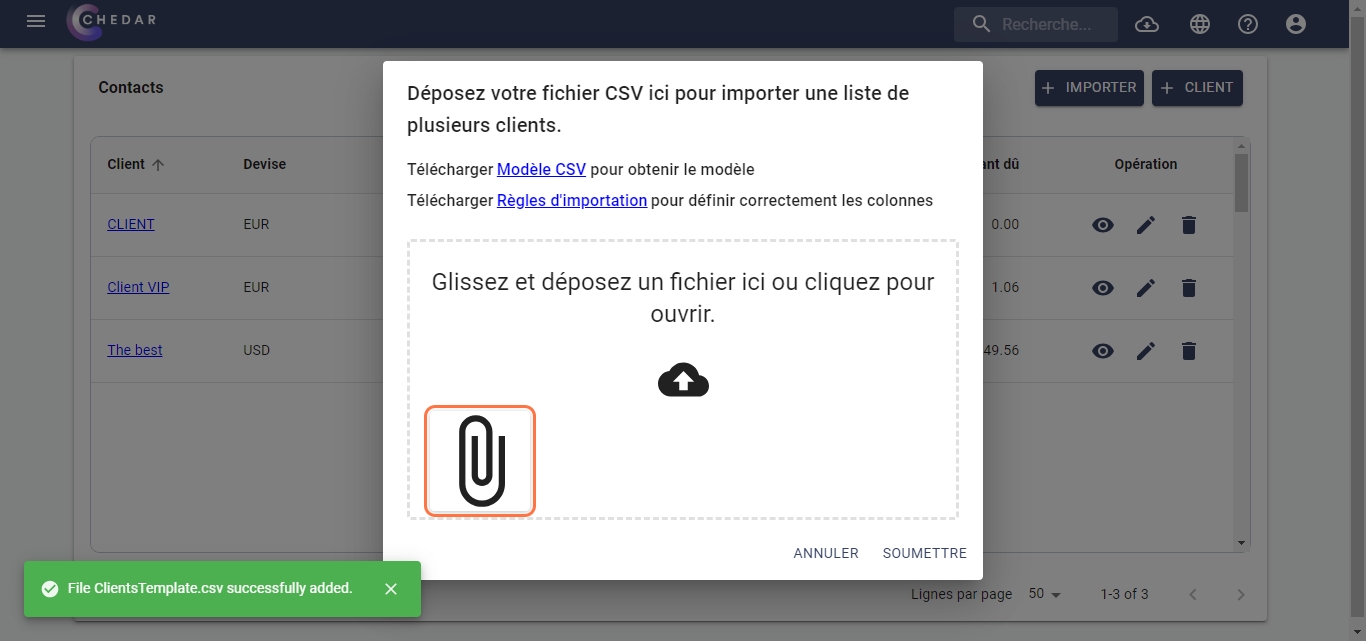
To open the file, drag and drop your file into the dialog box or click
 to locate the file on your computer.
A success message appears at the bottom left of the screen. The file has been added.
- You can delete the added file by hovering over the file, then click
 when the icon appears.
A success message appears at the bottom left of the screen. The file has been deleted.
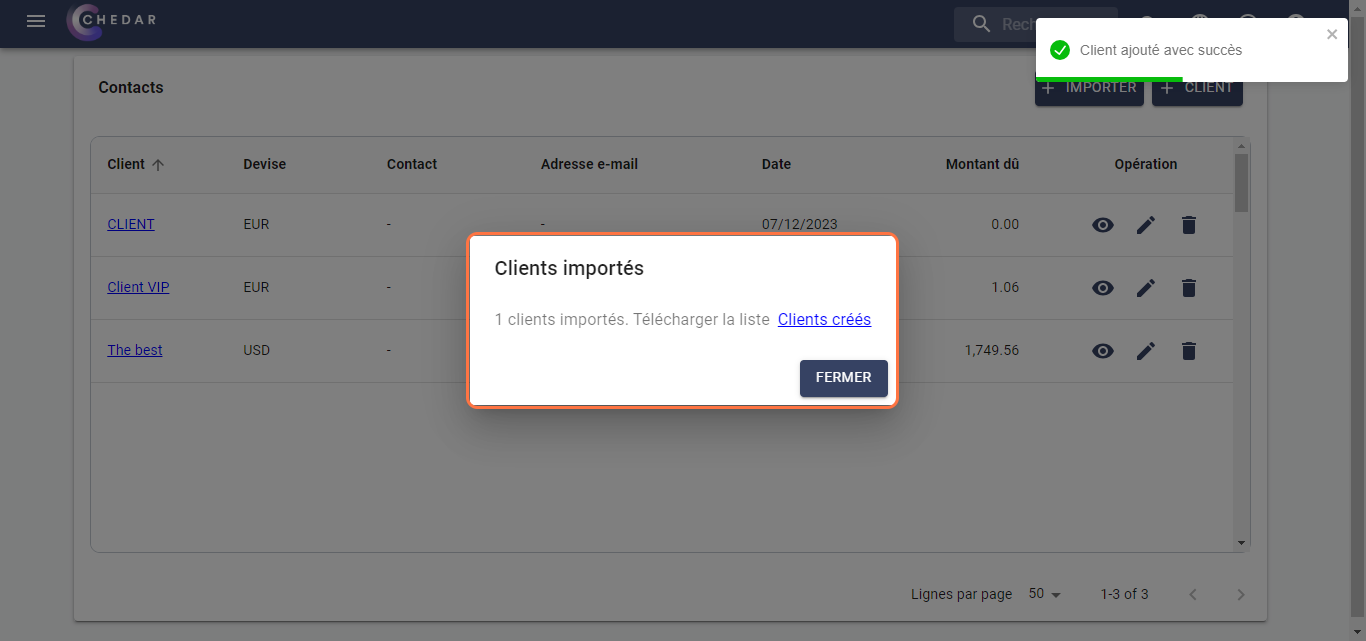
After adding the file, to import the data from it, click Submit.
A success message appears on the right of the screen. A window appears, indicating the number of clients added and giving you the option to download the list of Clients created.
- The message Created appears at the end of the affected lines.
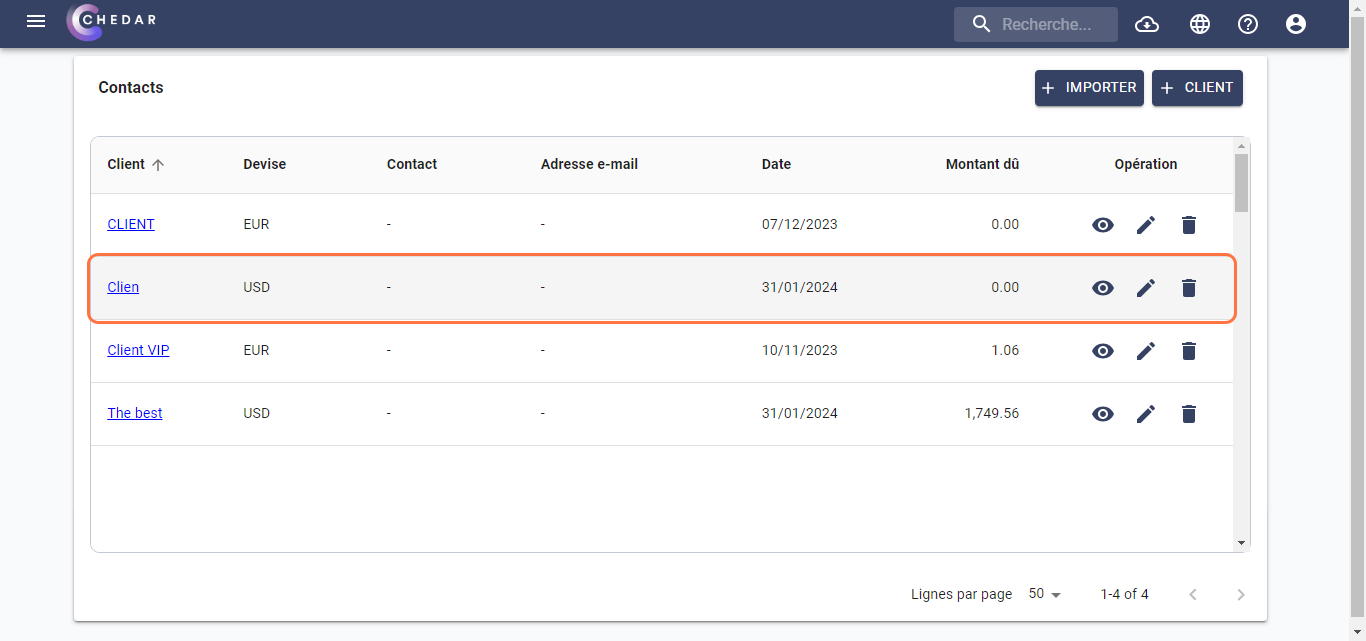
- The imported clients have been added to the list.
- In case there are clients that were not imported, you will have the option to download the list of unimported clients Failed Clients.
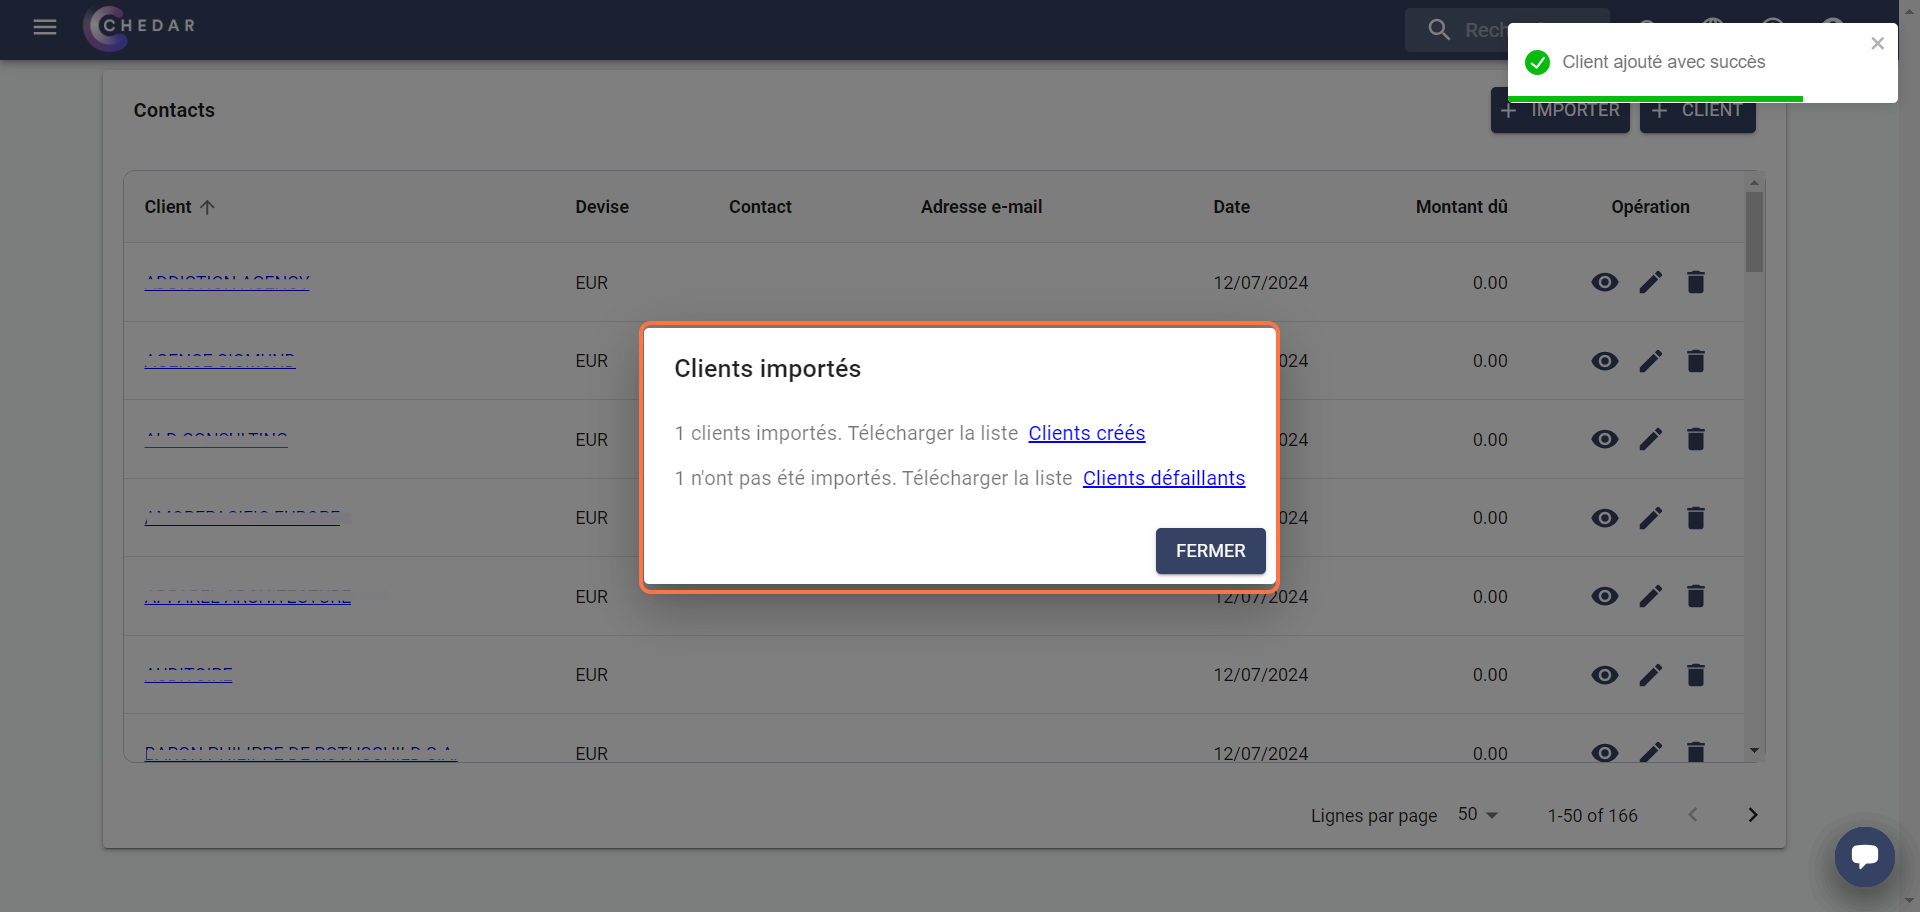
- An additional column will be added at the end of the file, indicating the reason why the client was not imported.
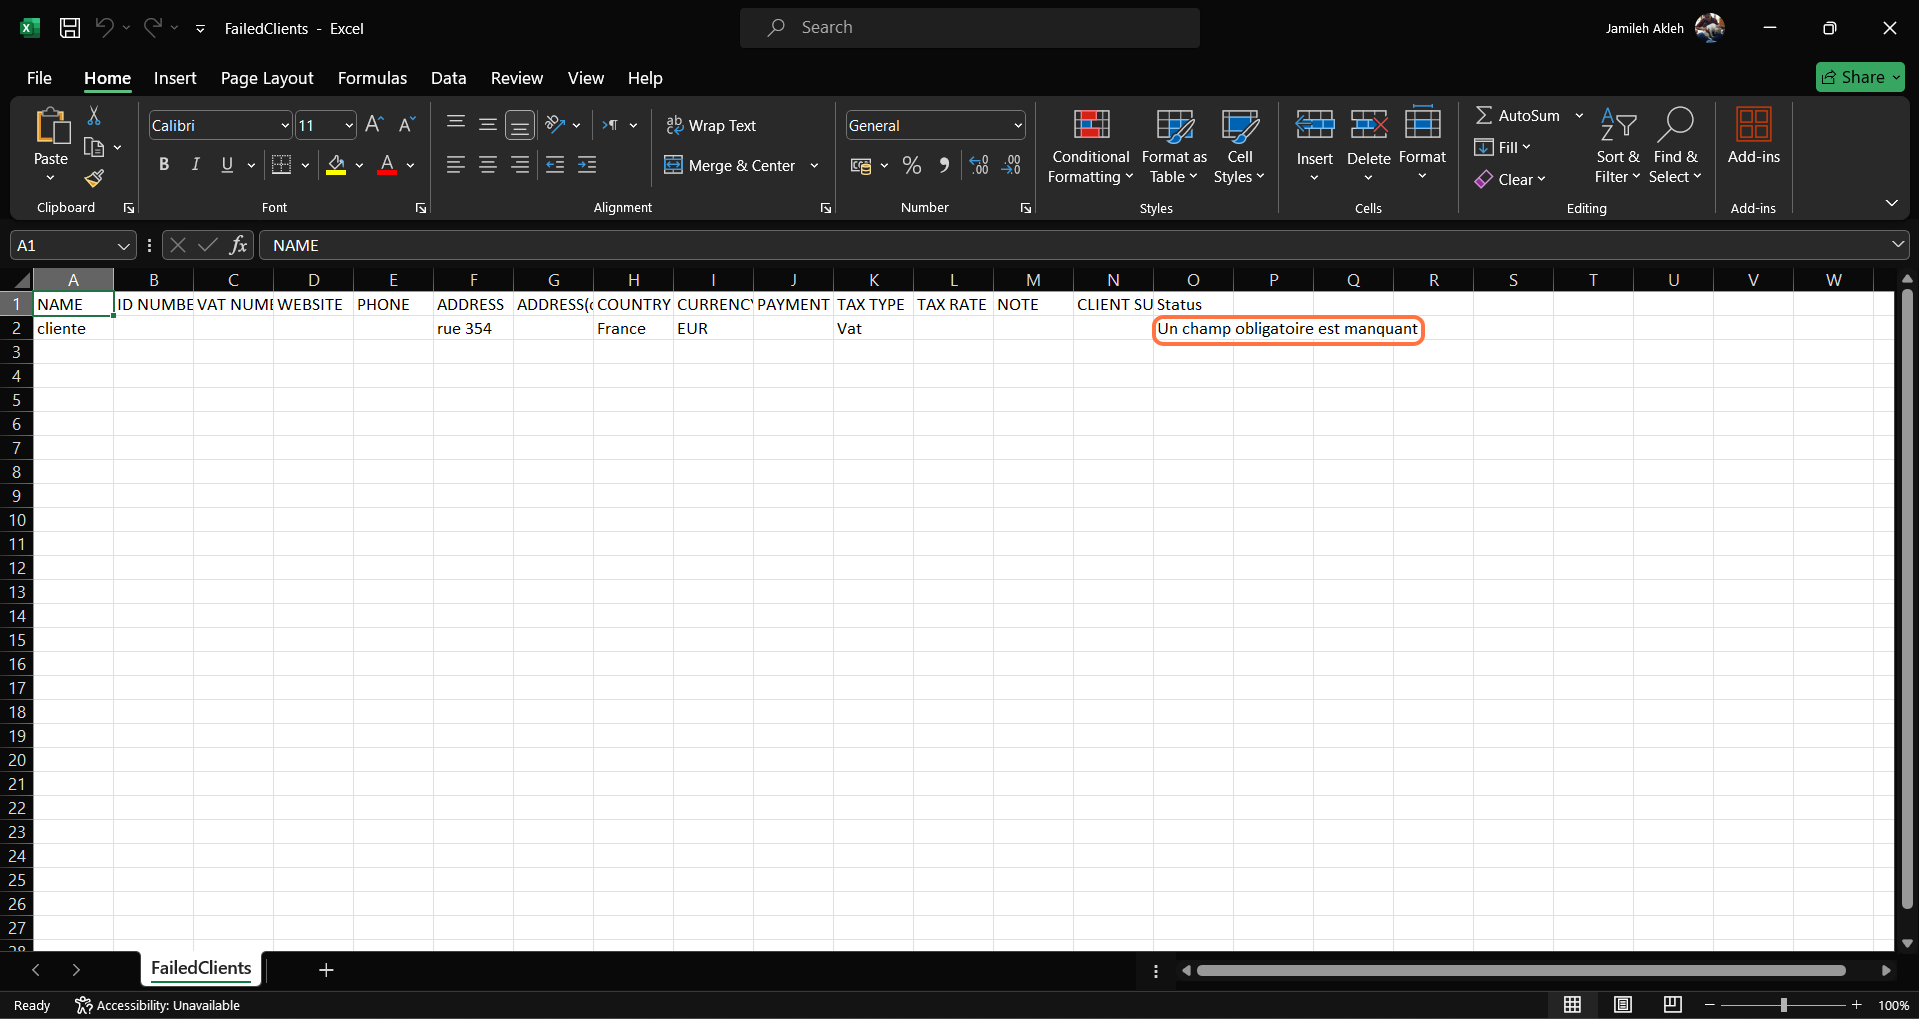
Remember to delete this column if you edit this file to drag it back into the dialog box.