General
This section allows you to define the accounting plan that will be applied in Chedar by choosing a country. It also allows you to add an additional note at the bottom of your invoice pages. To indicate this information, follow the steps below:
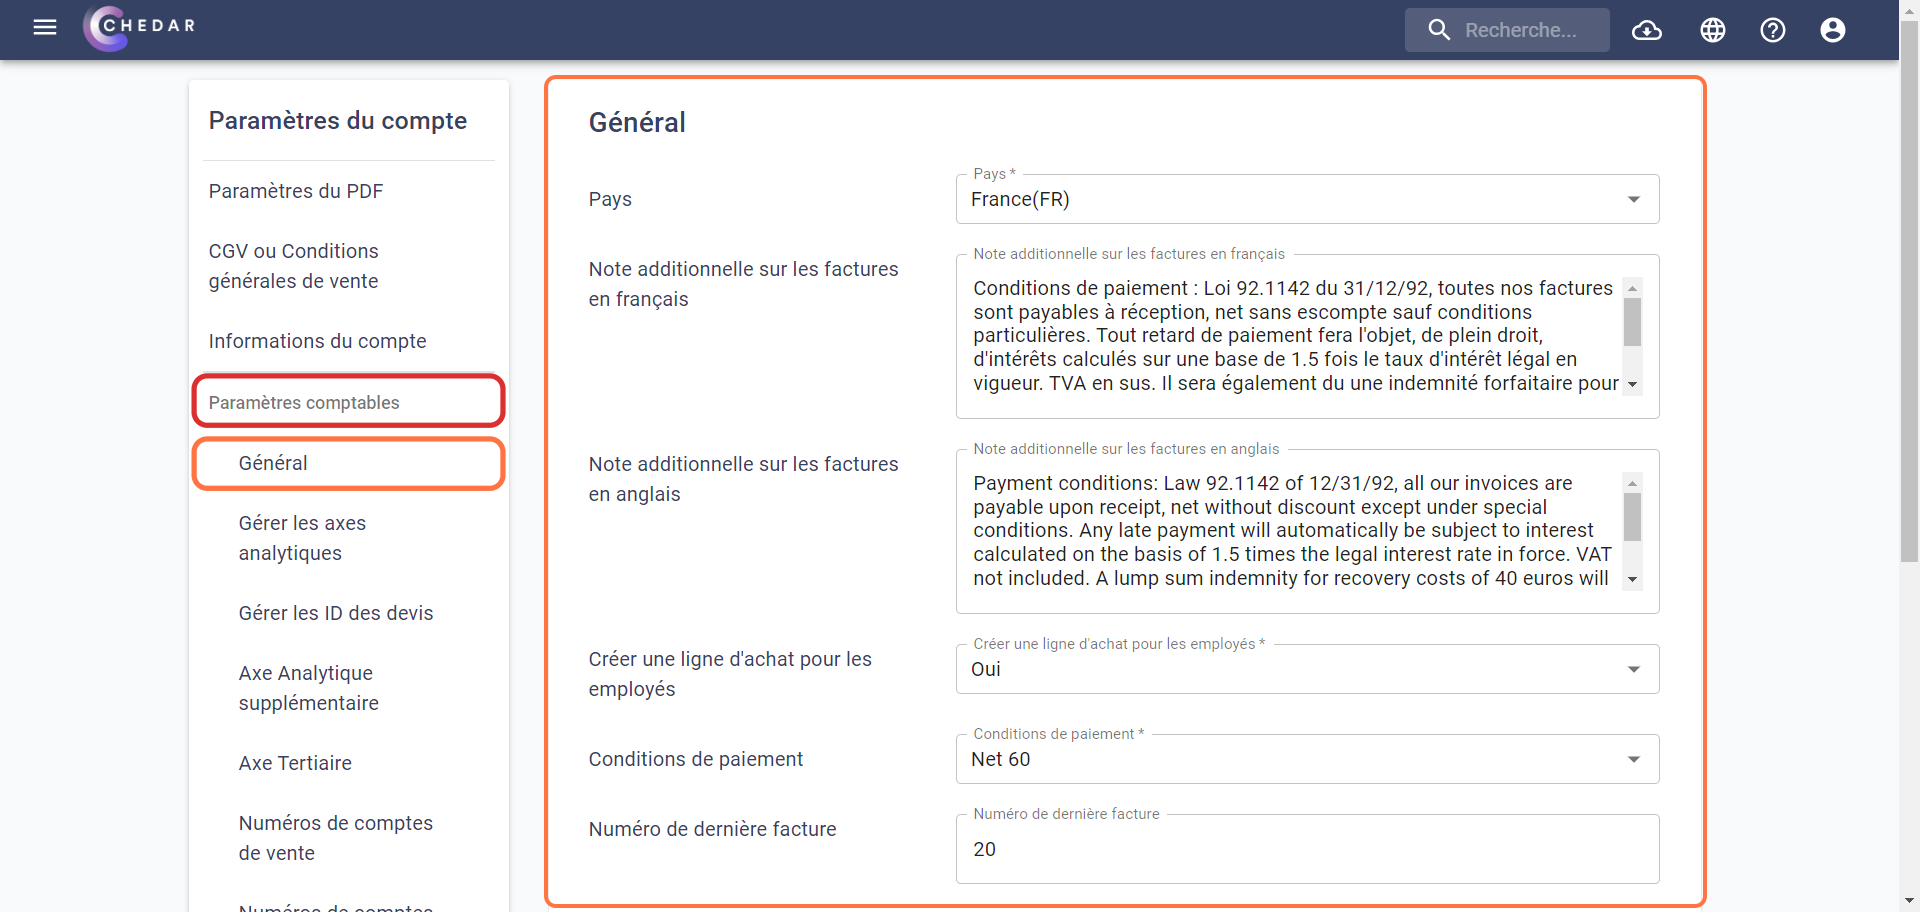
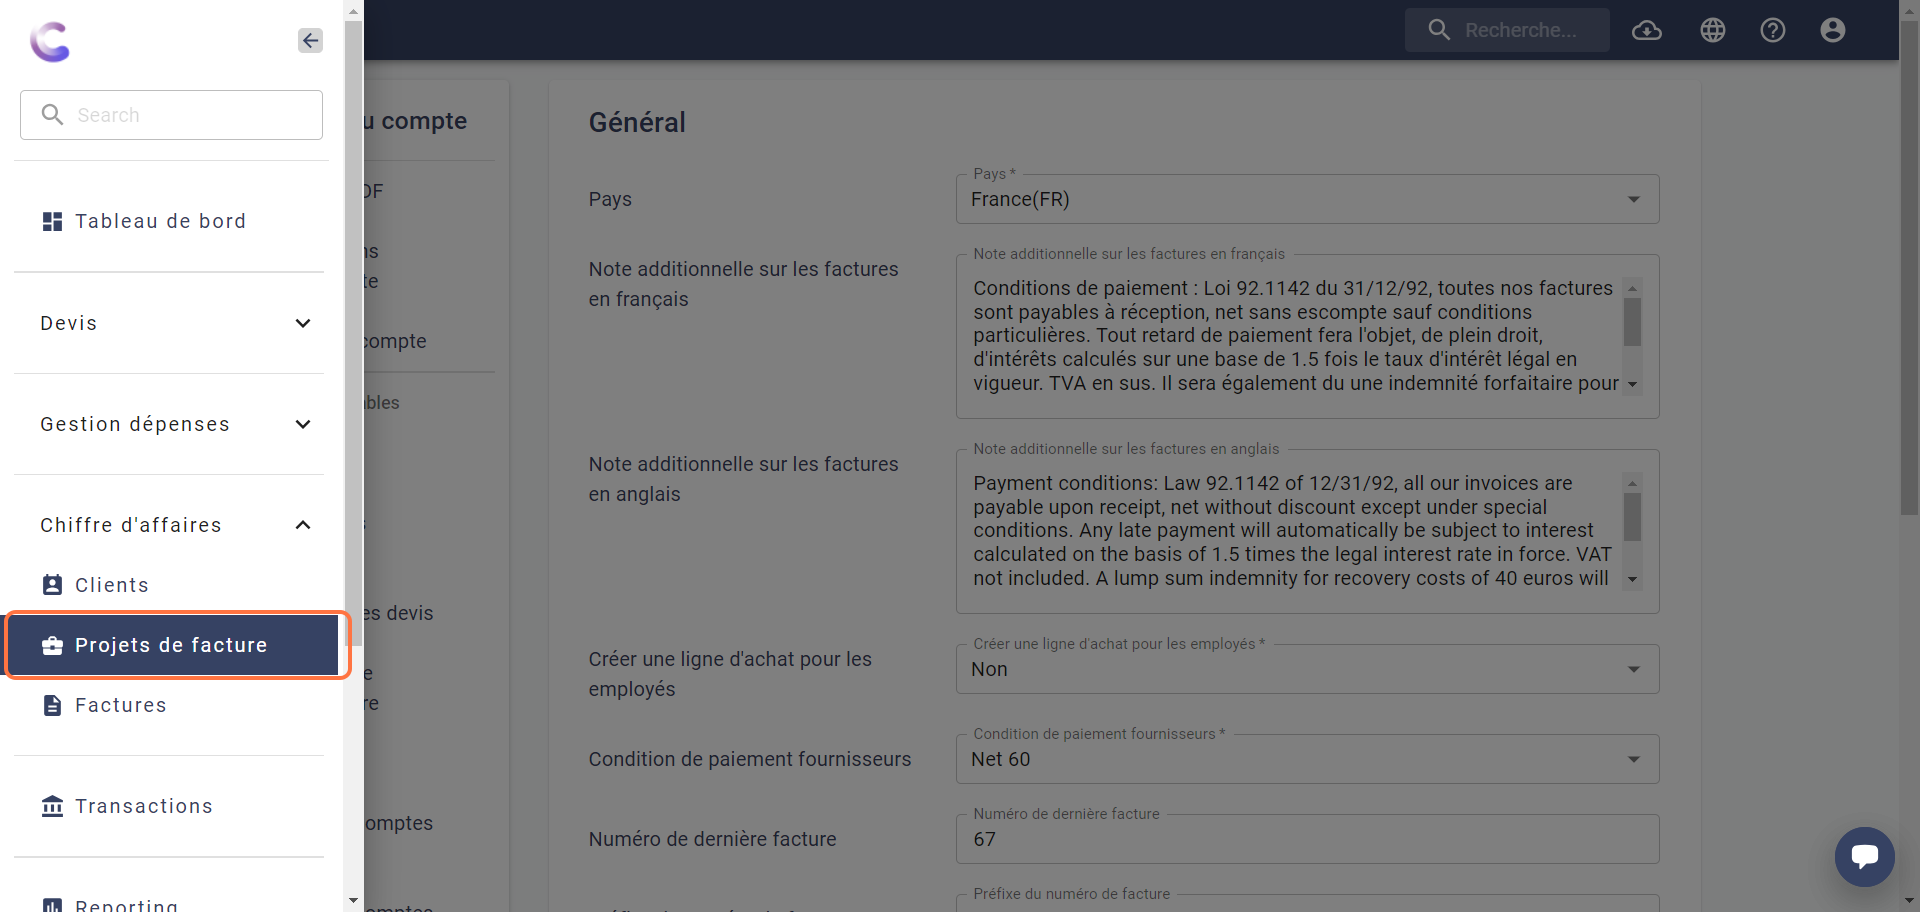
Click on General located in the menu.
The page looks like this:
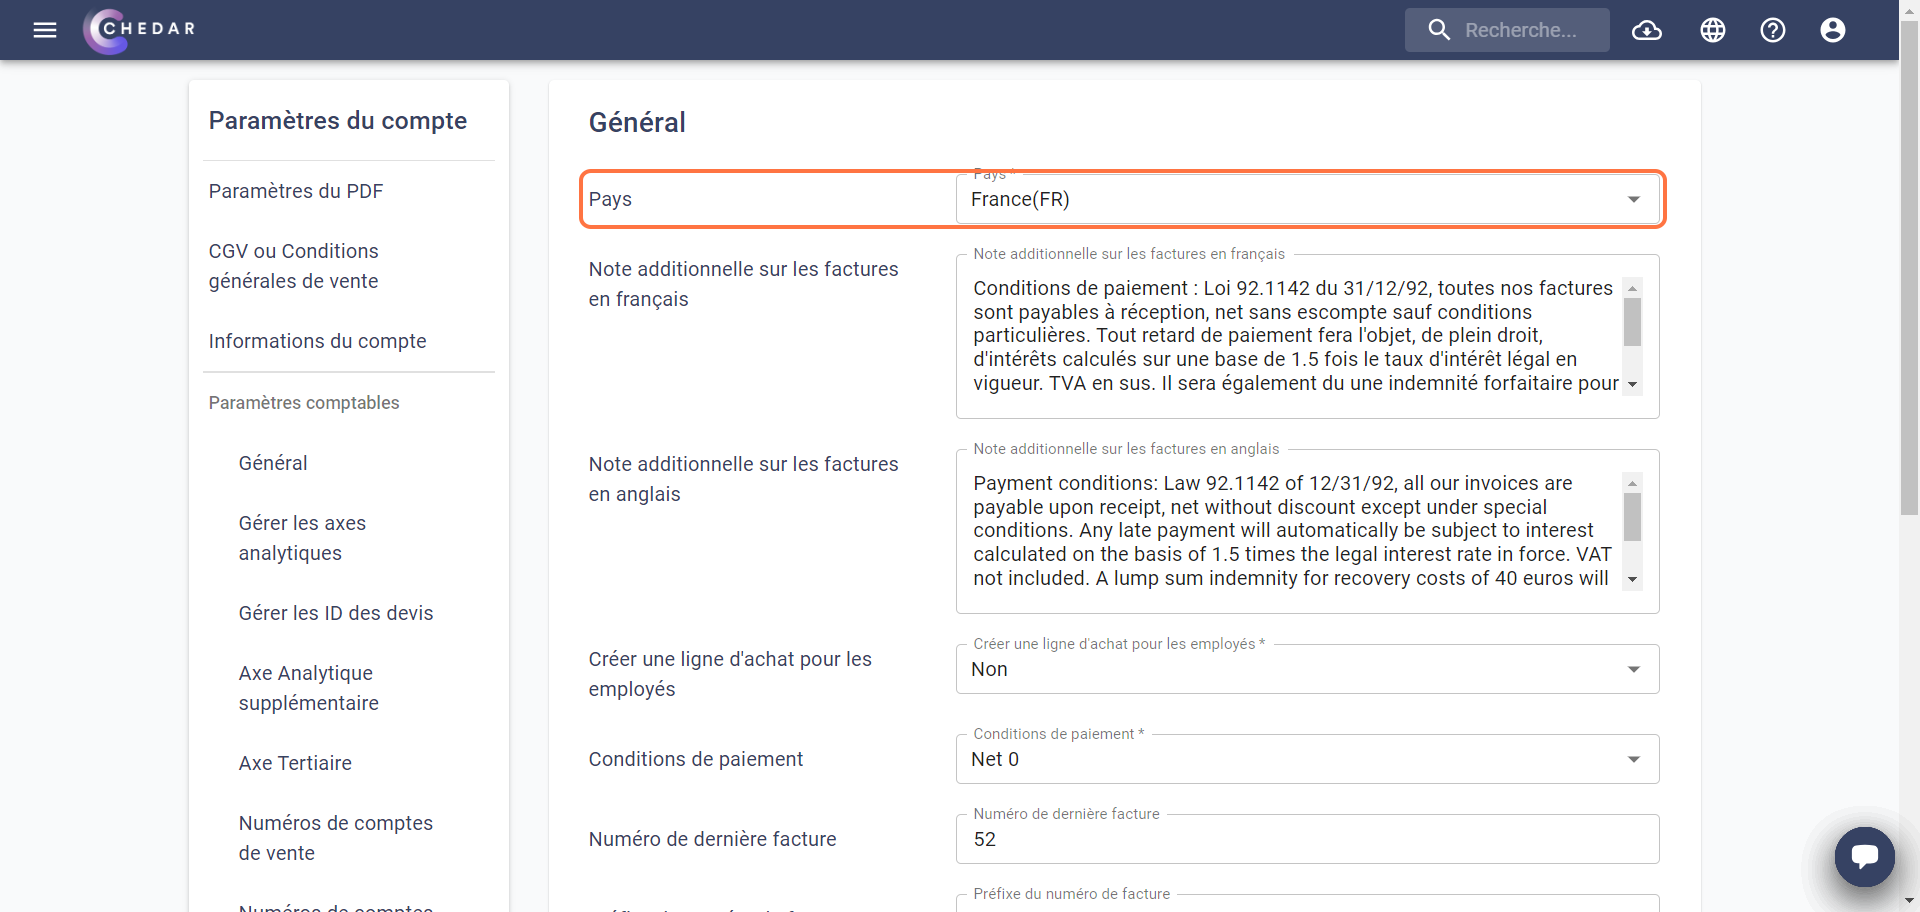
Country
- Click on the cell titled Country.
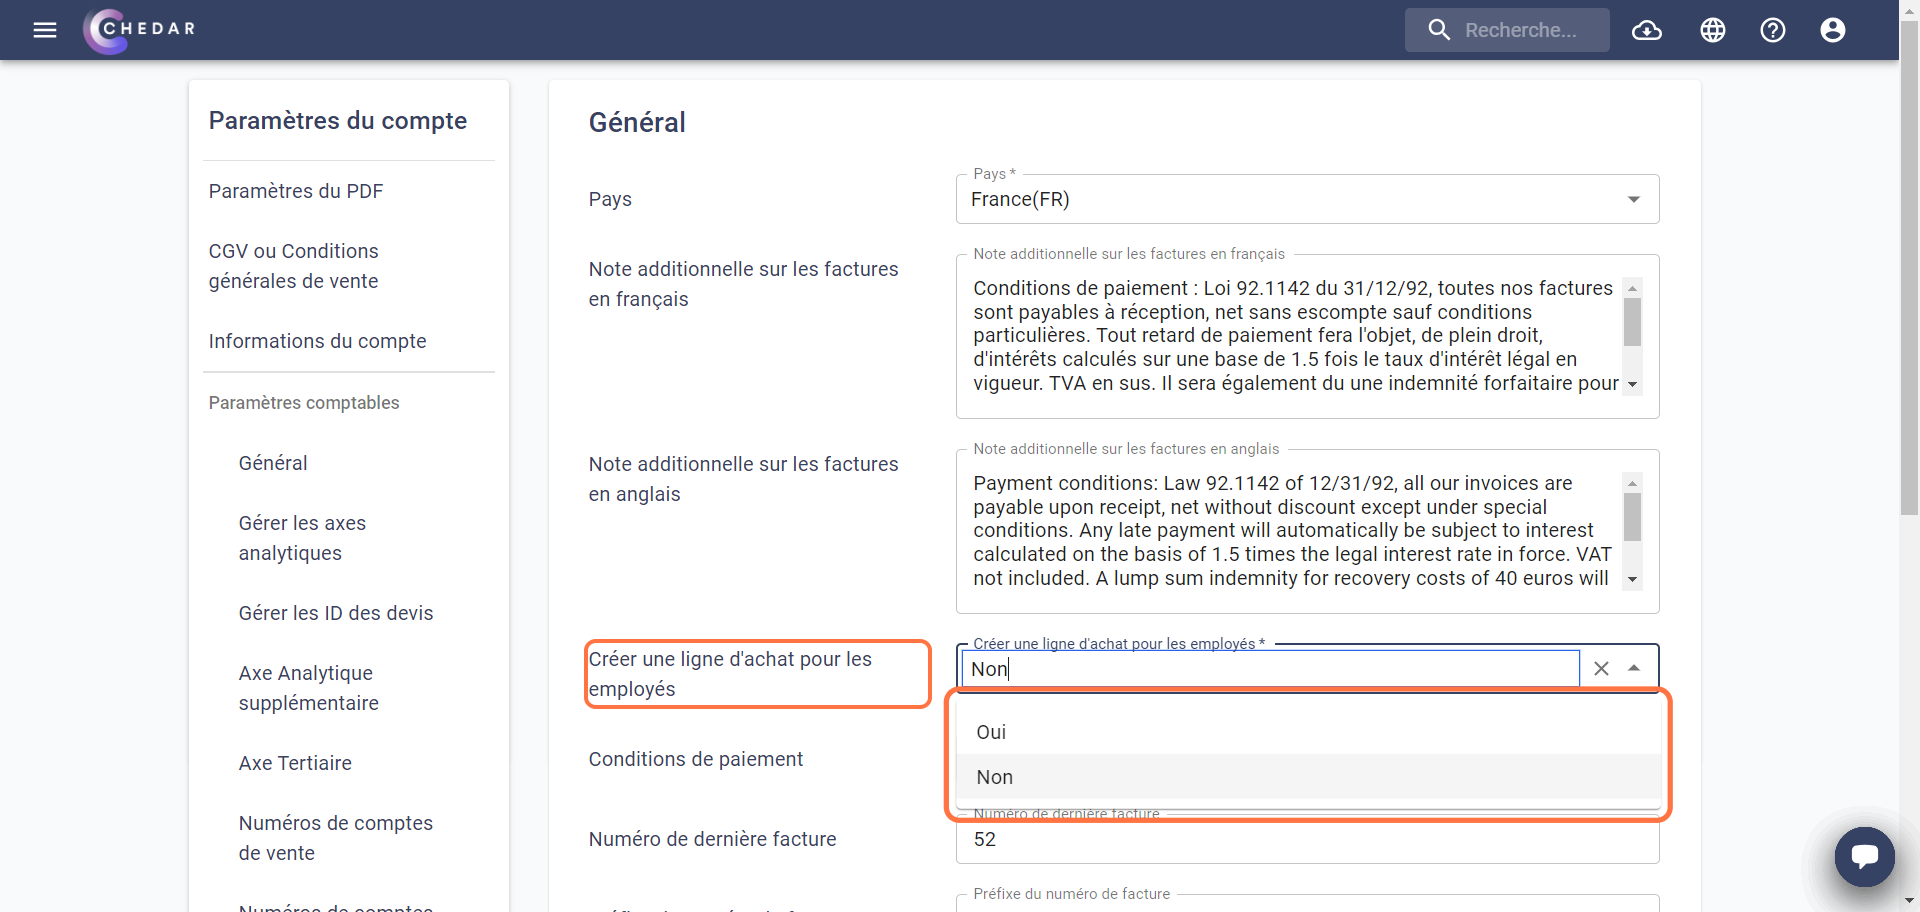
- A drop-down menu appears, choose the country that suits you:
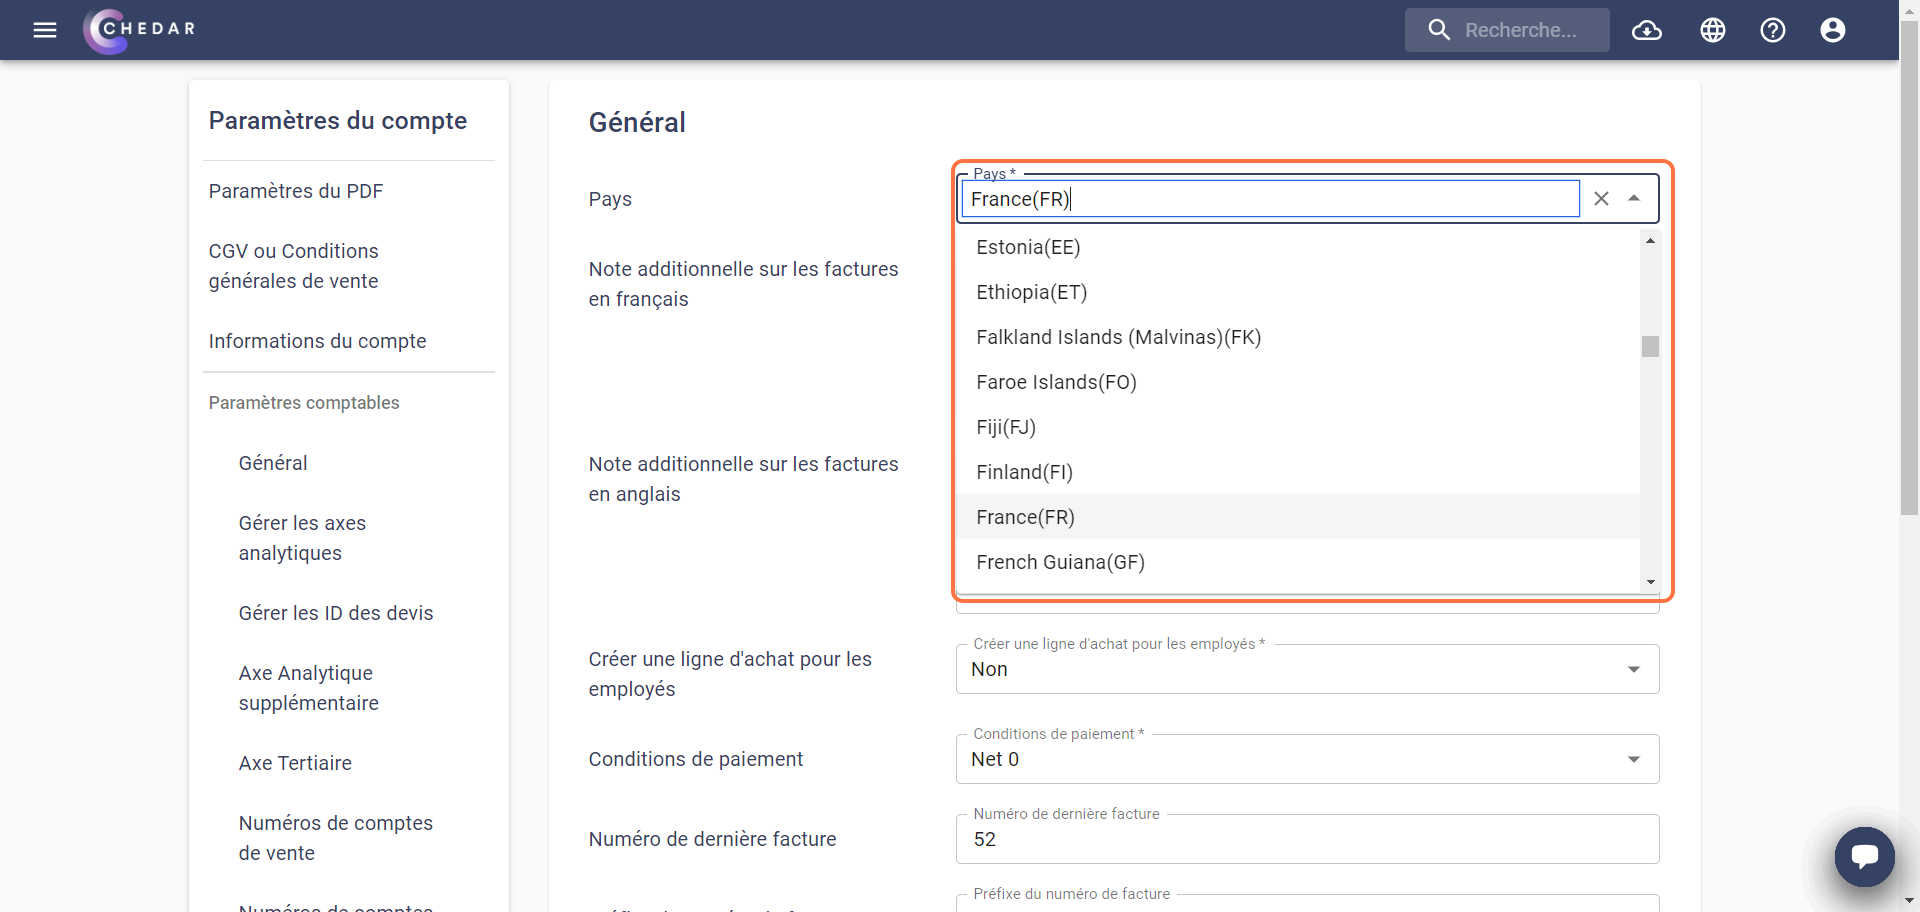
The country you have chosen will define your accounting plan.
Don't forget to click on Save to update this information.
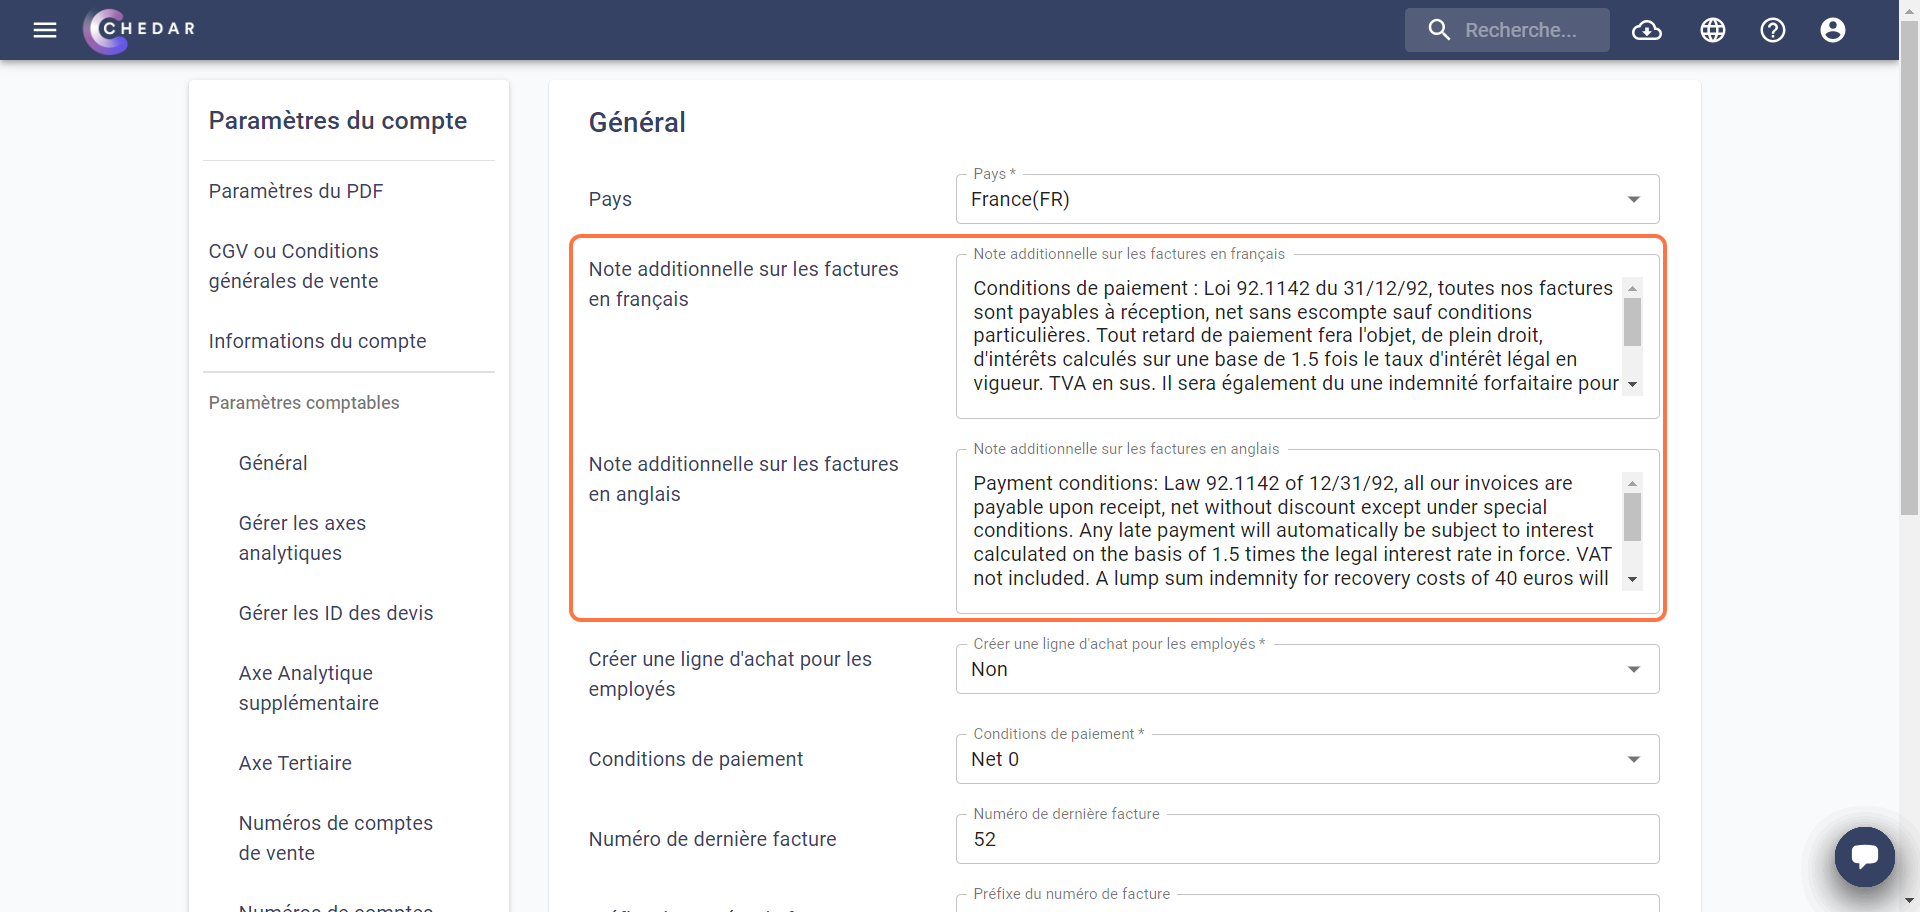
Special Note on Invoices
- The payment terms in French are indicated by default in the corresponding cell of the additional note:
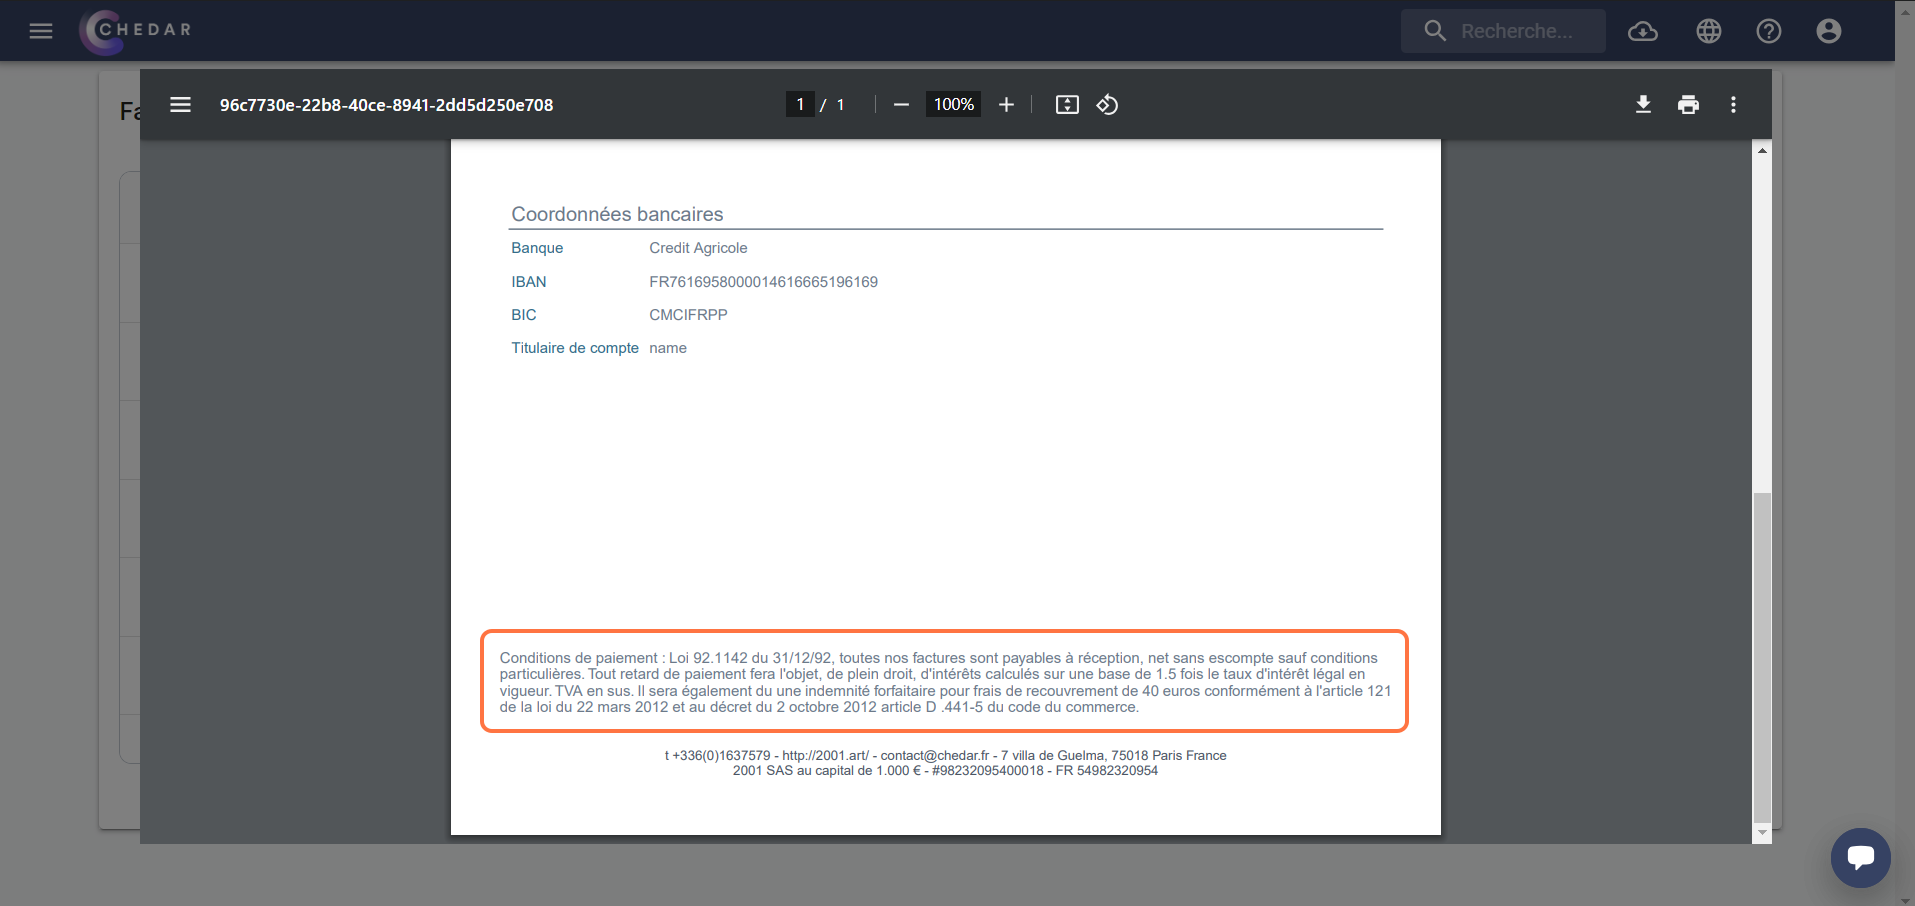
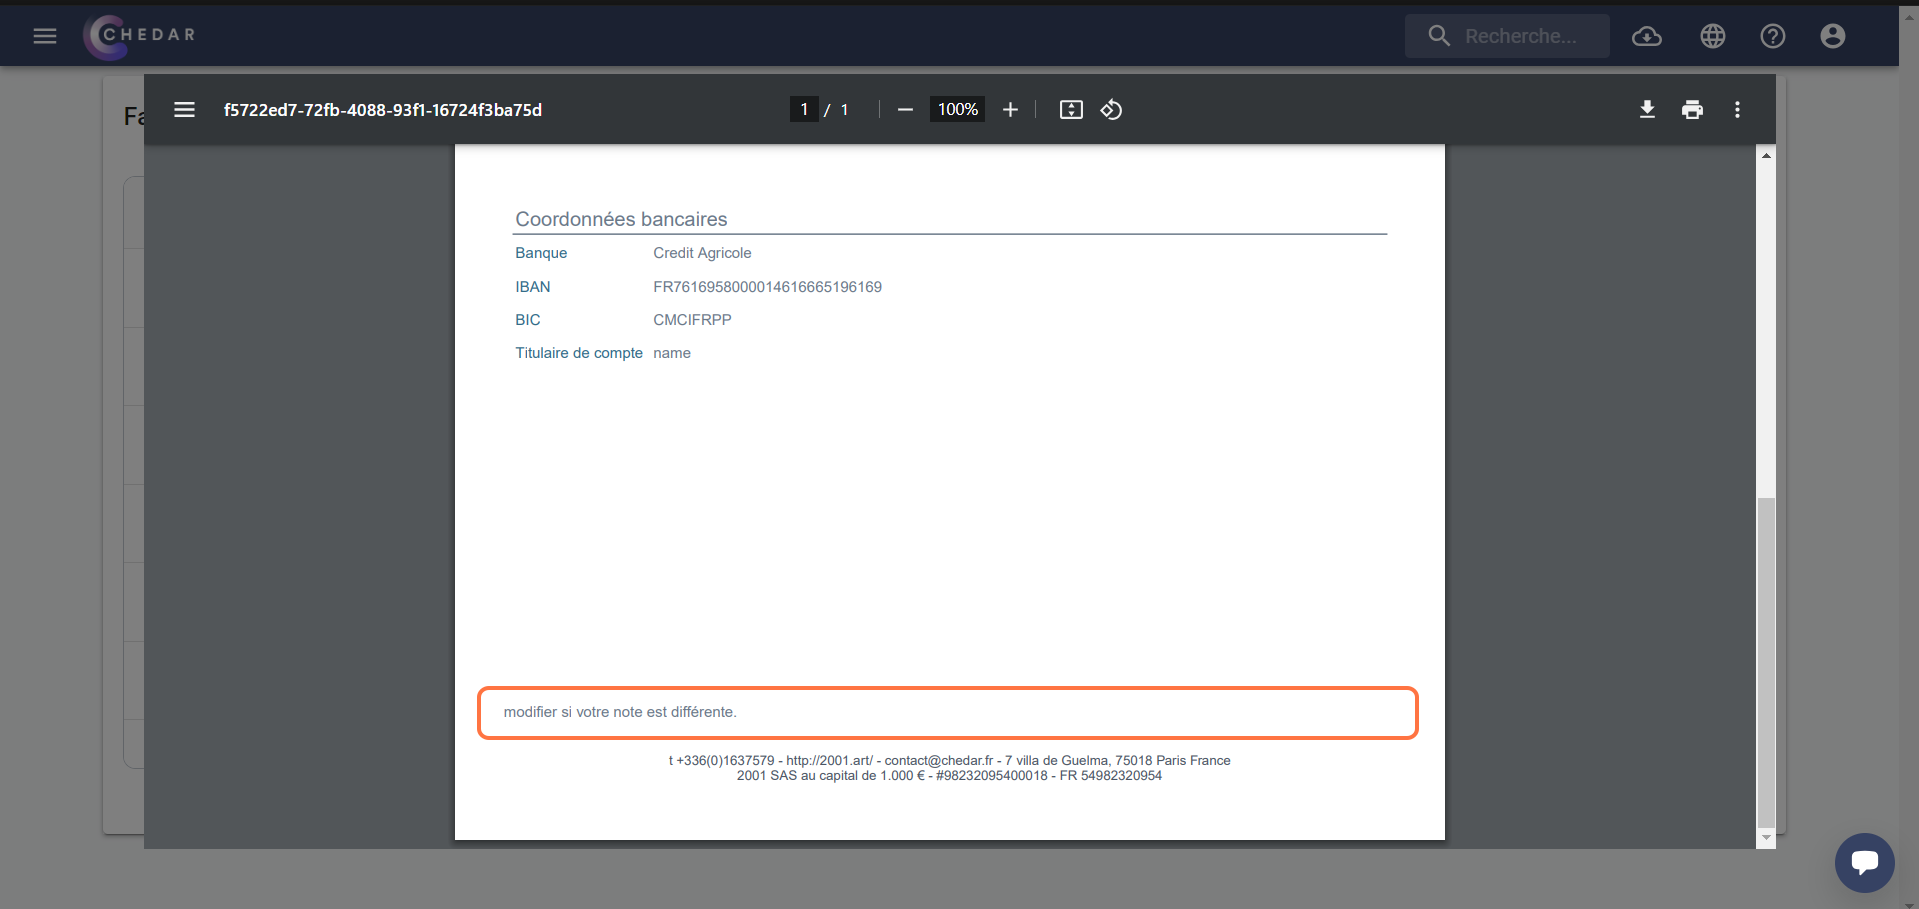
- When your Chedar account is in French, the payment terms appear in French at the bottom of your invoice pages:
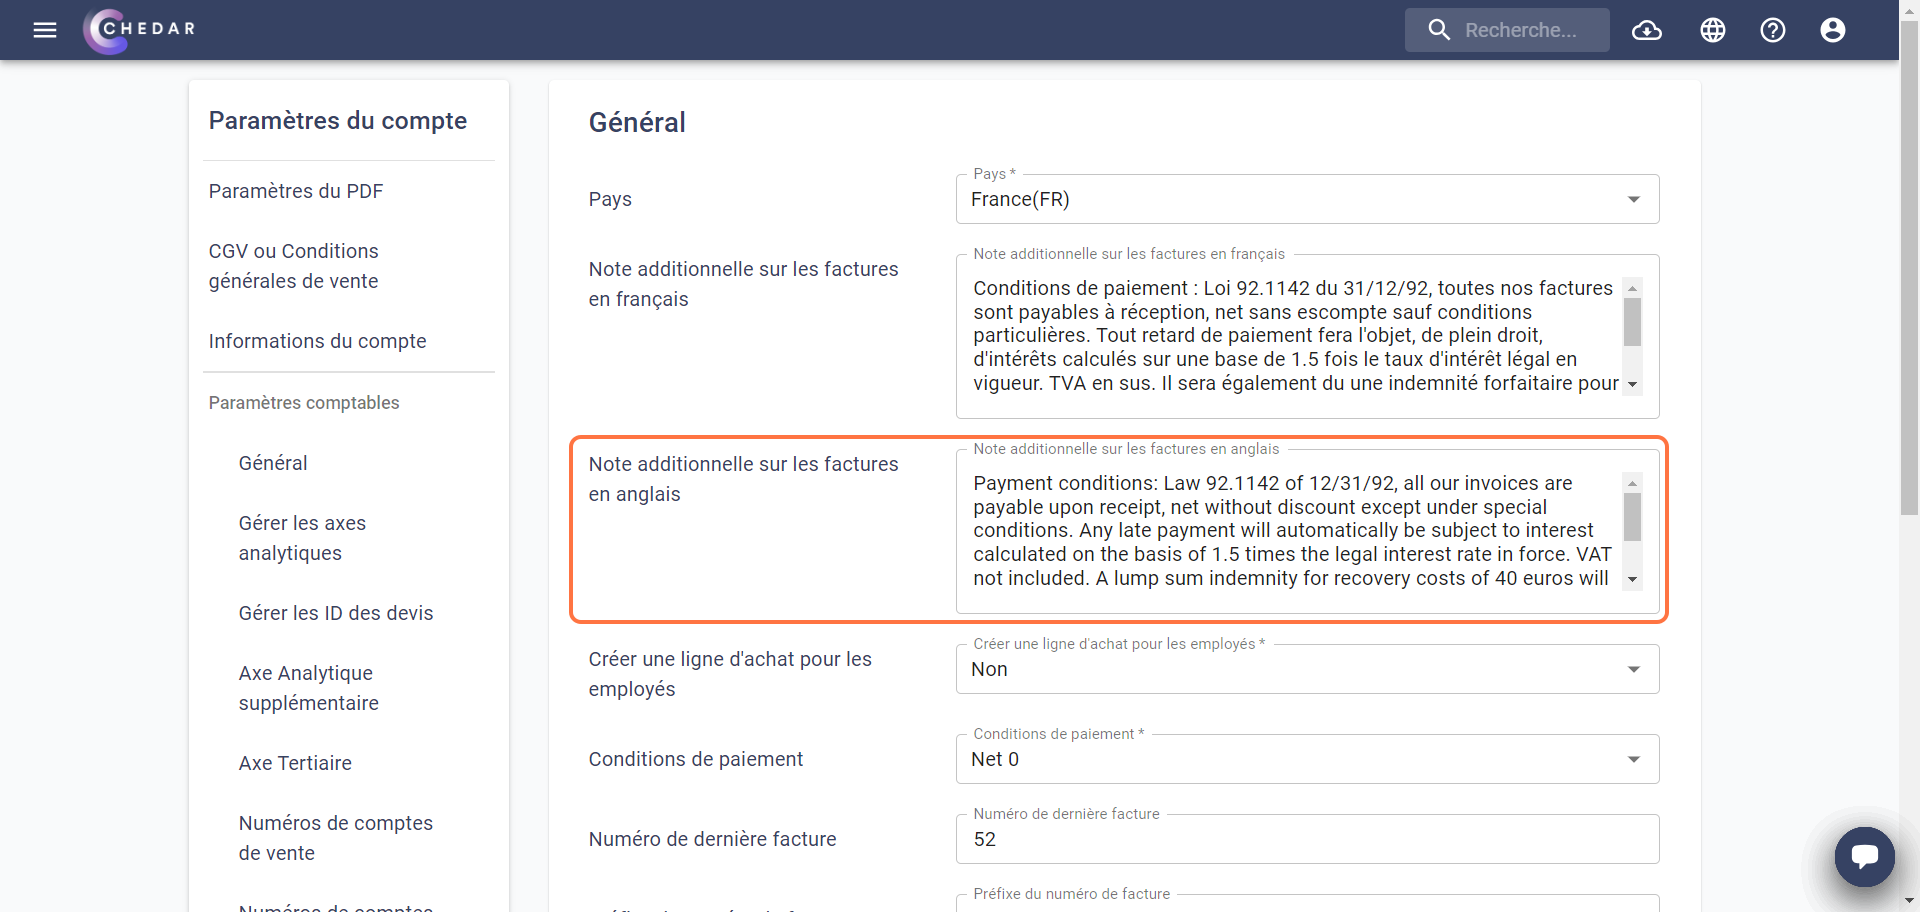
- The payment terms in English are also indicated by default:
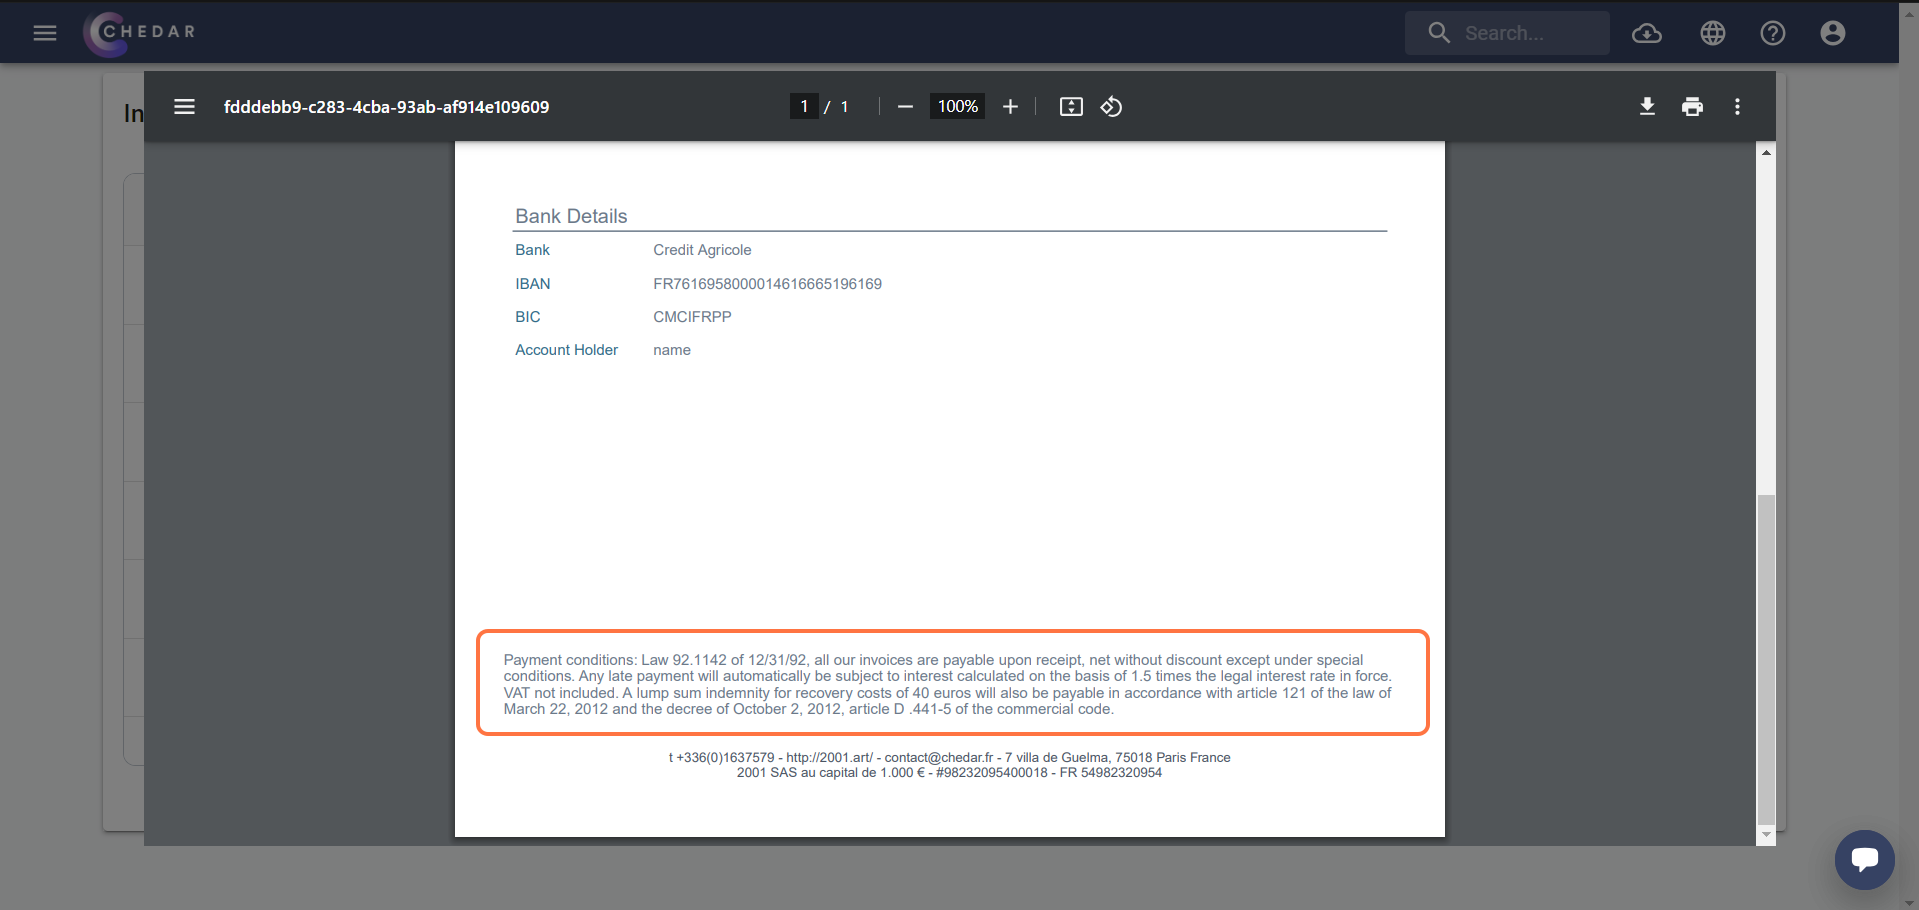
- When your Chedar account is in English, the payment terms appear in English at the bottom of your invoice pages:
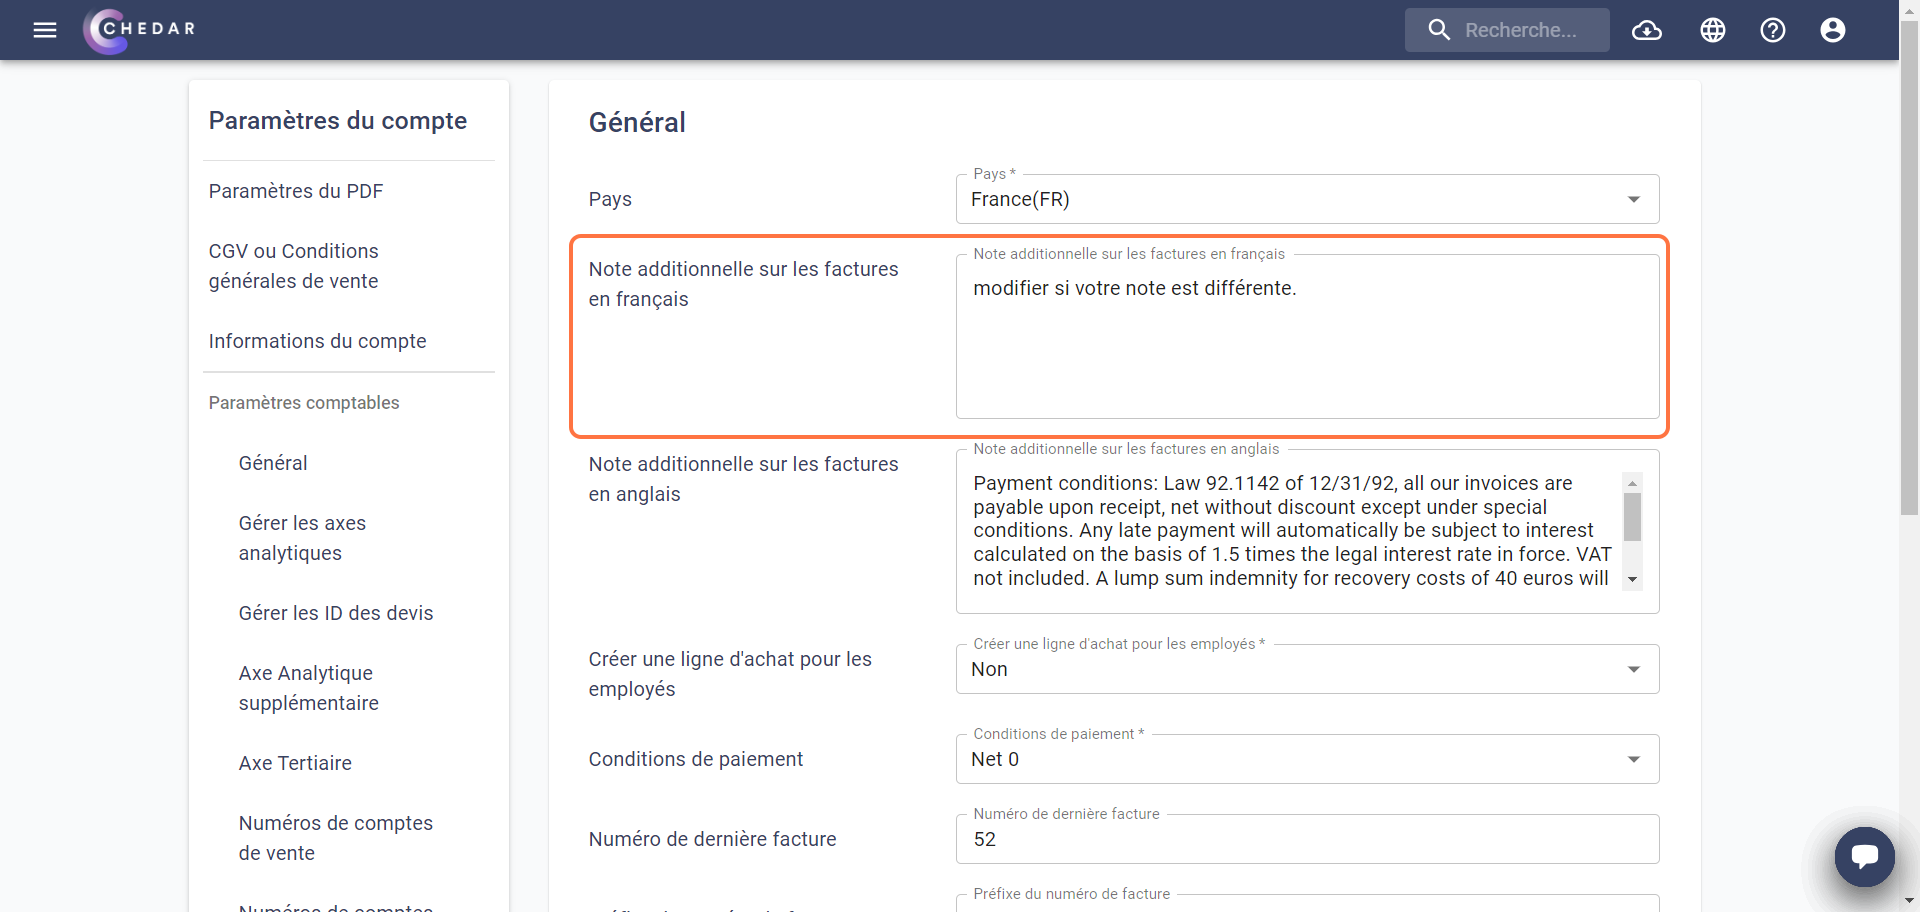
- You have the option to modify the additional note in French or English:
- Don't forget to click Save to update this information.
- The changes you made to the additional note will also appear at the bottom of your invoice pages:
Create a purchase line in Recap for employees
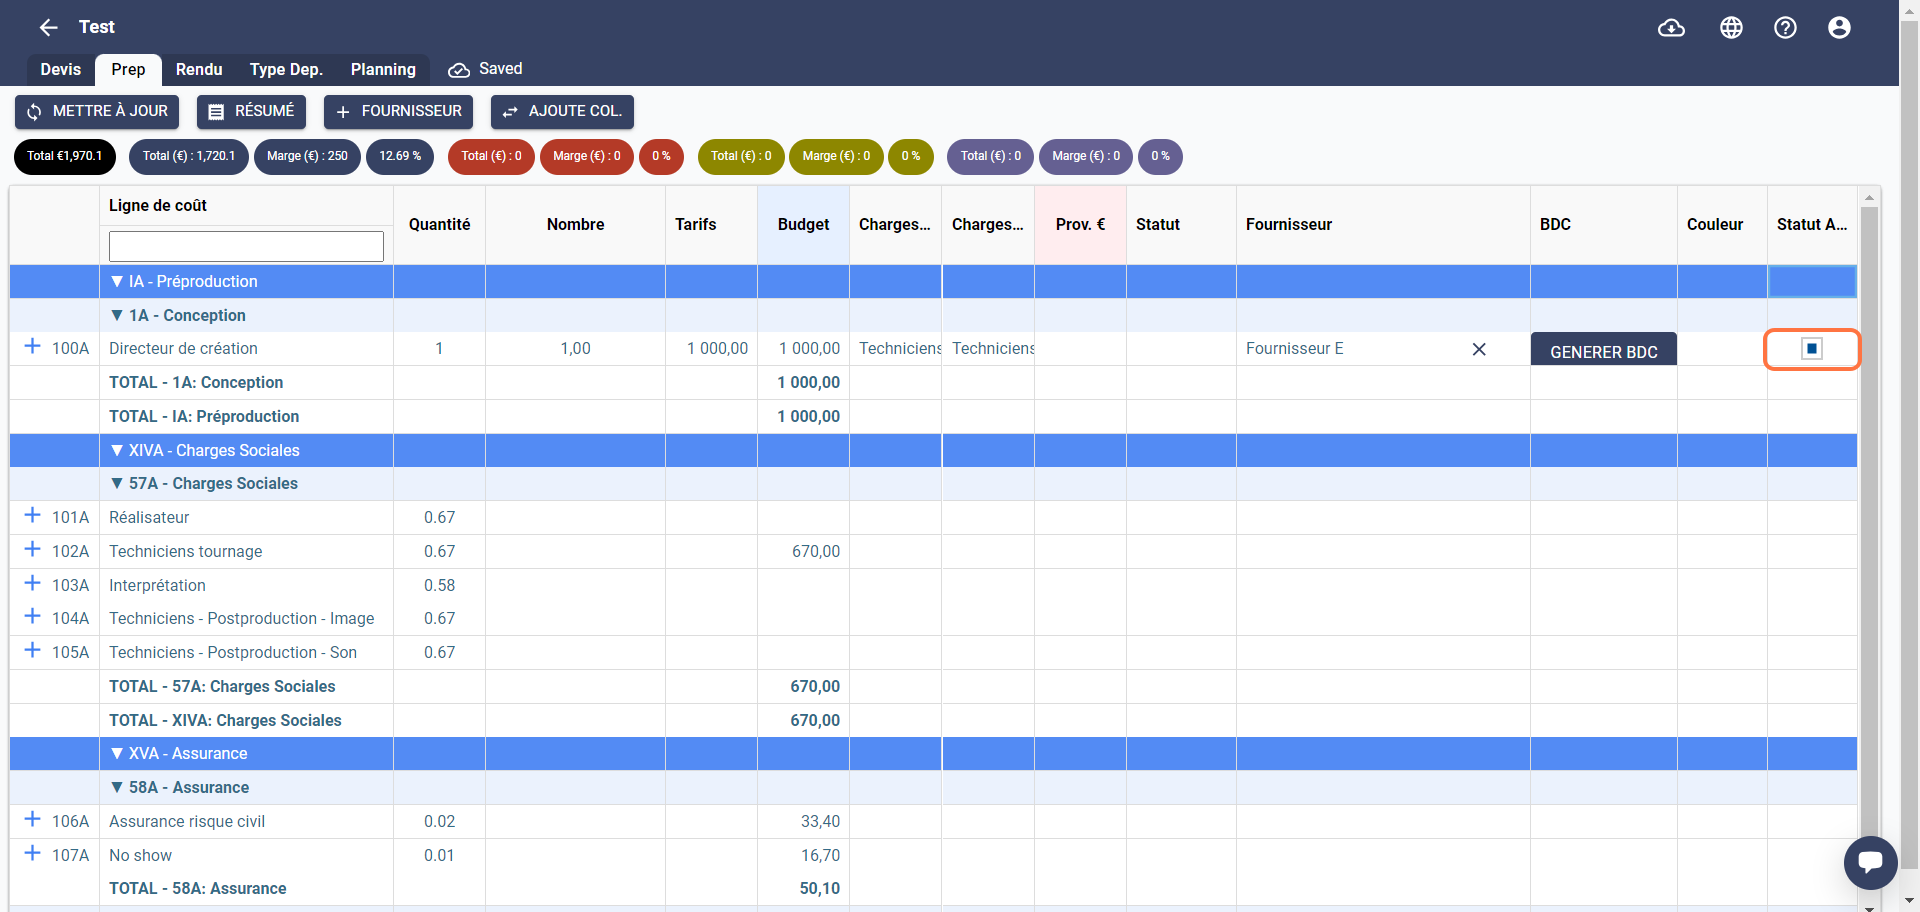
- Individual suppliers (employees and casual entertainment workers) in Chedar will not, by default, have a purchase line automatically created once added in the "Prep" tab. The box in their cell in the Purchase Status column is empty.

- If you need to automatically create a purchase line for these suppliers once they are assigned to a cost line in the rendering, you can modify the "Create a purchase line for employees" field by double-clicking on it and selecting Yes.
Don't forget to click Save to update this information.
After making this change, when adding an individual type supplier, the box in their cell in the Purchase Status column will be filled in automatically.
Supplier Payment Terms
You have the option to choose the default payment terms for your suppliers.
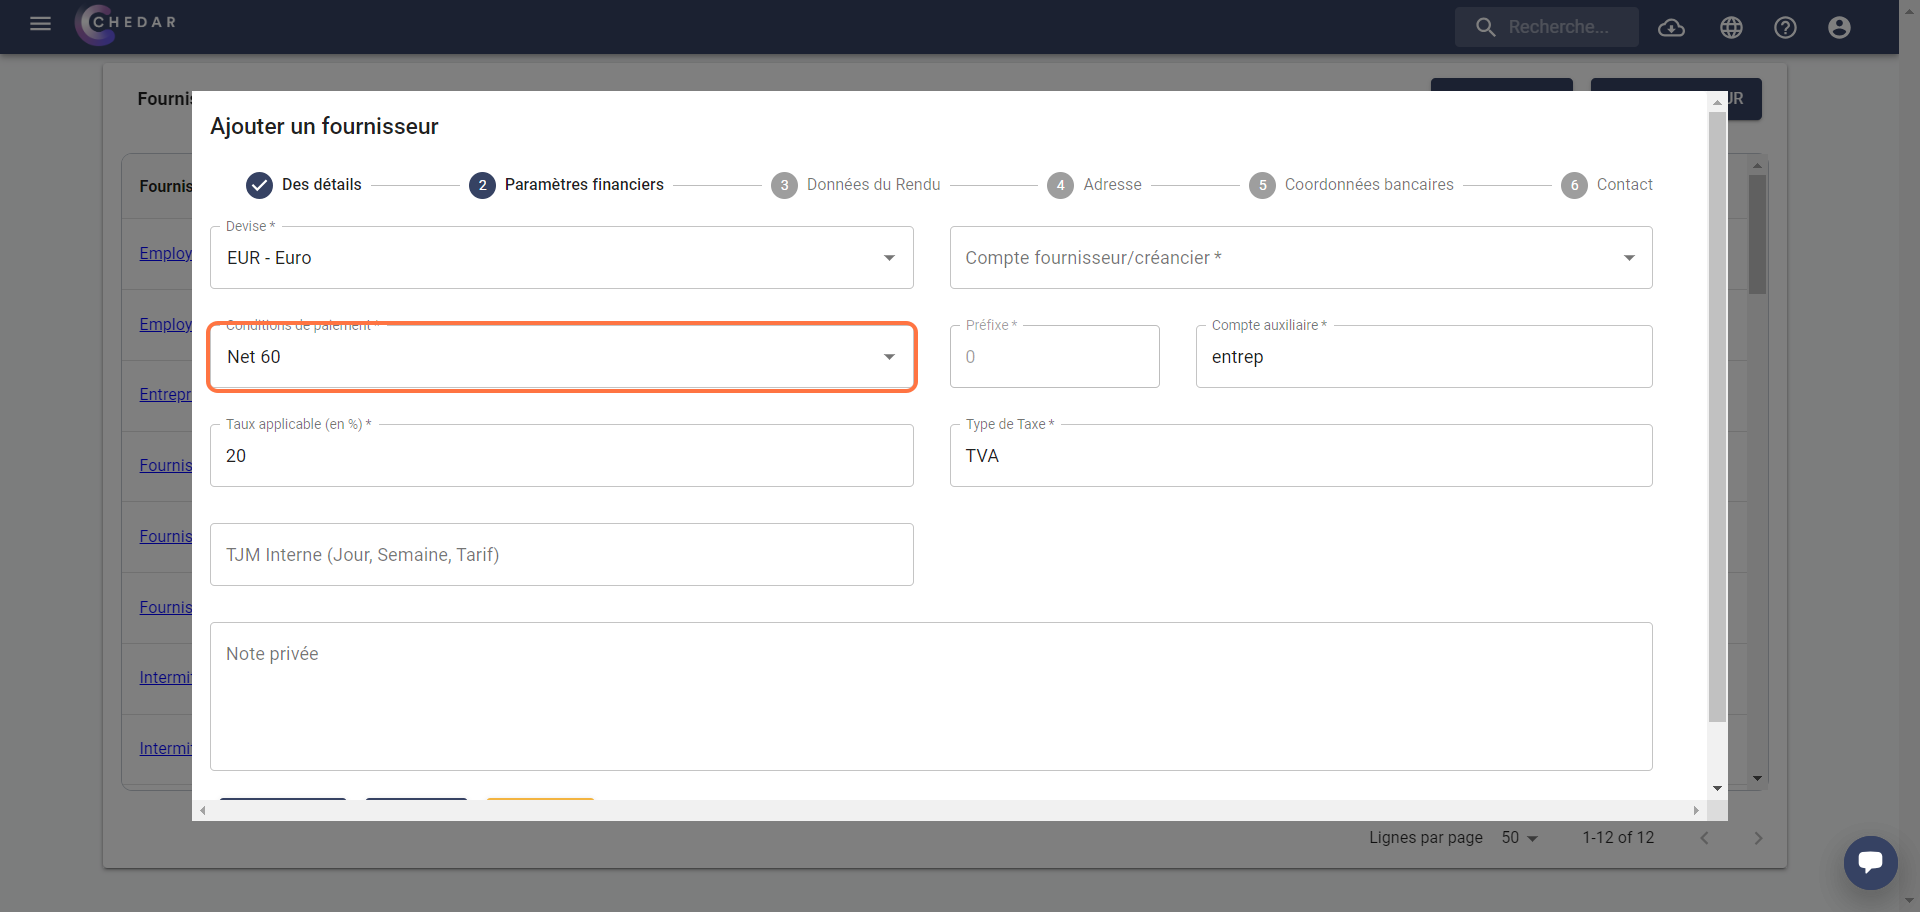
- Click on the Payment Terms cell:
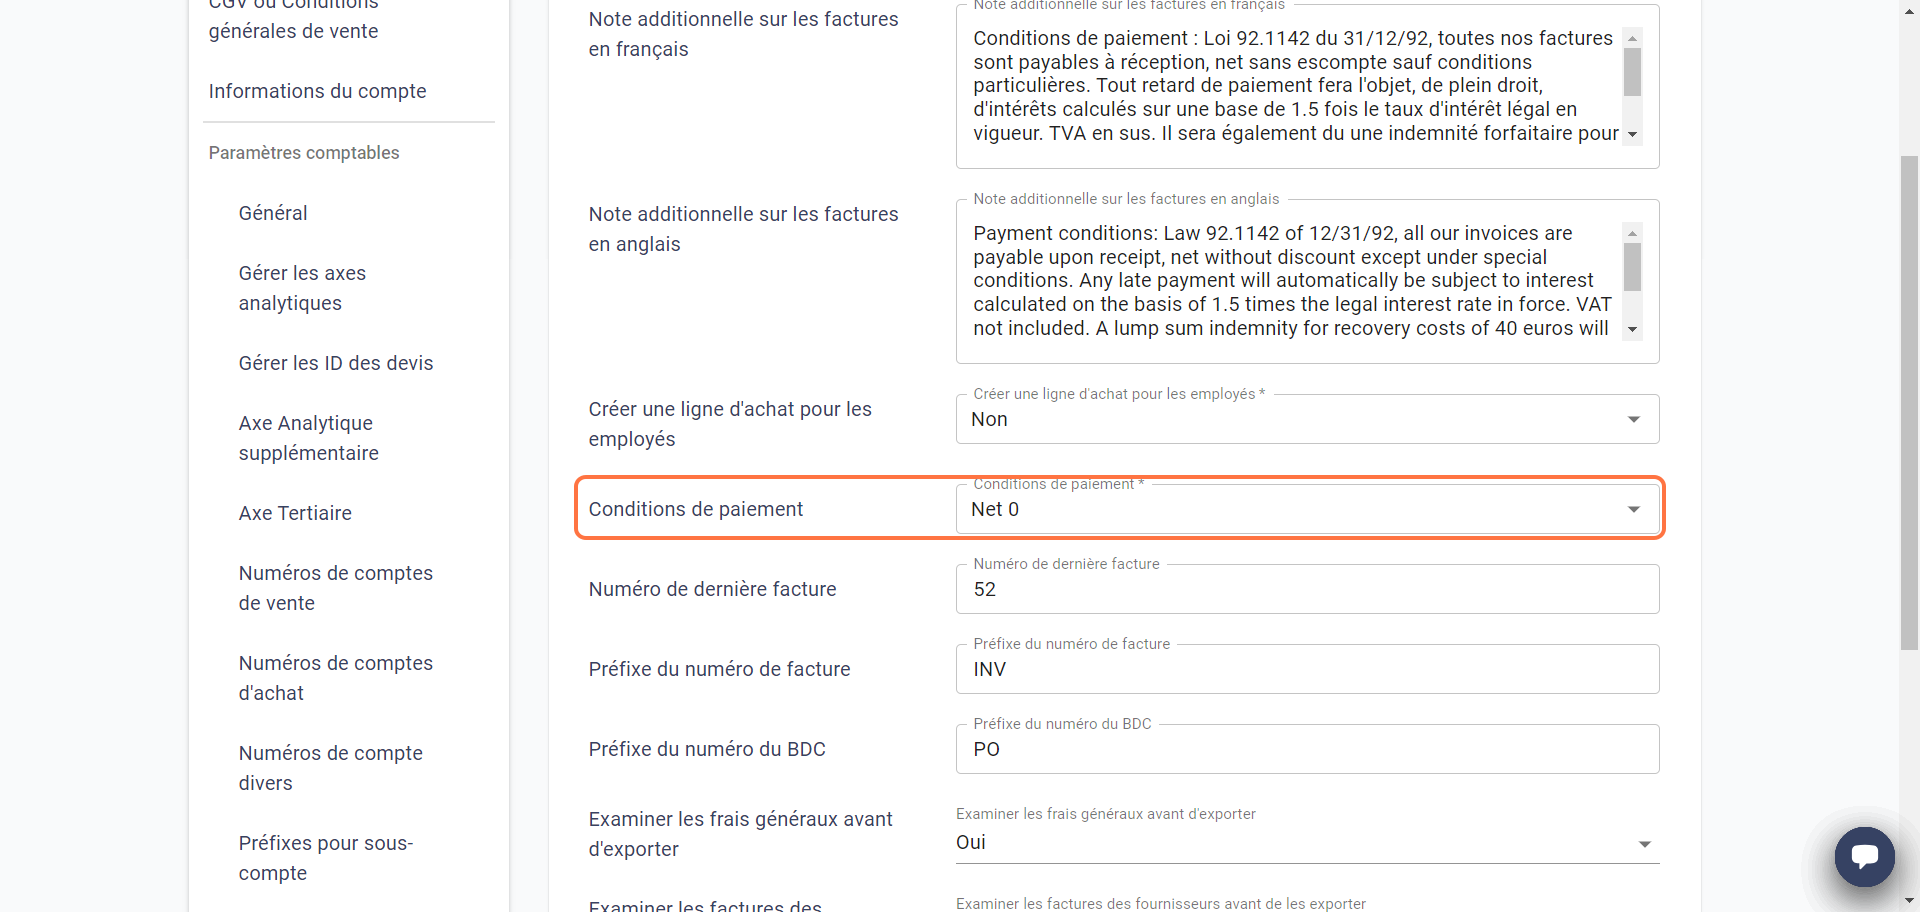
- A drop-down menu will appear:

Choose the option that suits you.
Click Save.
Don't forget to click Save to update this information.
These conditions will appear when creating a supplier record in Financial Settings.
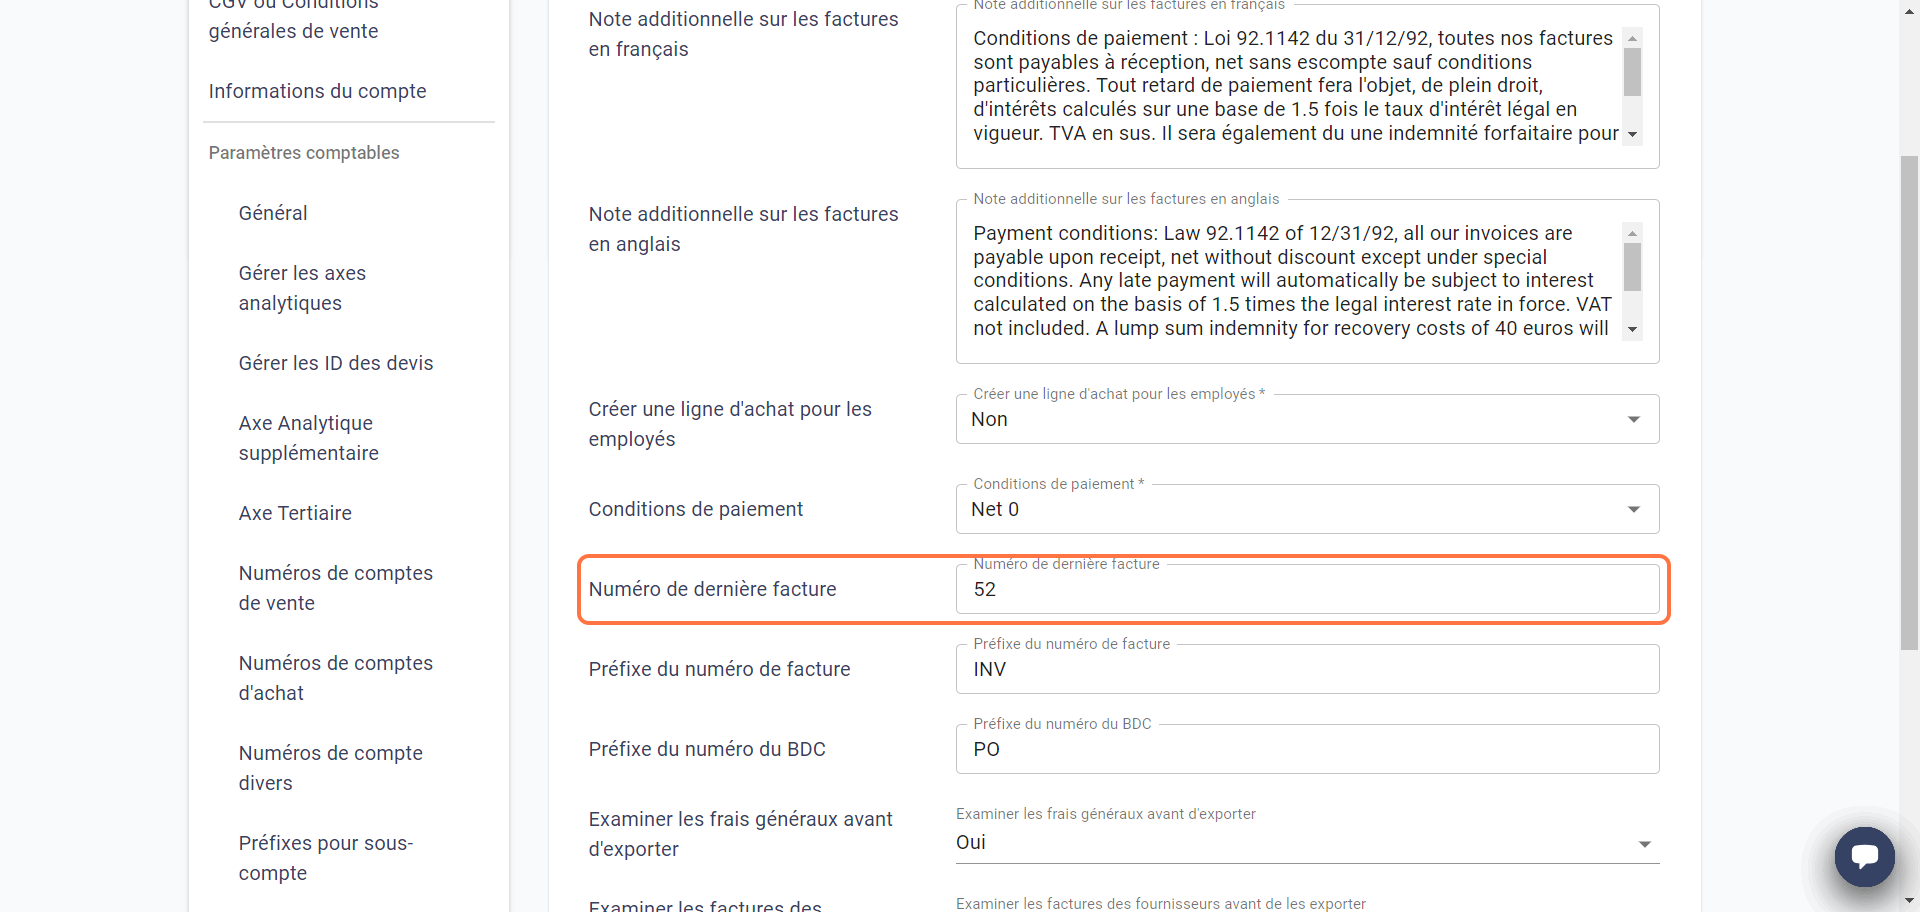
Last invoice number
This field will display the number of your last invoice issued to your customers. You can change this number and choose the number of the last invoice you issued in your previous software.
Invoice number prefix
You can change the prefix of your invoice number in this field:
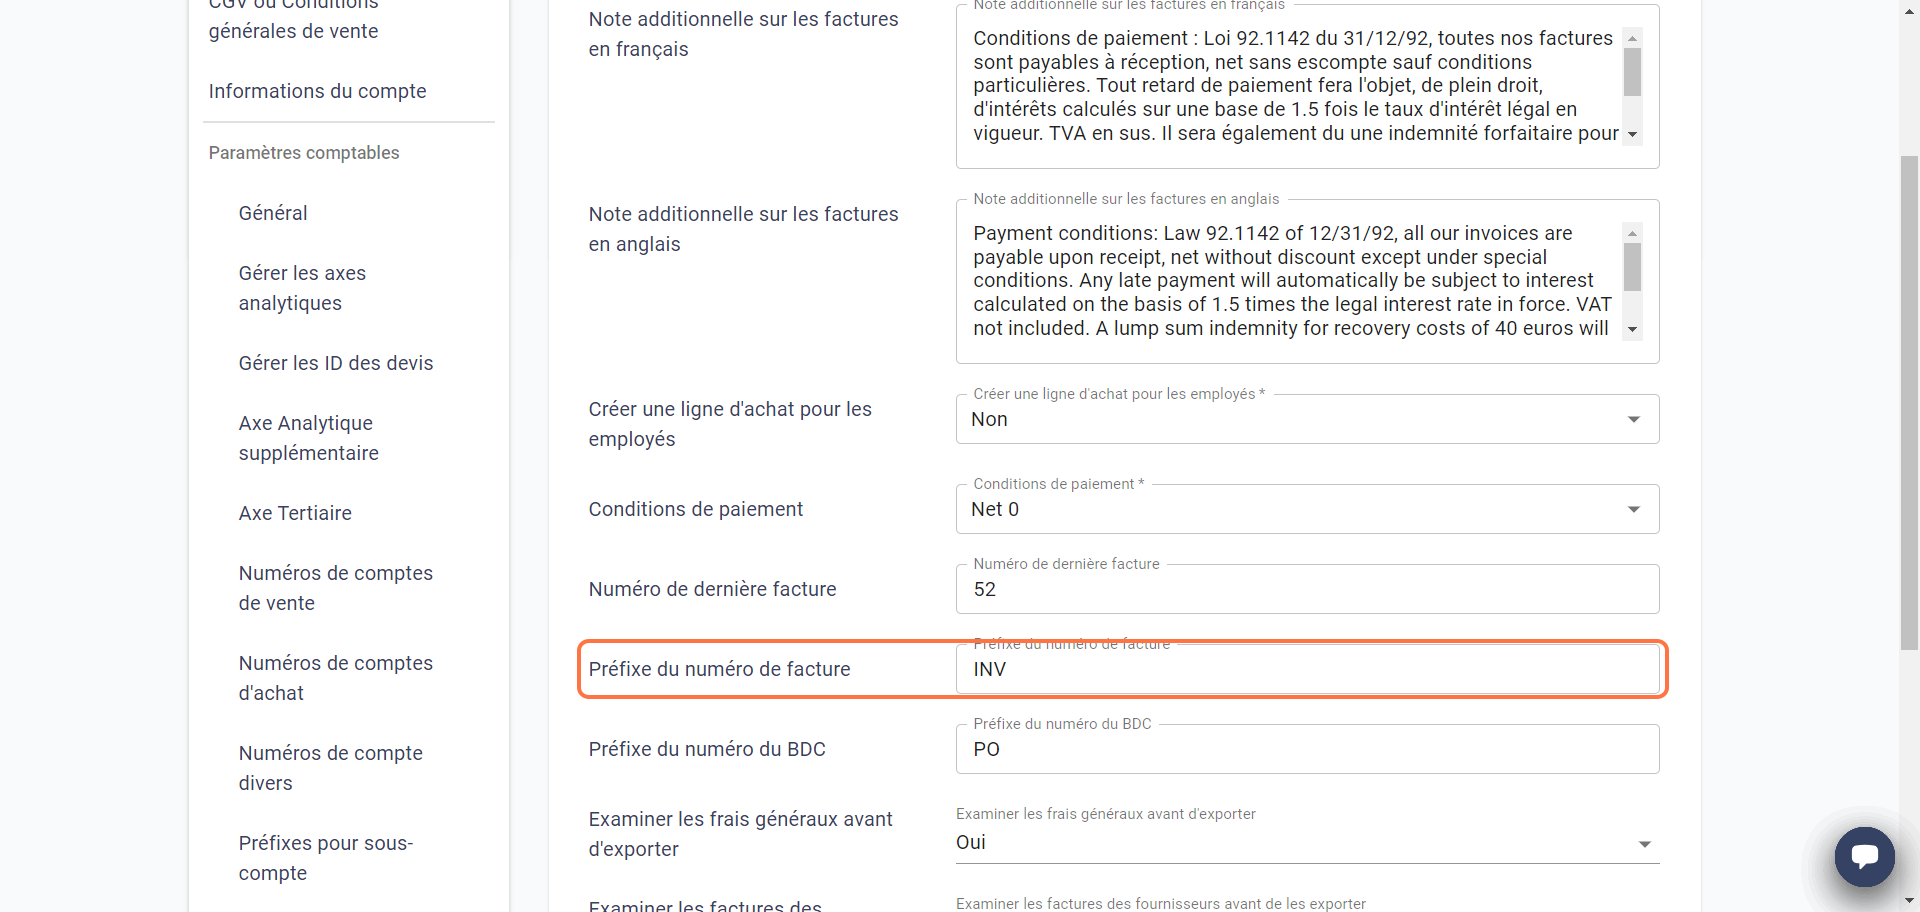
Changes do not apply to invoices already edited.
PO Number Prefix
You can change the prefix of your purchase order (PO) number in this field:
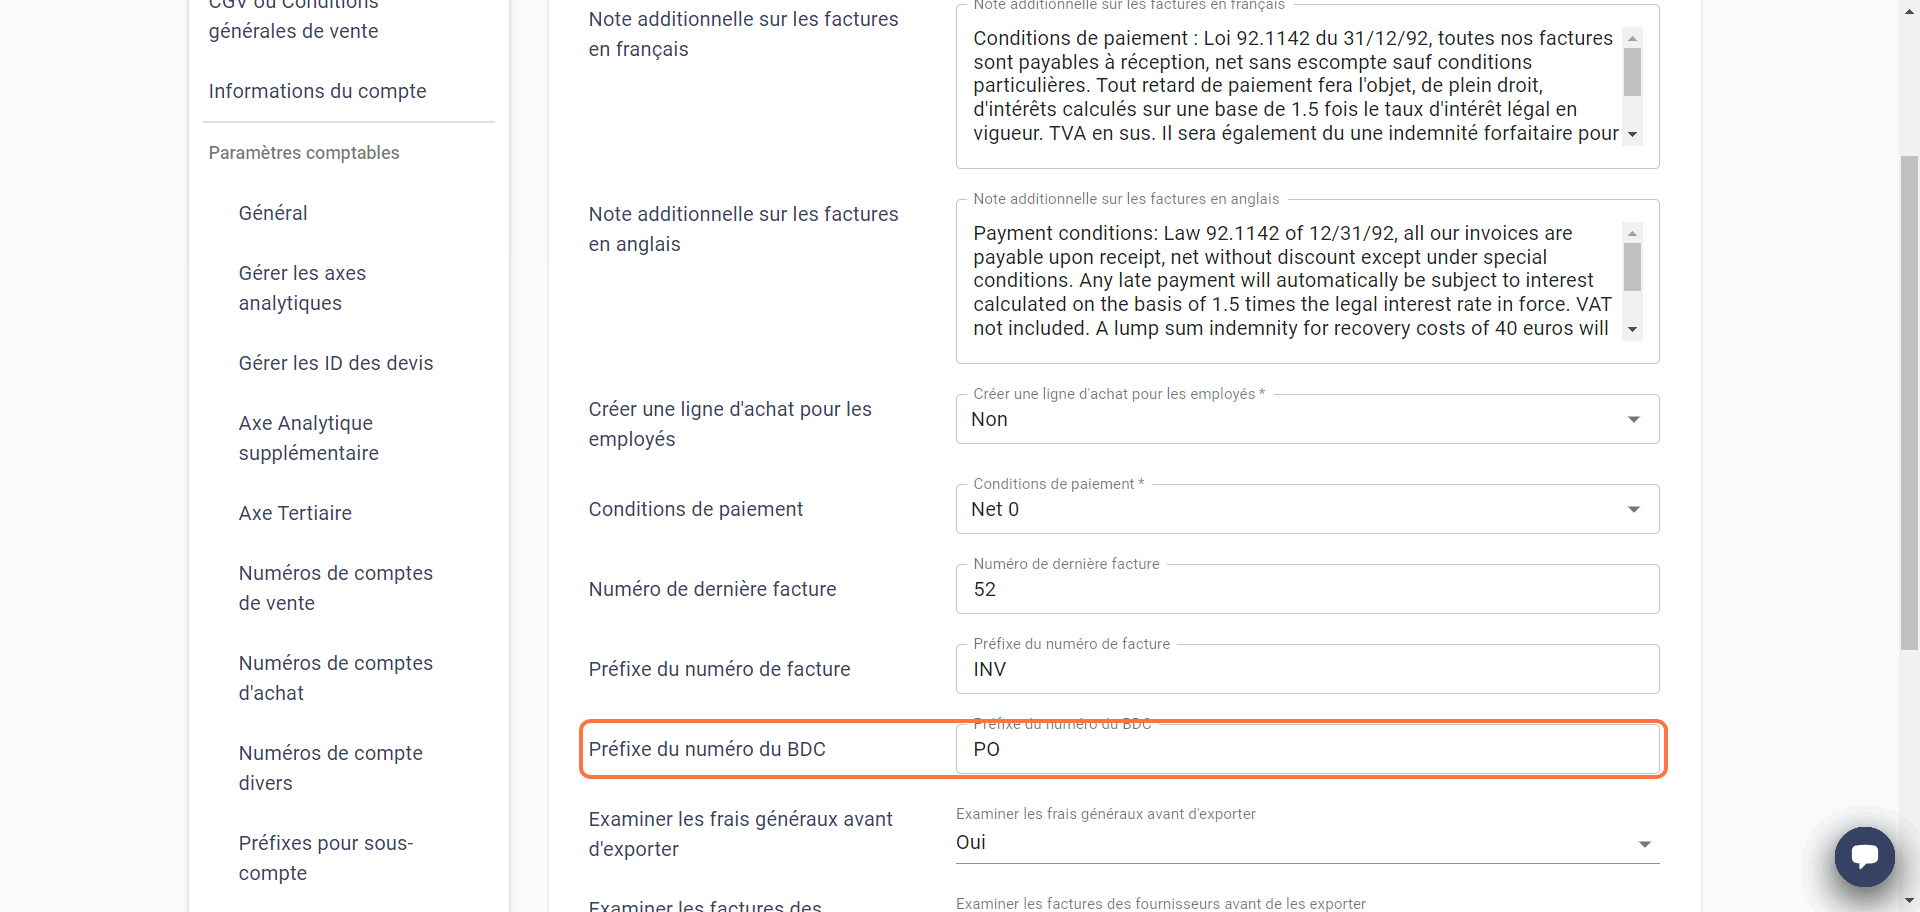
Changes do not apply to POs that have already been generated.
Review invoices before exporting
You have the option to review your overhead and/or supplier invoices in the Supplier Invoices section.
- The Yes option is checked by default for the Review overhead costs before exporting and Review supplier invoices before exporting sections:
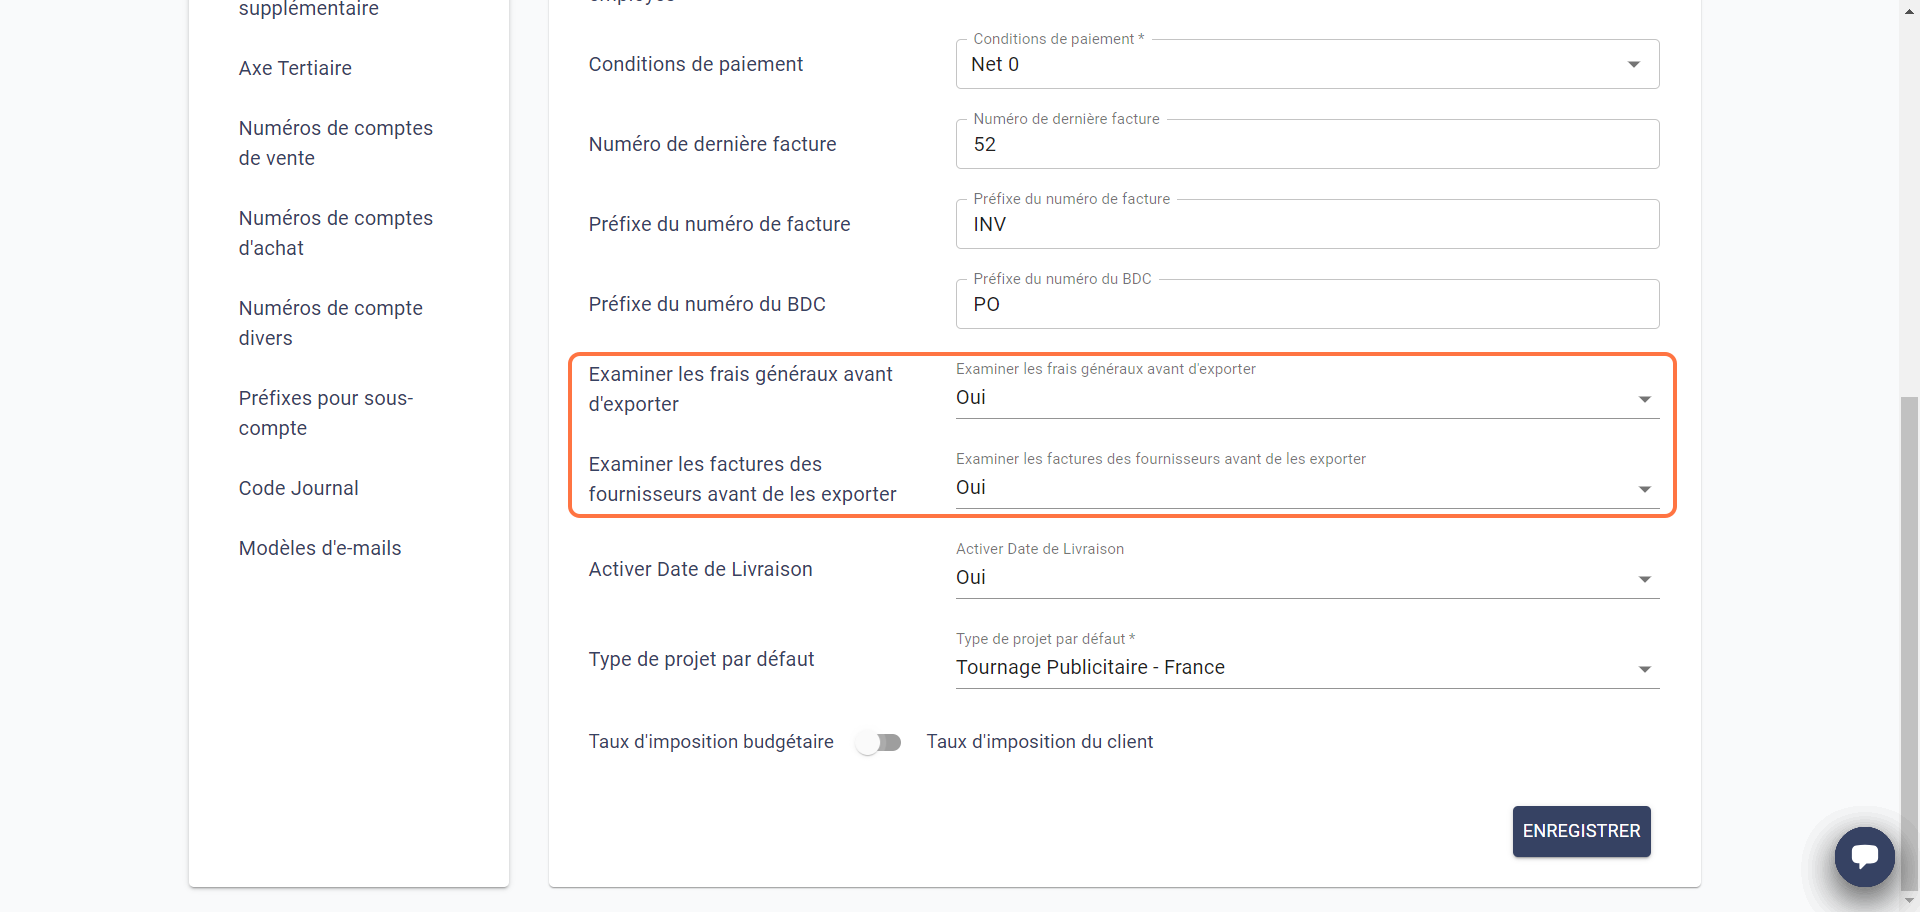
- These two options affect the Supplier Invoices section tabs and invoice processing.
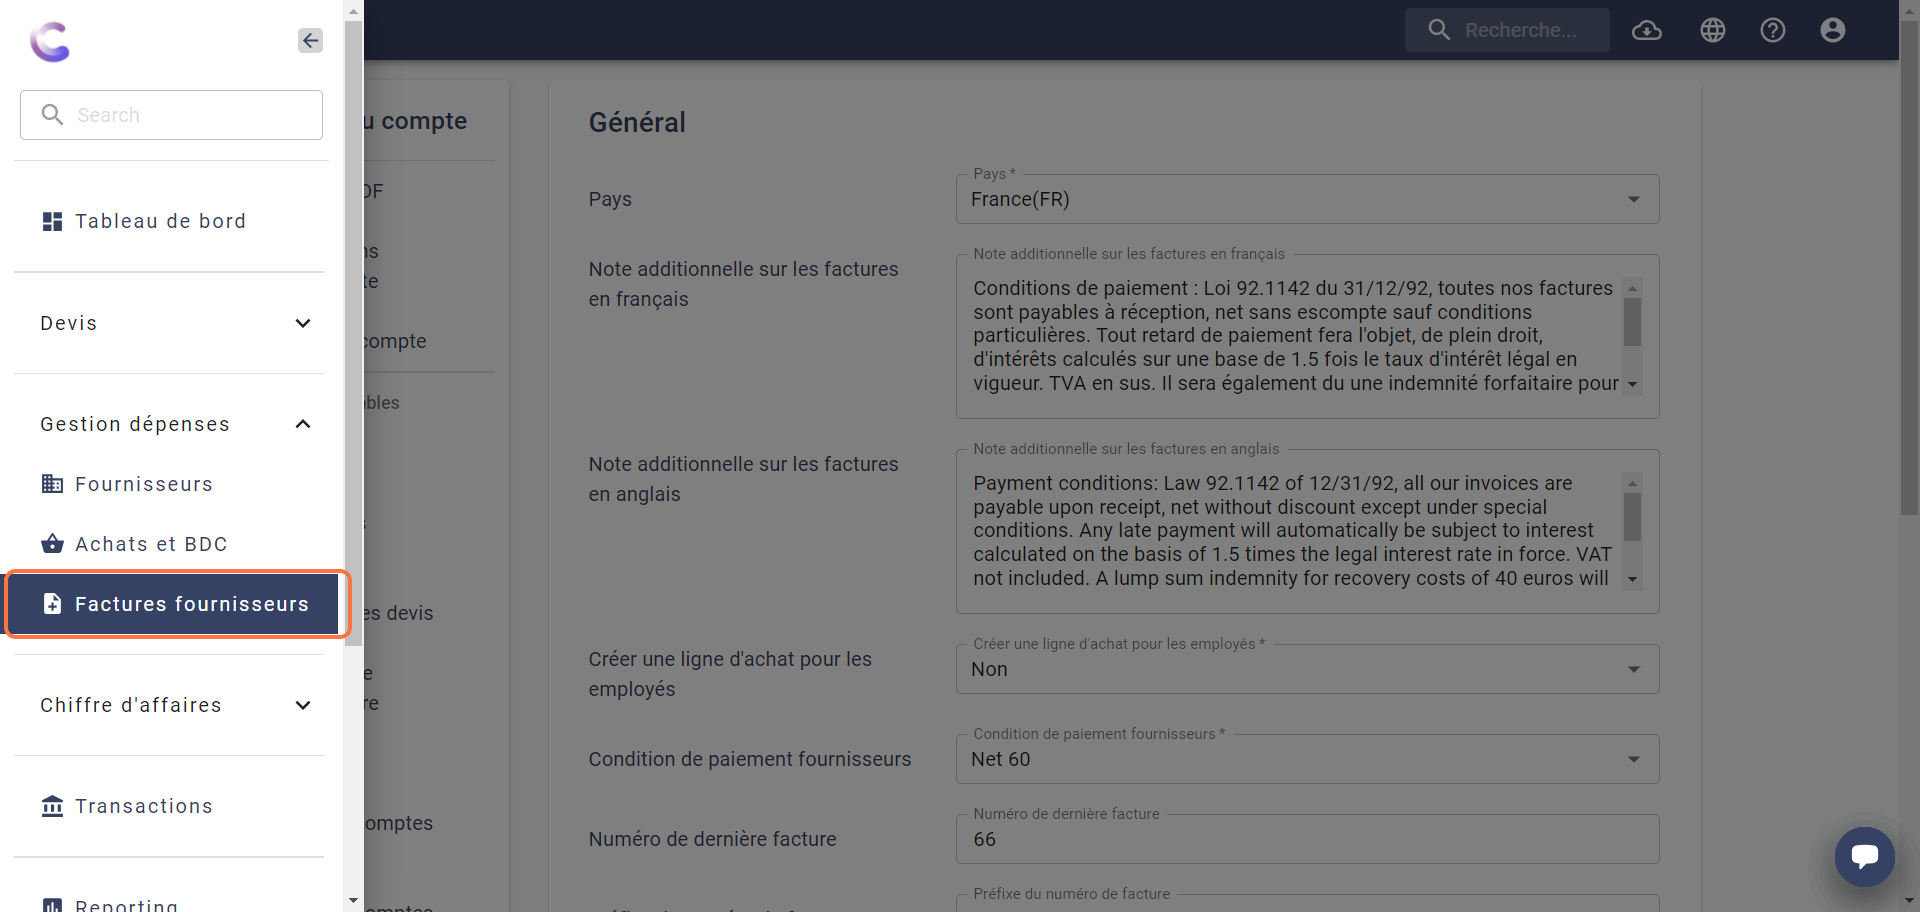
- To see their effect, go to Supplier invoices in Expense management in the menu by clicking on the three horizontal bars at the top left of the screen.
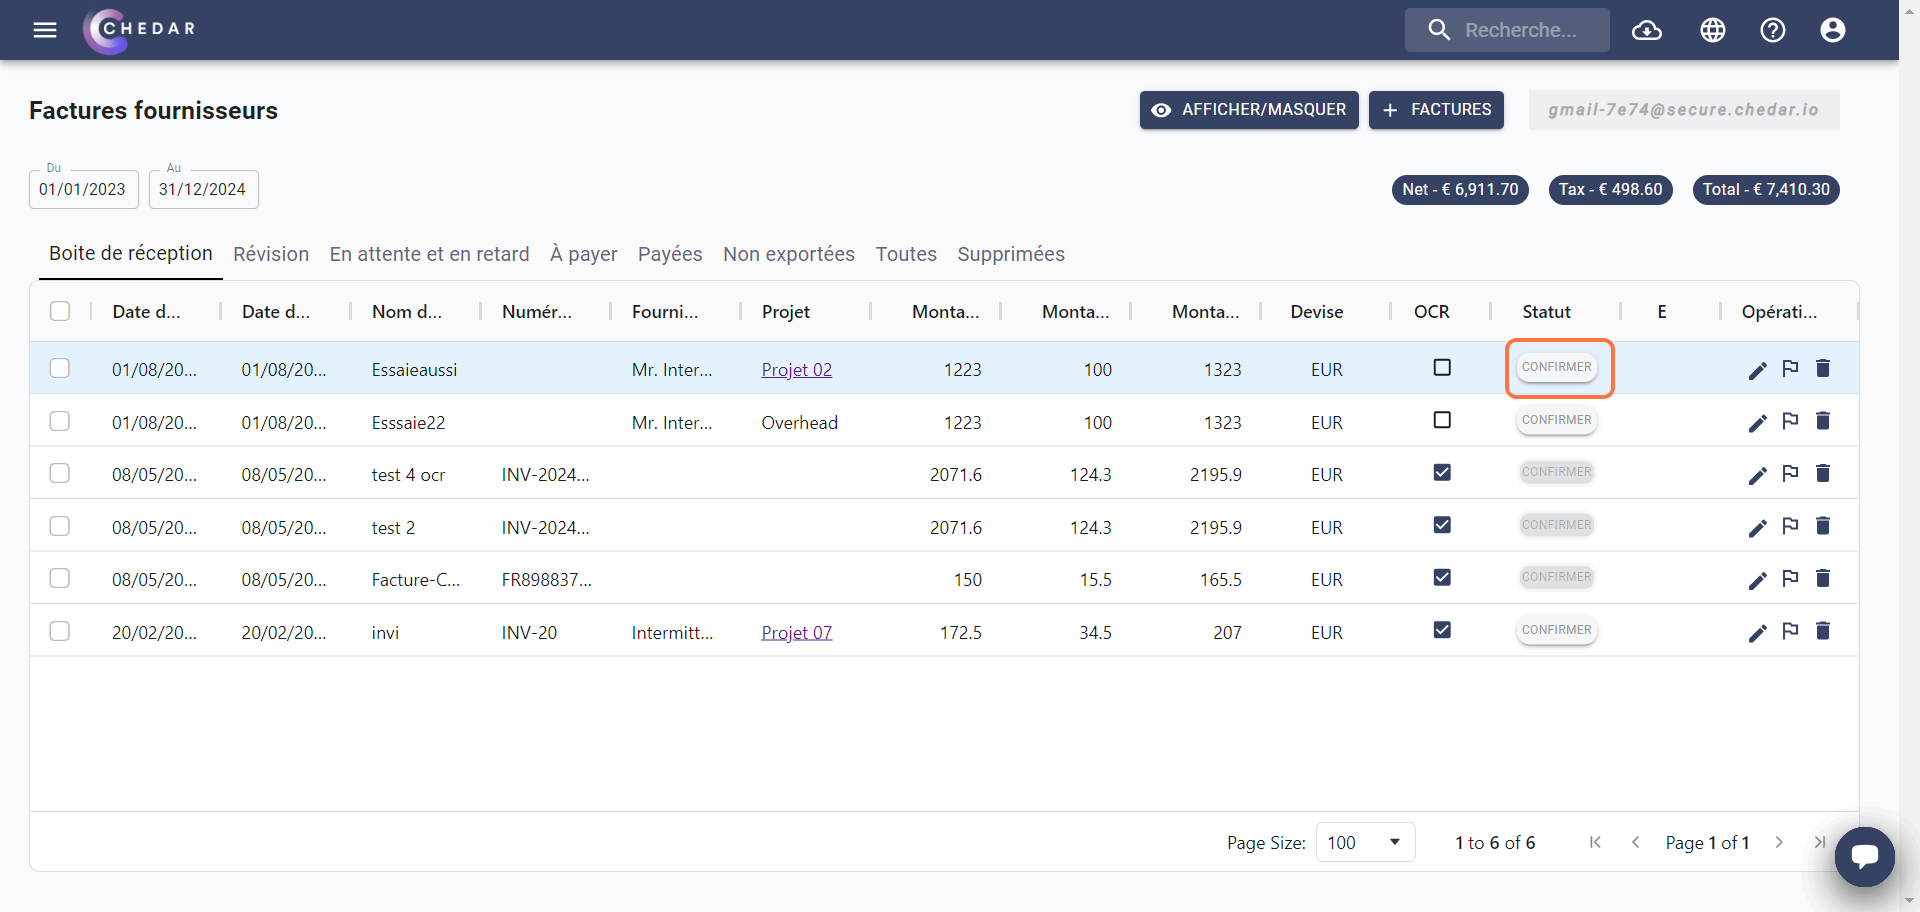
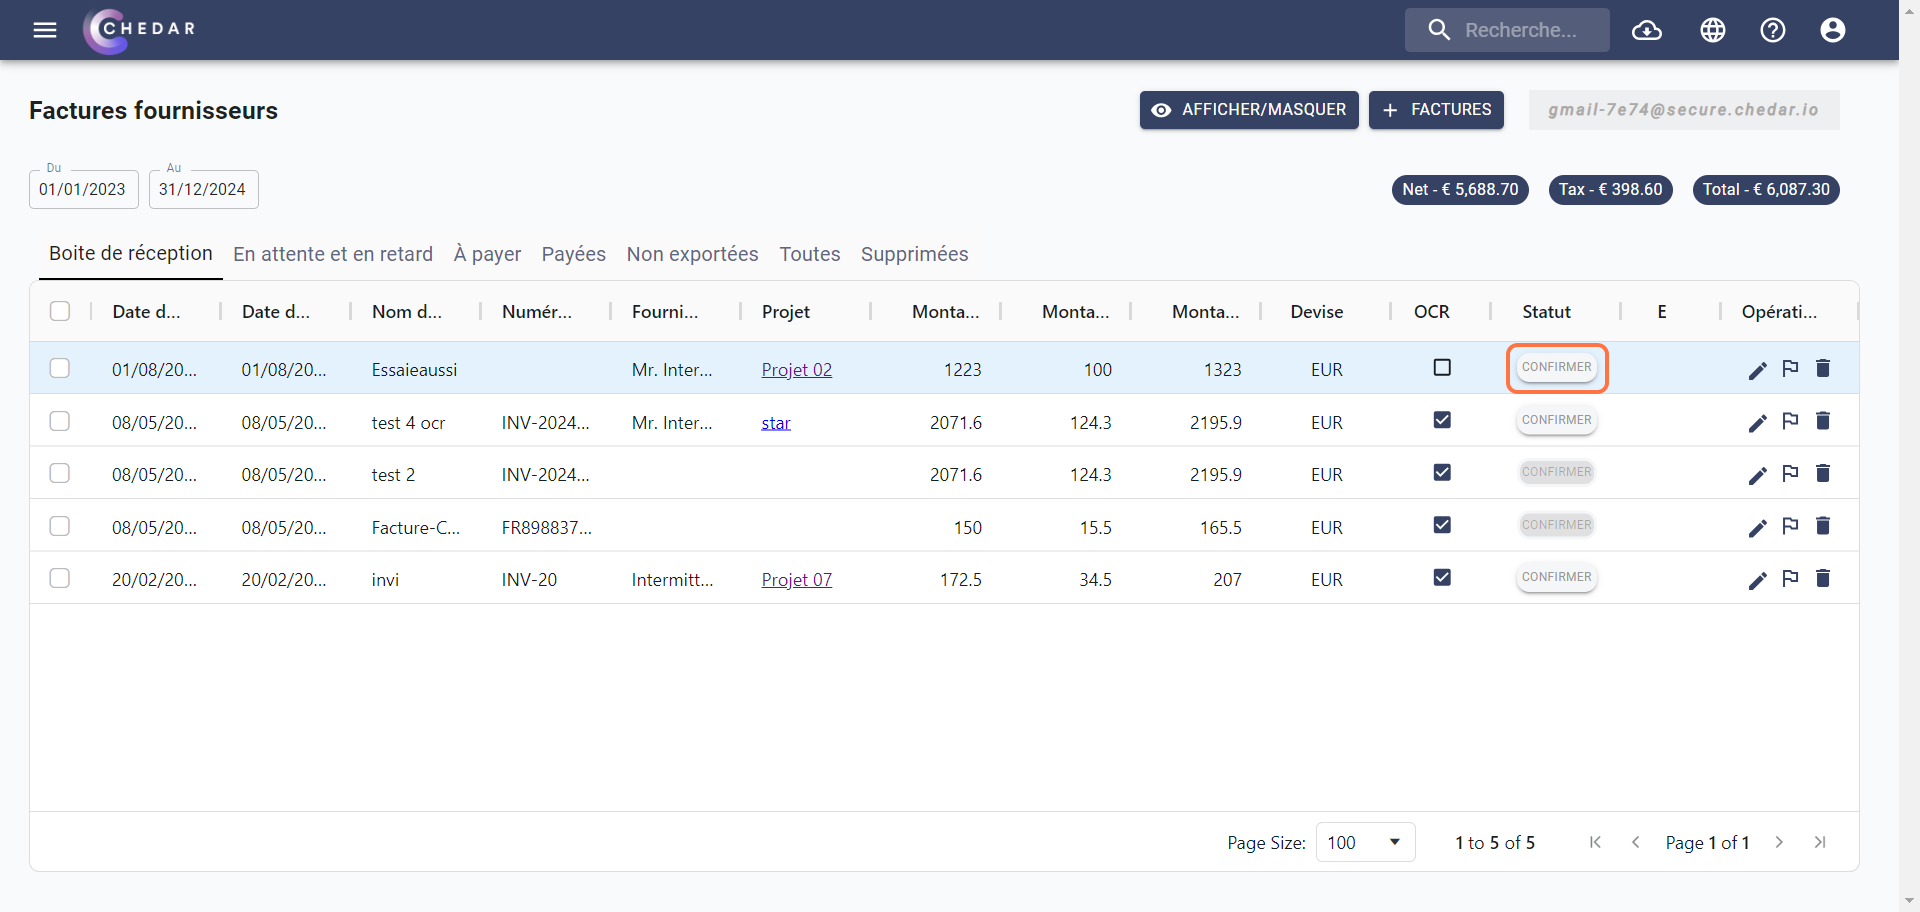
- For example, once the information of your supplier invoice is filled in, click on Confirm:
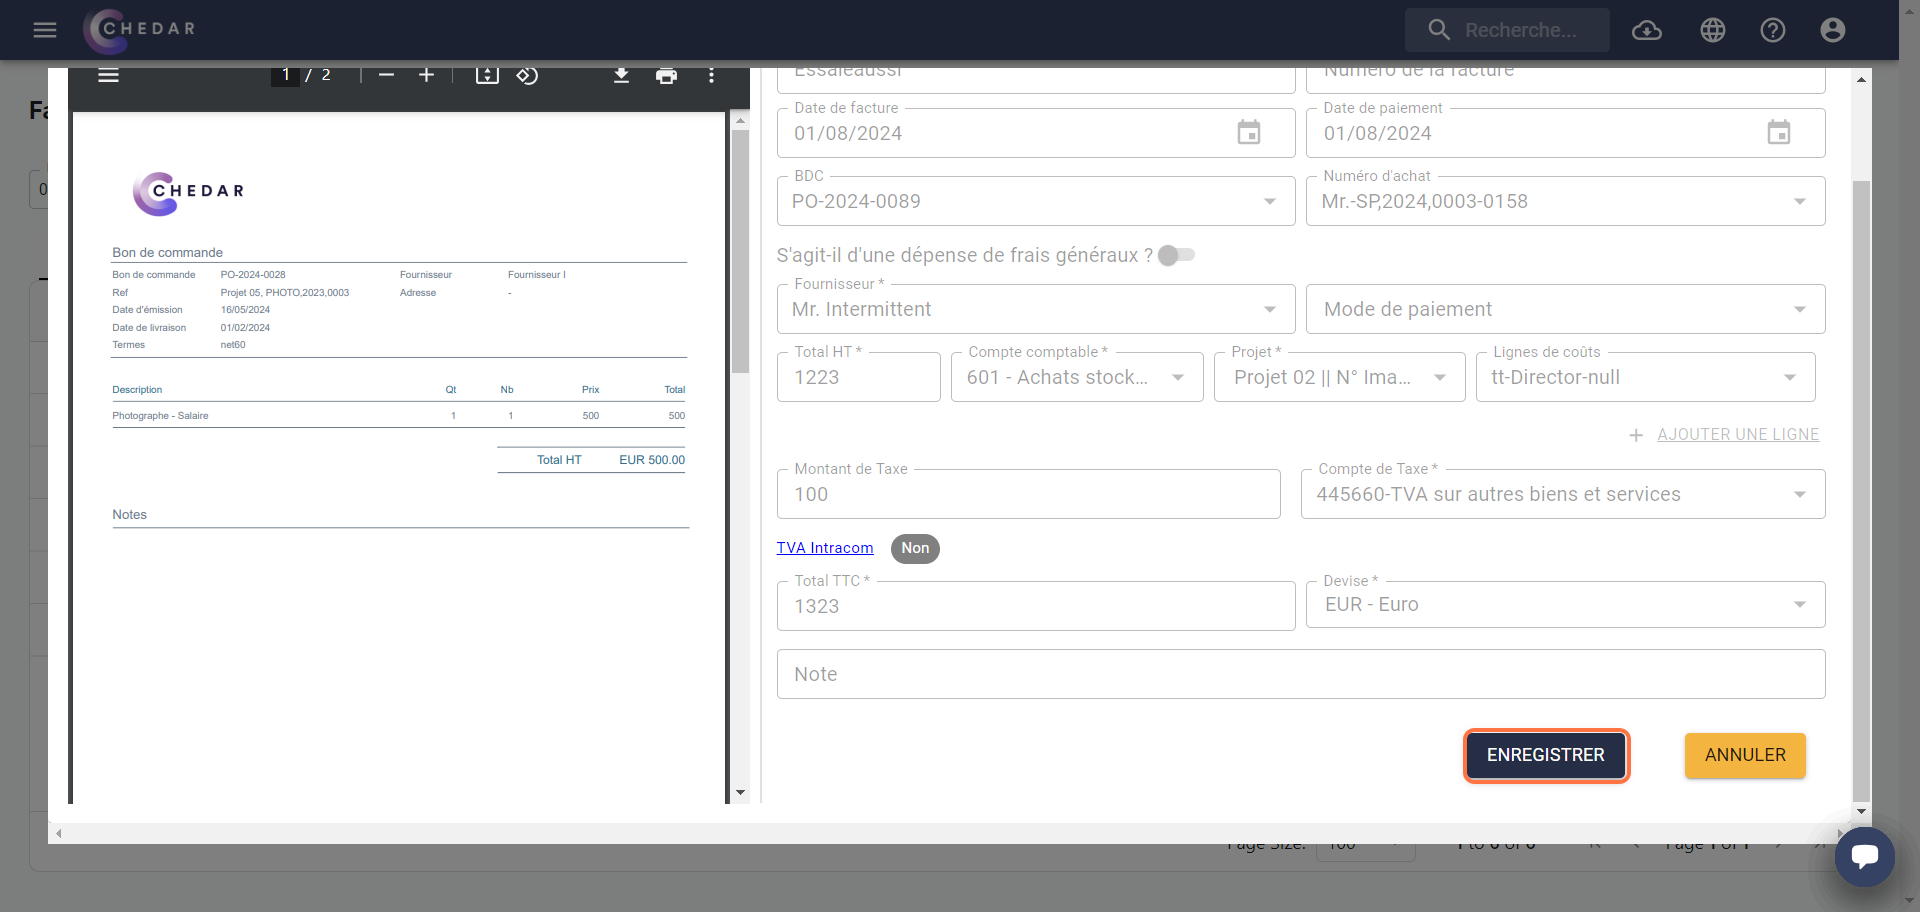
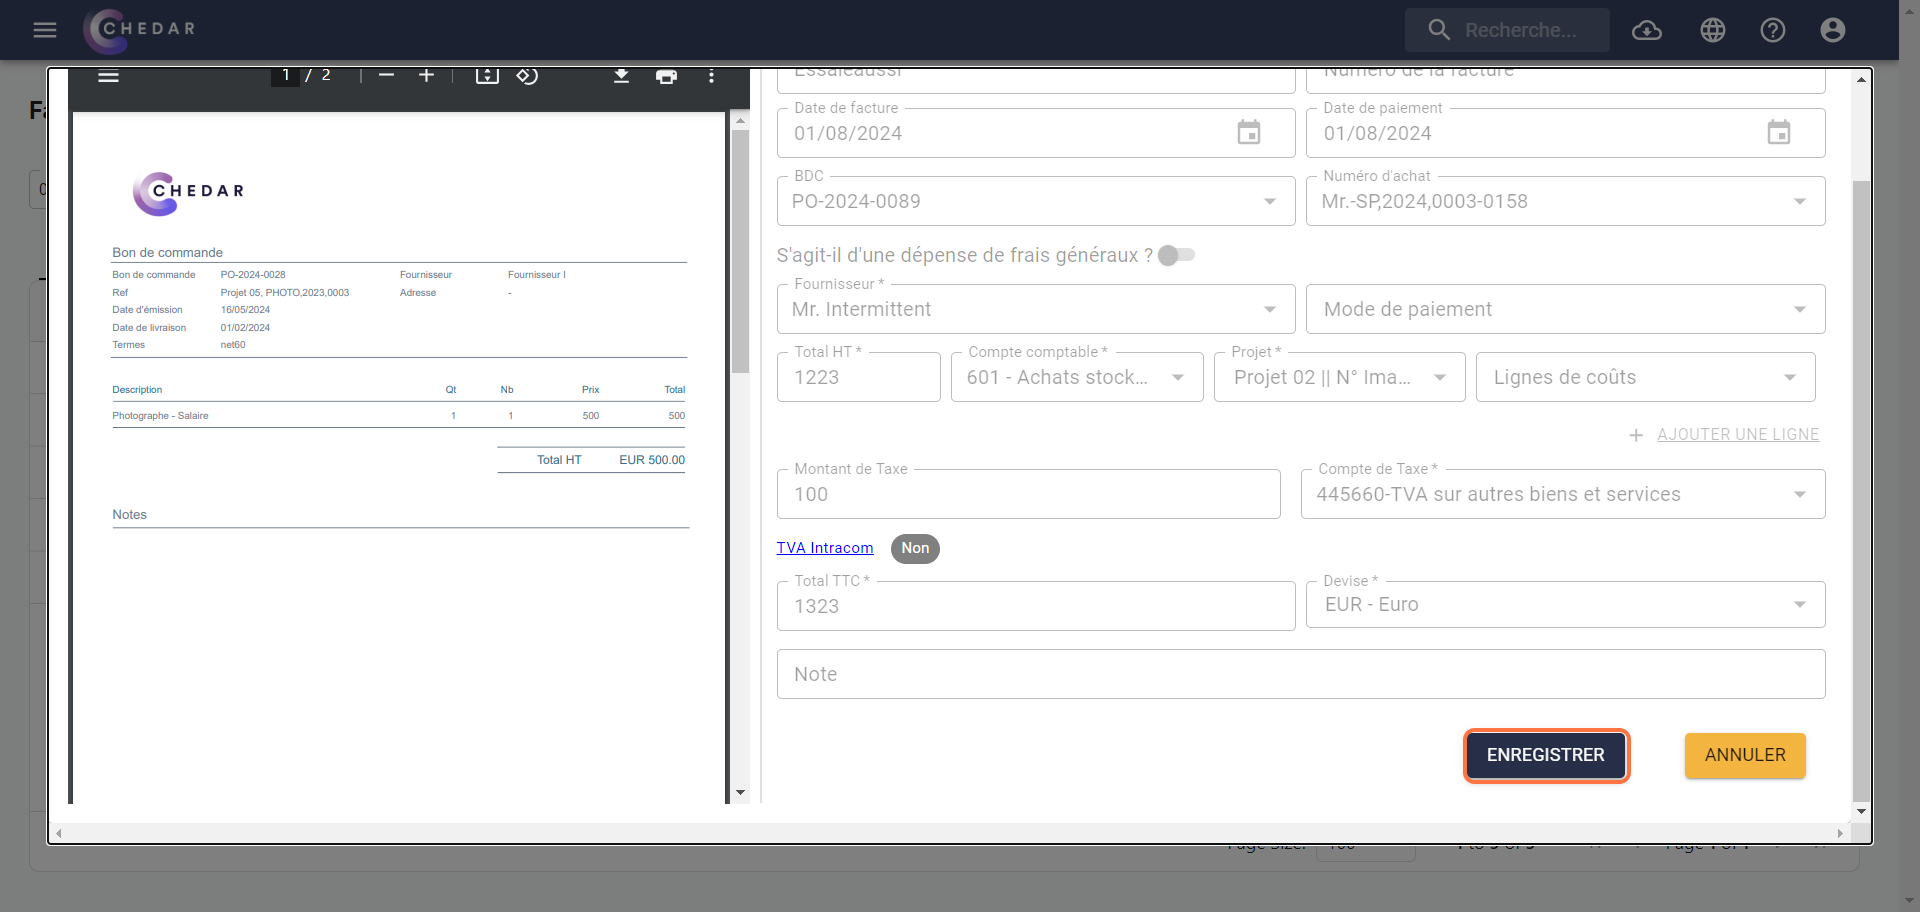
- A window allowing you to see all the information of your invoice appears. Click on Save:
- A success message appears on the right of the screen, your supplier invoice has been moved to the Review module.
- Follow the same steps to continue processing an overhead invoice.
- If you want to skip the Review step, select the No option for Review overhead costs before exporting and/or for Review supplier invoices before exporting.
If you select the No option for Review overhead costs before exporting and for Review supplier invoices before exporting, the Review tab will be hidden in Supplier Invoices
- Click Save to save your changes.
- To see how your invoice will be processed when you choose the No option, access Supplier Invoices in Expense Management from the menu by clicking on the three horizontal bars at the top left of the screen.
- For example, once you have filled in your supplier invoice information, click Confirm:
- A window allowing you to see all the information on your invoice appears. Click Save:
- A success message appears on the right of the screen, your supplier invoice has been moved to the Review module.
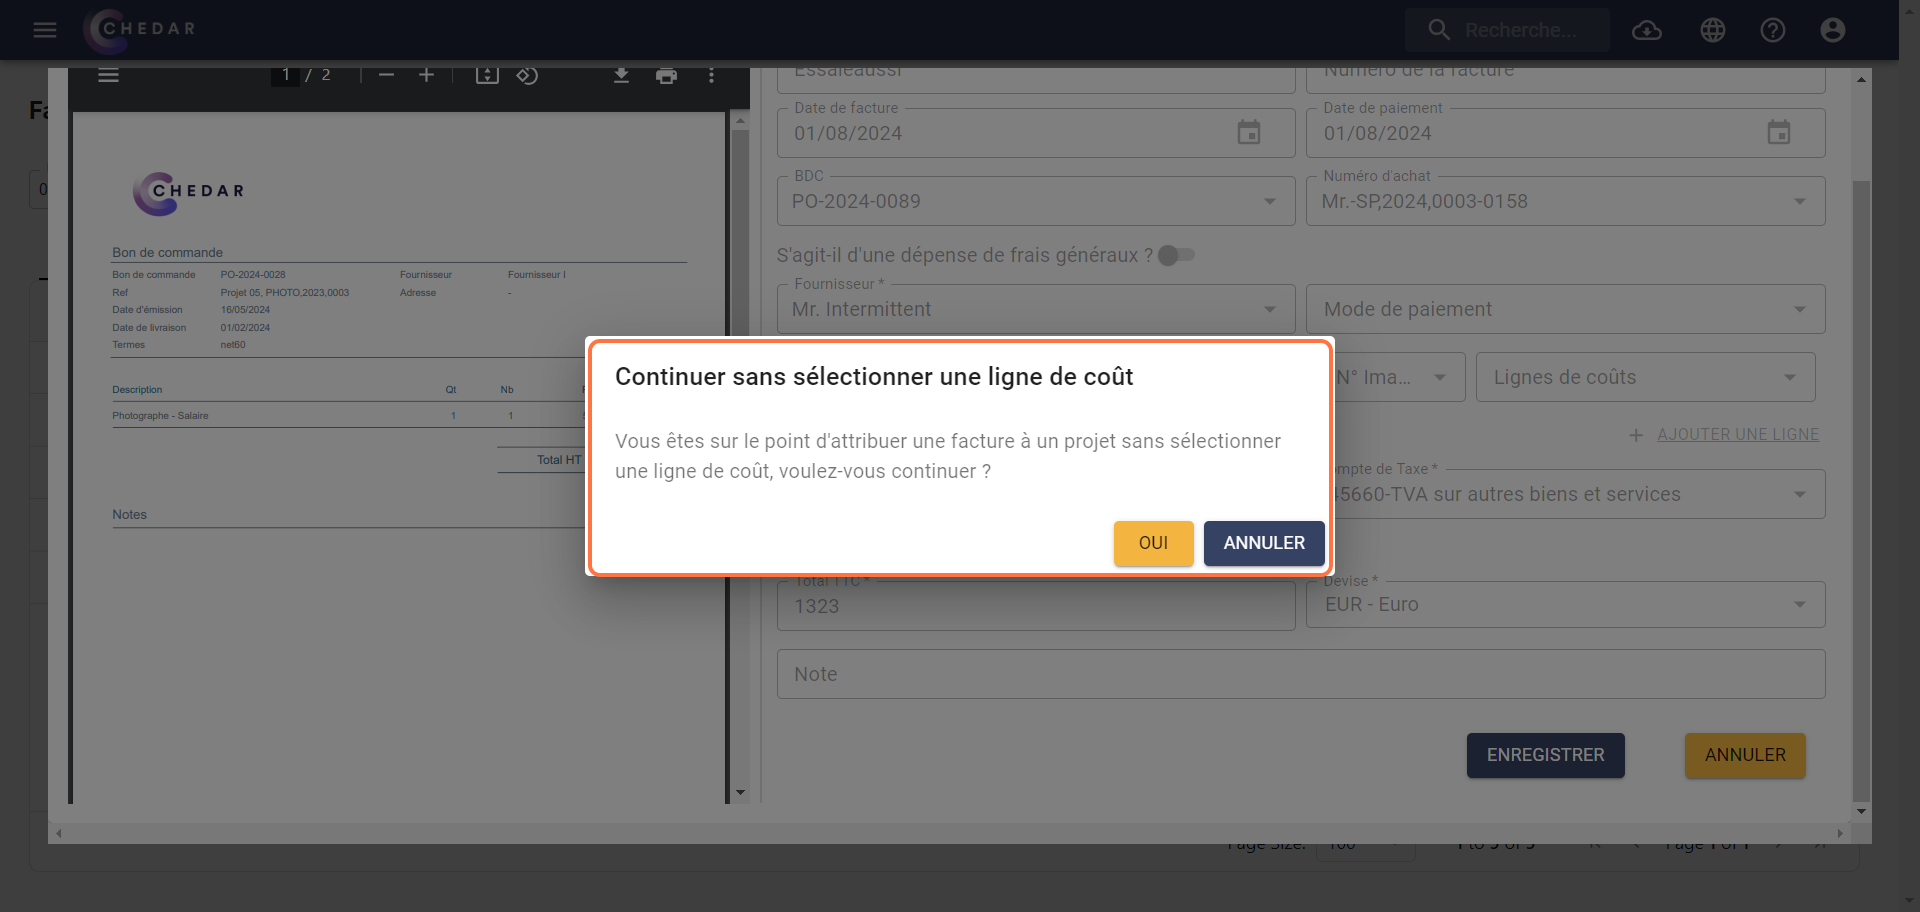
If you have not selected a cost line in your invoice, a confirmation window appears. Click Yes if you want to assign your invoice to a project without selecting a cost line.
- A success message appears on the right of the screen, your supplier invoice has been skipped the Review module and has been directly sent to the ALL section.
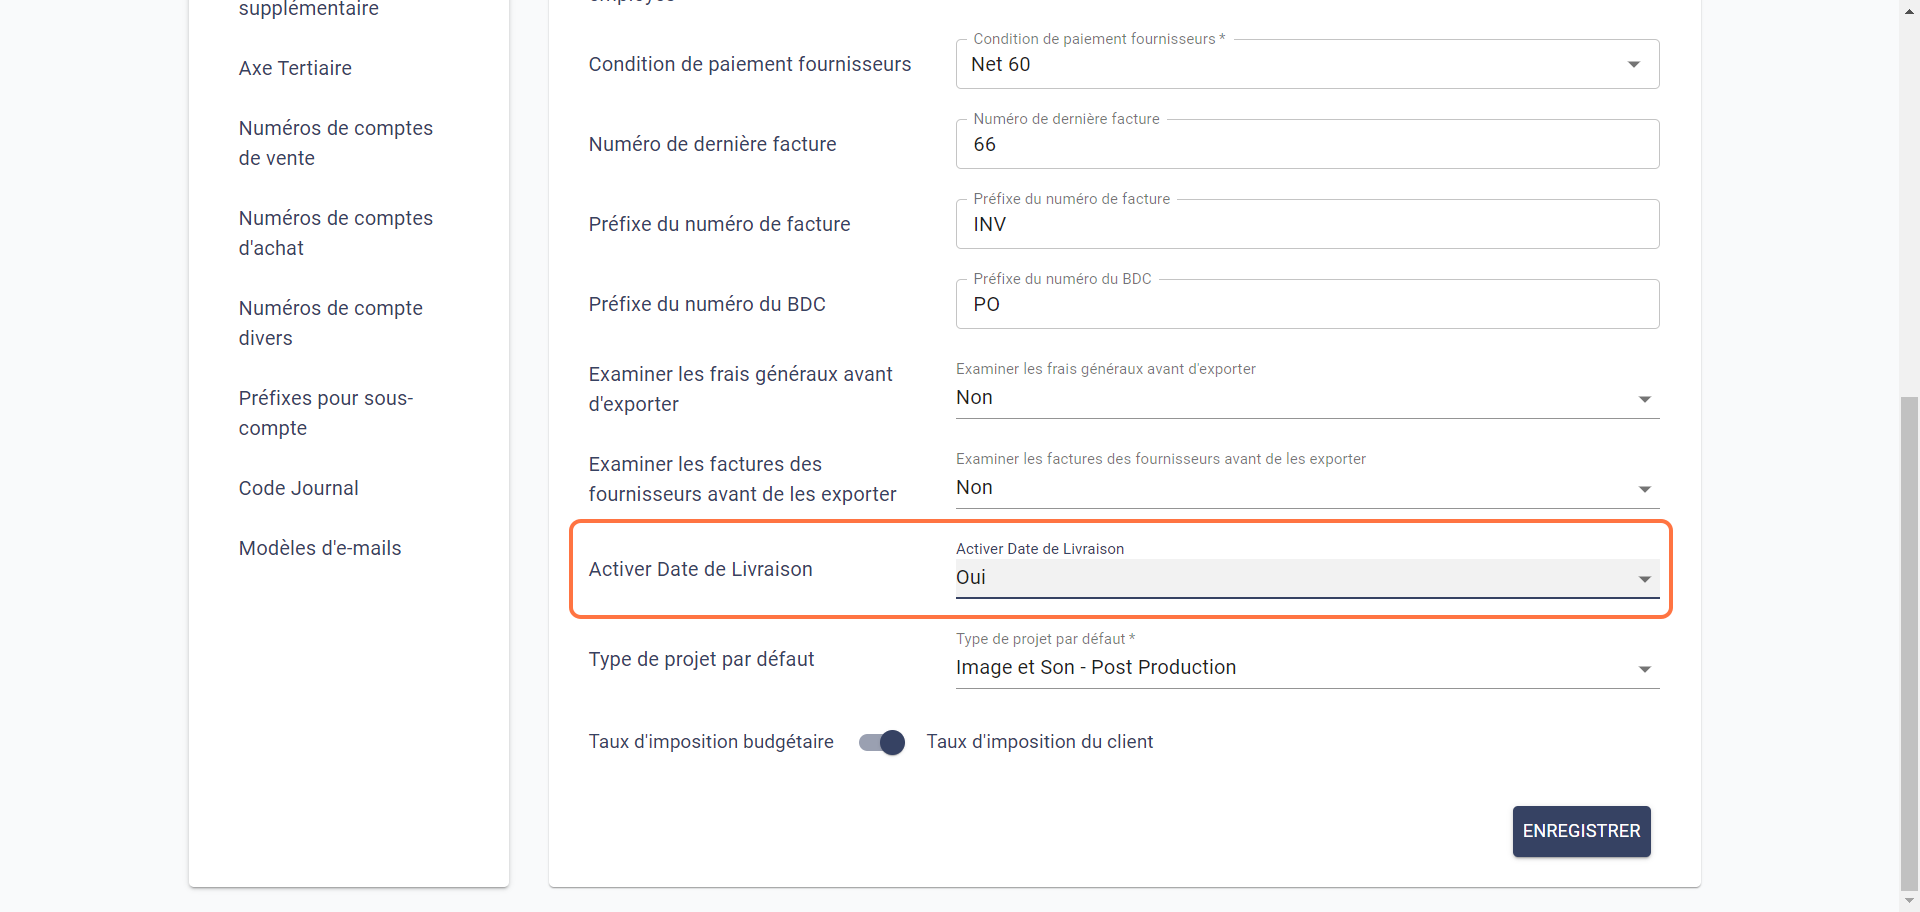
Activate Delivery Date
- You can enable the delivery date by choosing the Yes option for Enable delivery date.
- Once enabled, an additional field will appear in the quote header when creating a quote or when modifying a quote.
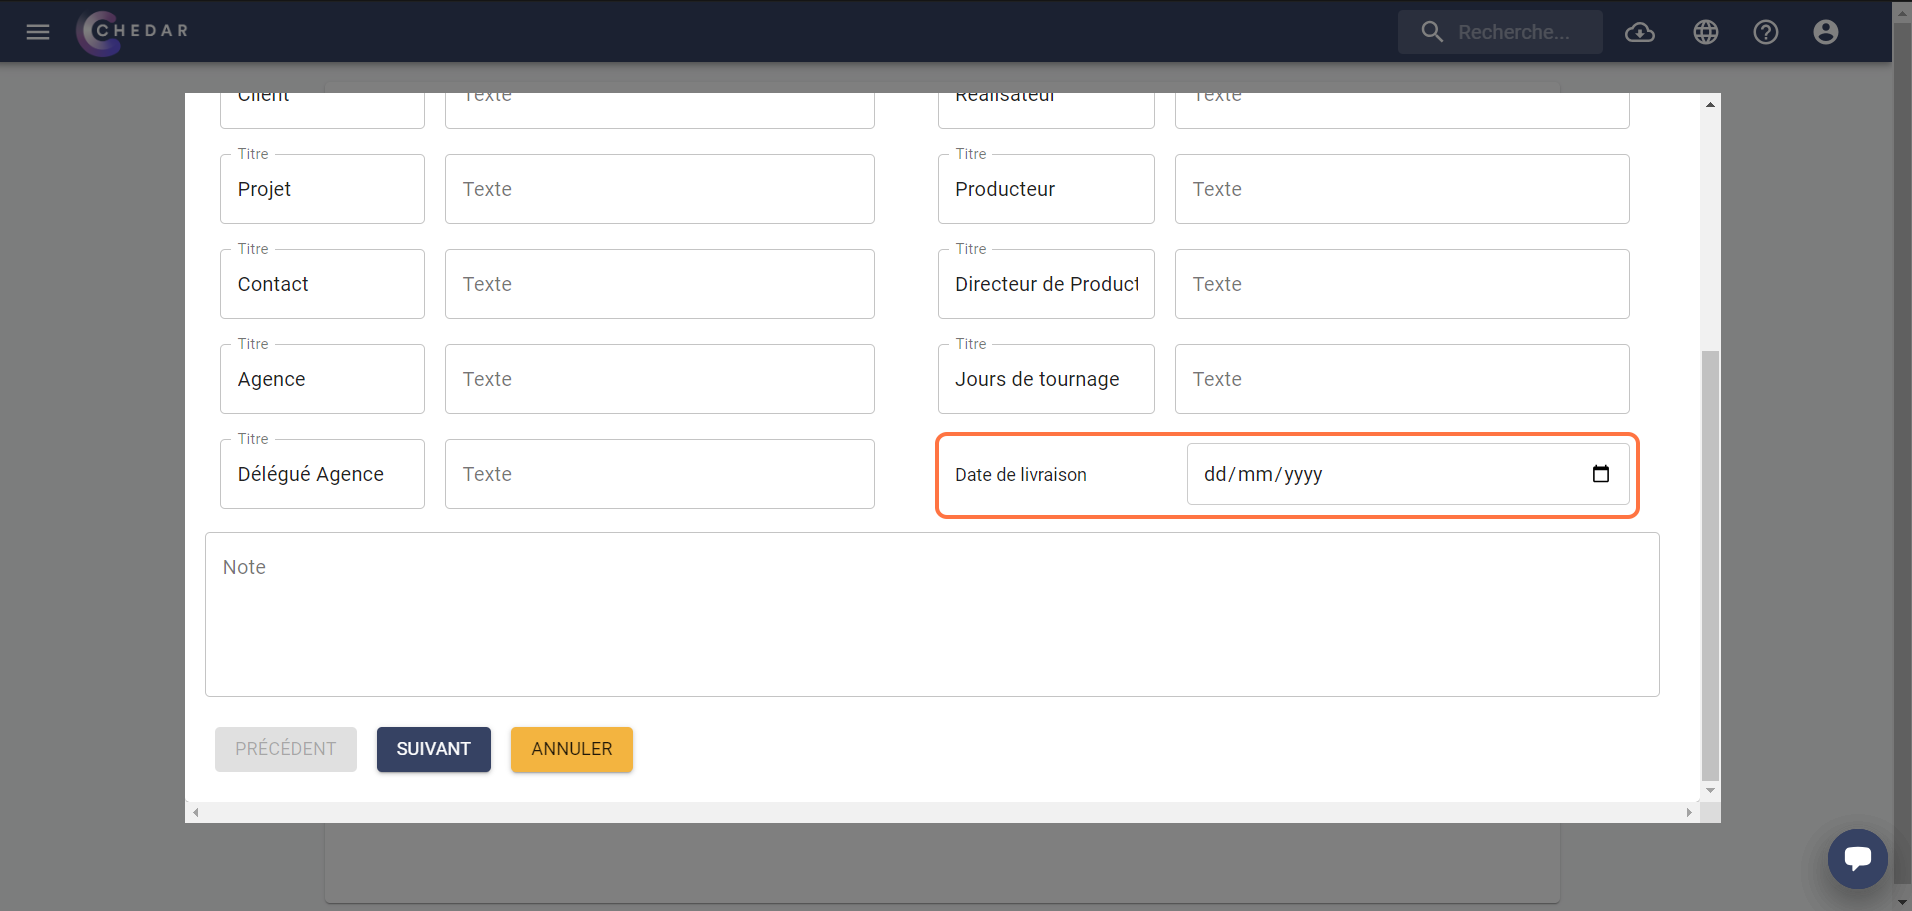
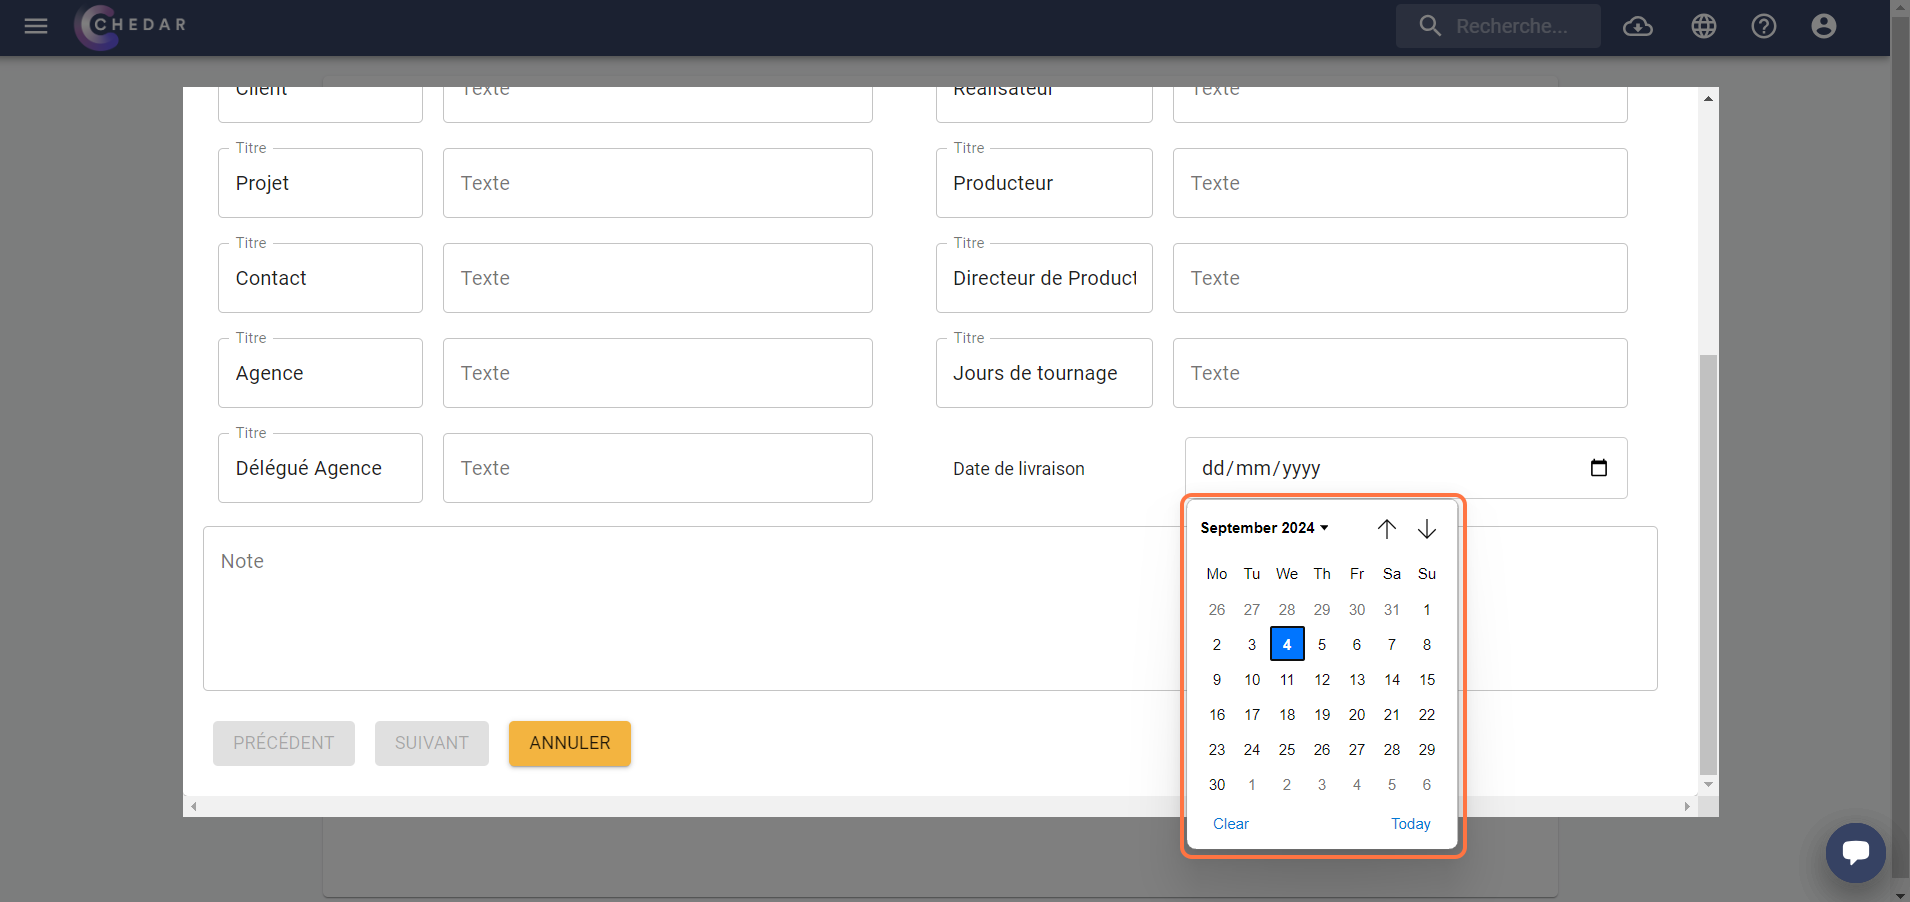
- Click on the field and choose a date from the calendar that appears.
When the delivery date is enabled, its entry becomes mandatory for all quotes. We recommend that this date correspond to the project launch date.
The delivery date allows you to track the progress of your project and ensure that the defined deadlines are met.
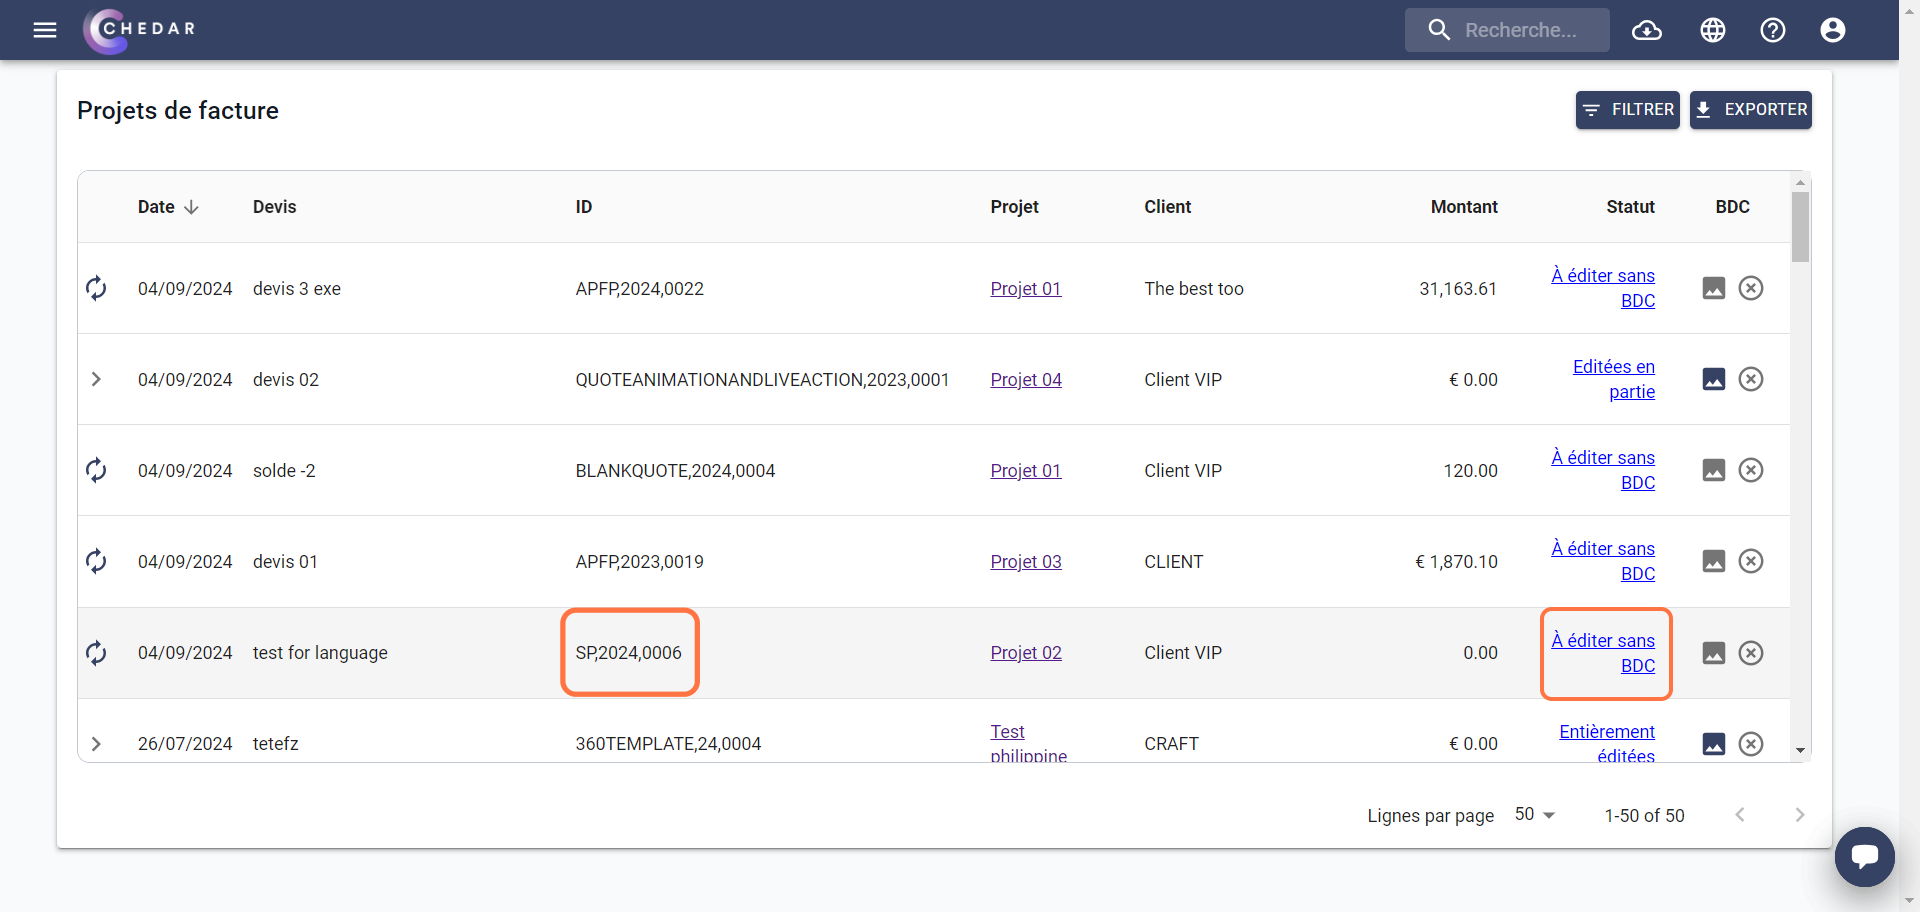
You can track the budget status from the Budget Status column in the Quote List.
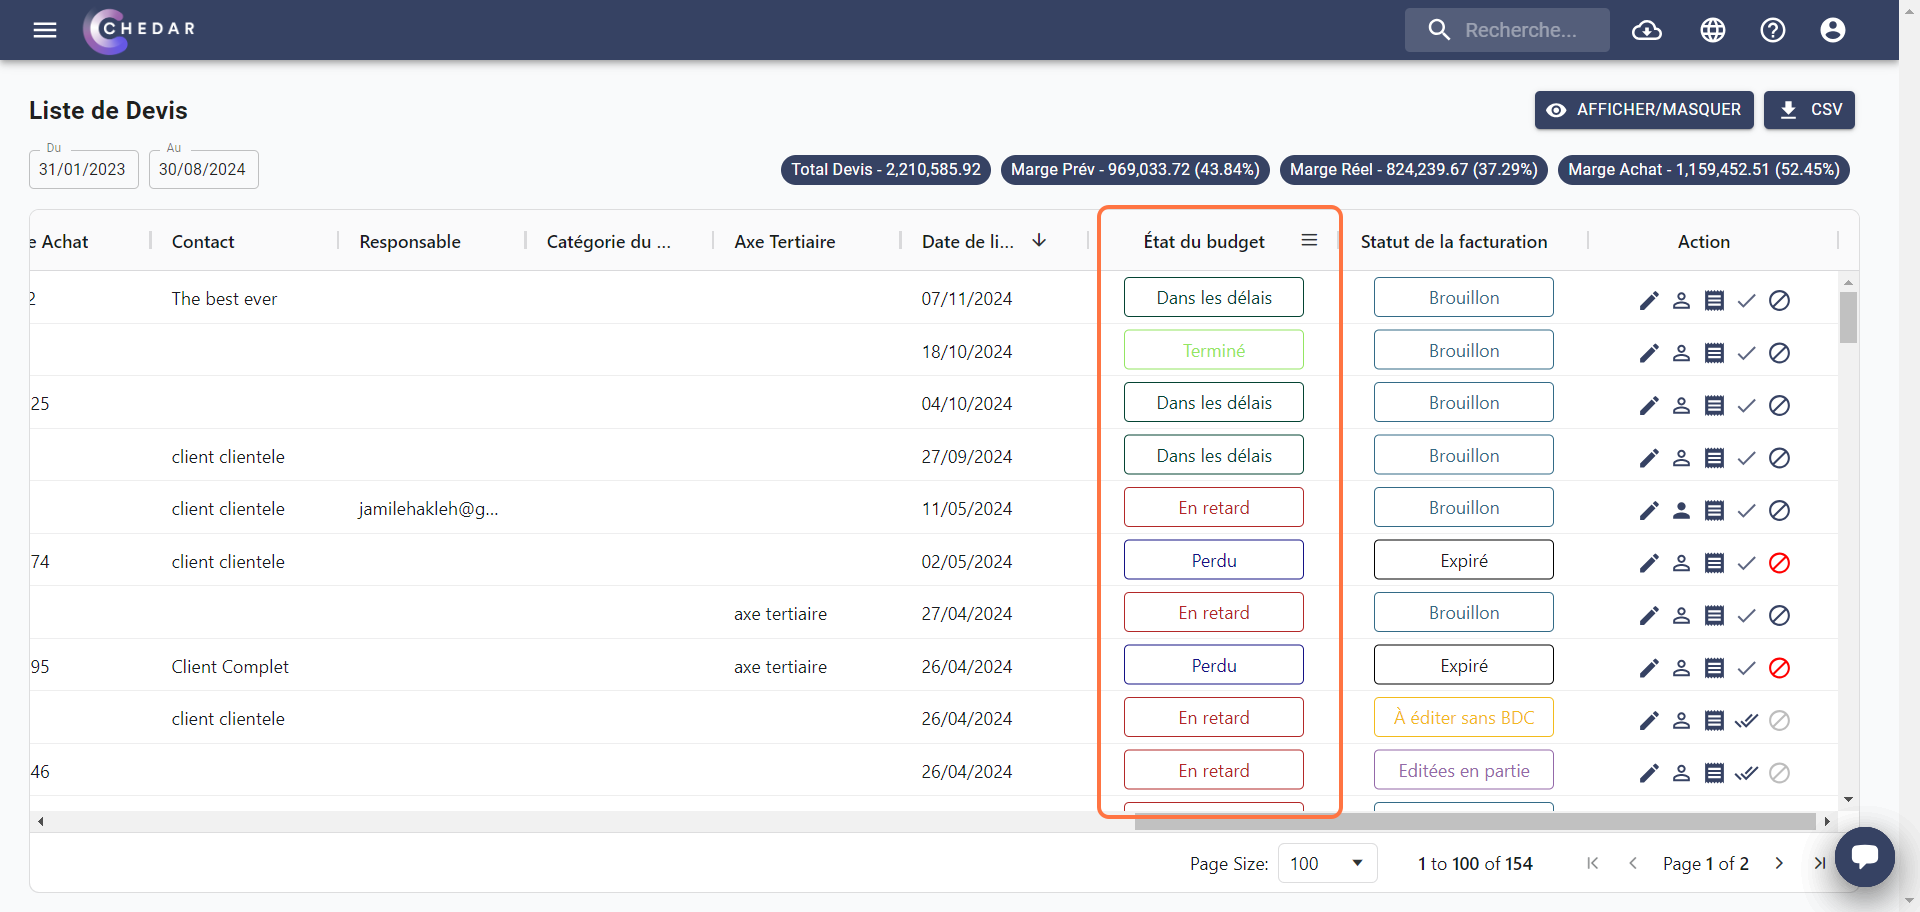
- This column shows the status of the quote based on the delivery date. The possible statuses are:
- Complete: The quote is locked.
- Off track: The quote is not locked, and the delivery date is later than today's date or has not been specified.
- On track: The quote is not locked, and the delivery date is less than or equal to today's date.
- Lost: The quote is expired.
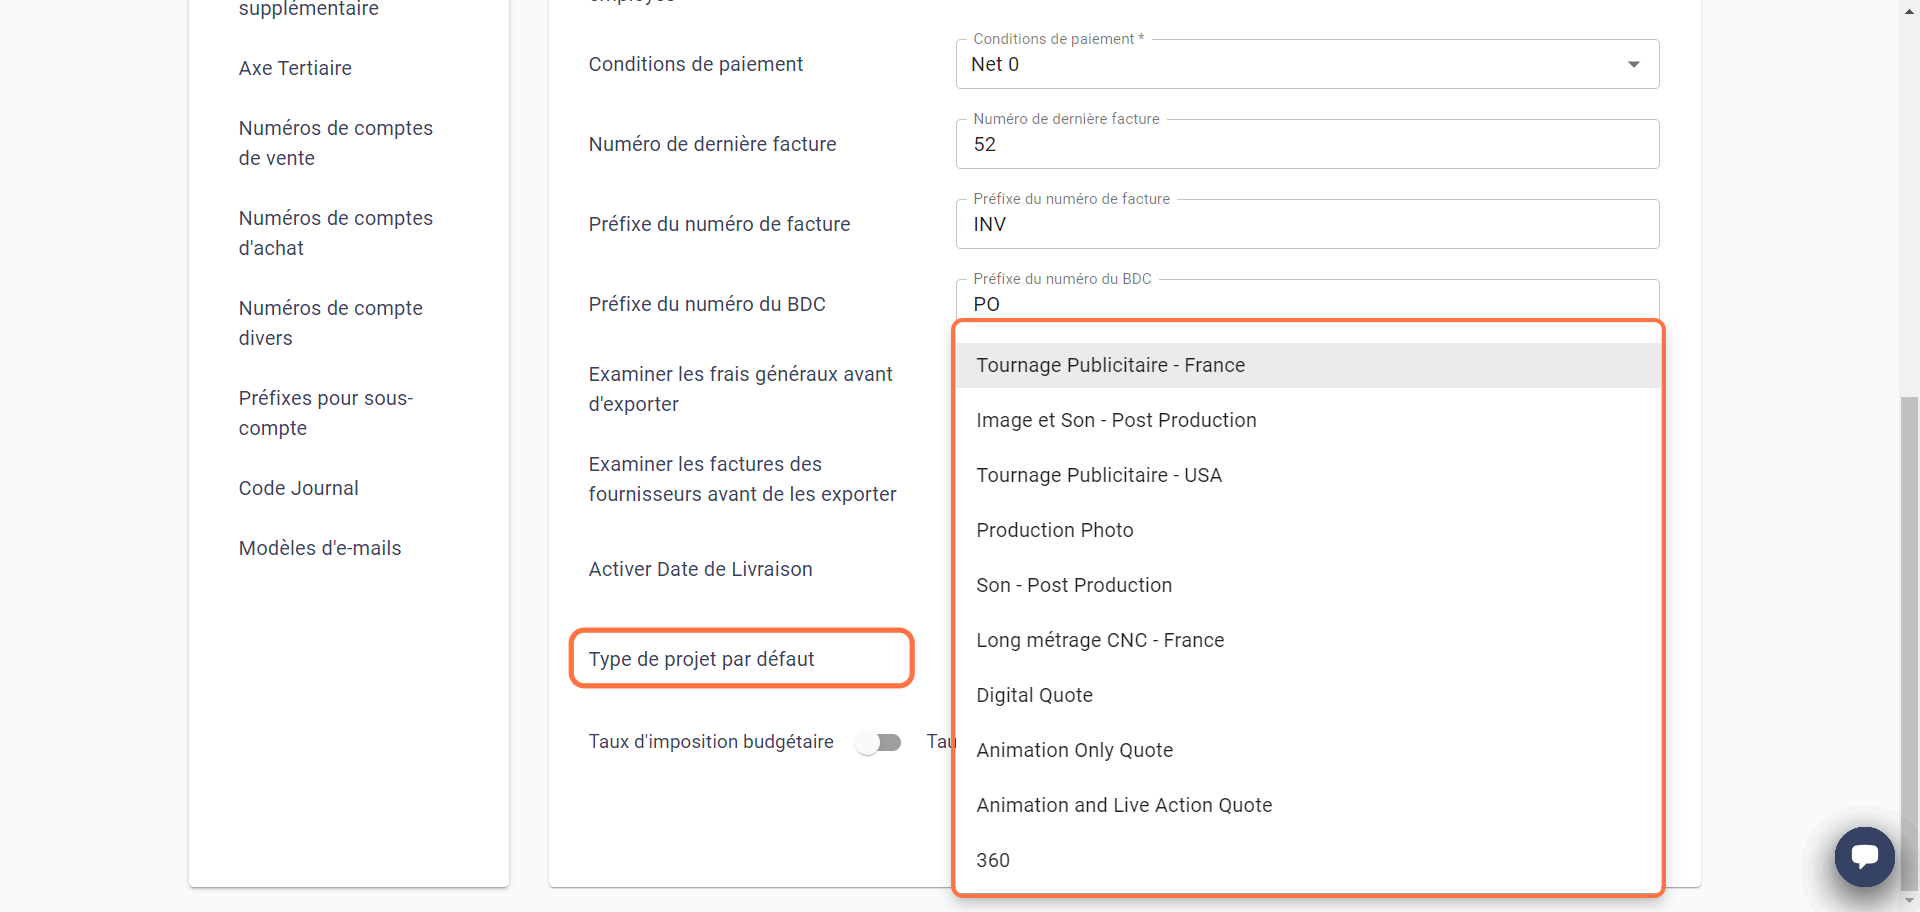
Default Project Type
- This field allows you to specify the default project type for "Expense Management" quotes.
- Click on the Default Project Type field and choose the default project type you want as default.
The Expense Management quote is a quote automatically created by Chedar when you confirm an invoice without assigning a cost line to it.
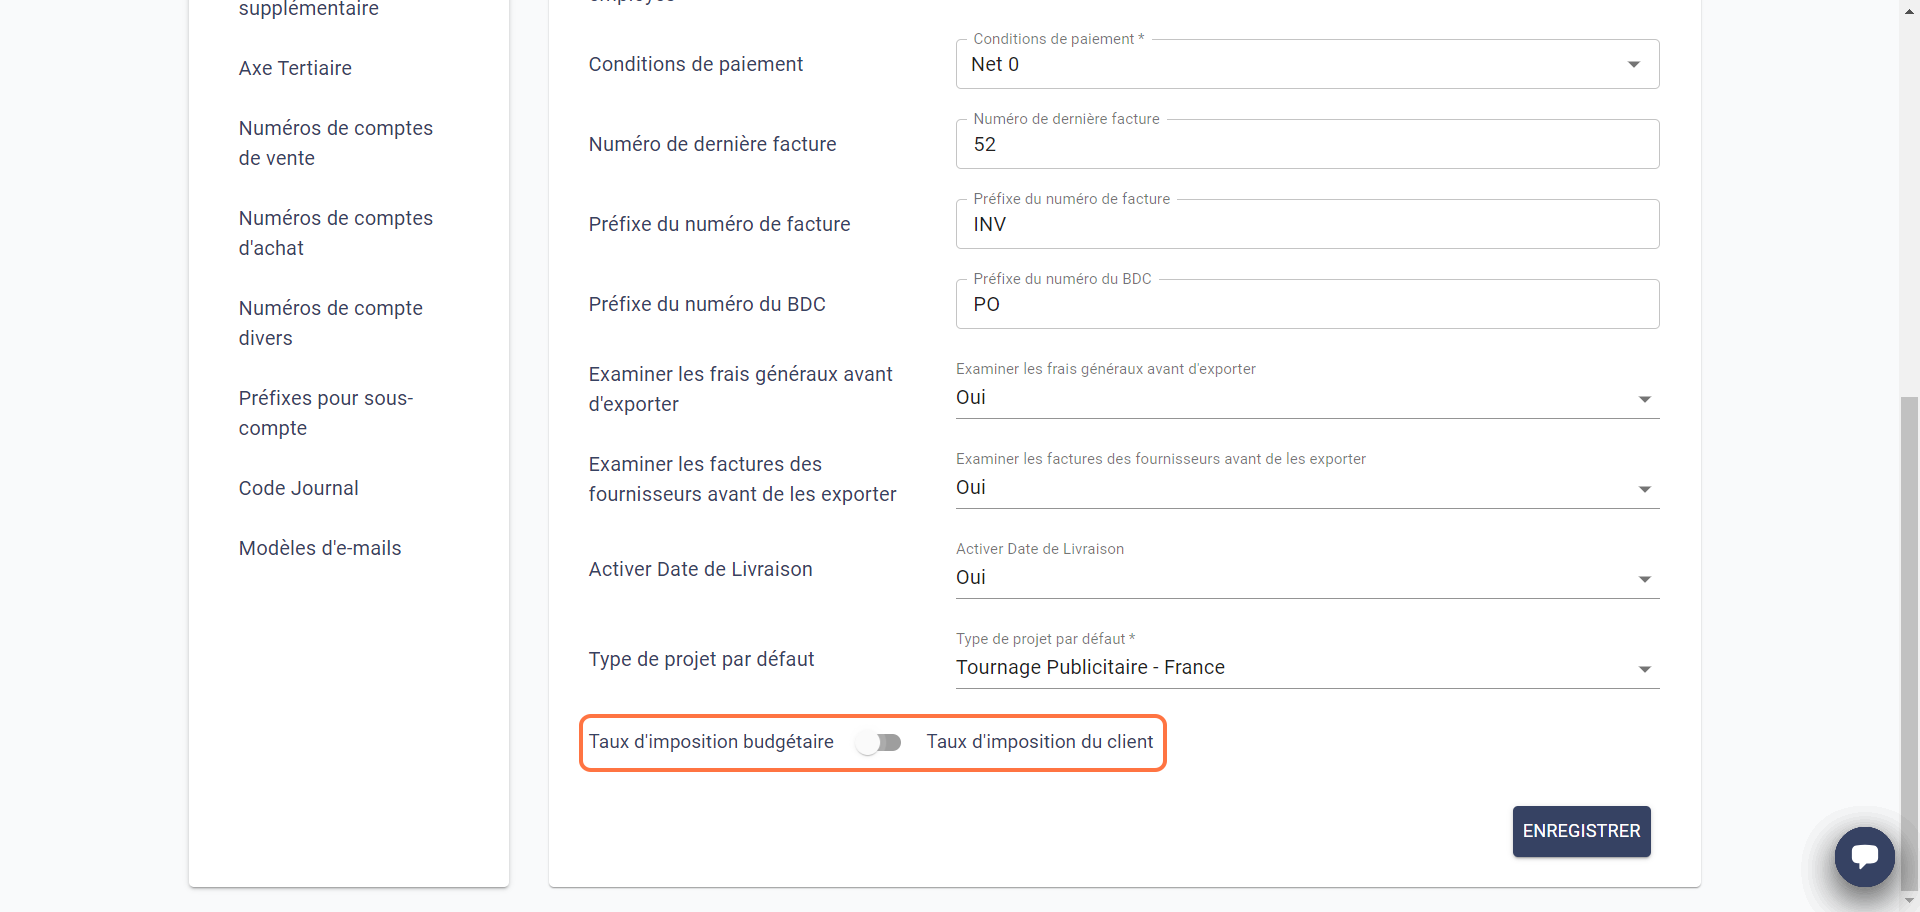
Bidget Tax rate
You have the possibility to choose the type of tax rate that will be applied to your customer invoices for "Sound Post-Production - France" quotes. See below:
- The Budget tax rate option is checked by default:
- To see the effect of this option, go to Draft invoices in Revenues in the menu by clicking on the three horizontal bars at the top left of the screen:
- Click on Generate without PO or Generate:
The draft invoice must correspond to a Sound Post-Production - France quote.
- A window appears. Click Next to access the Confirm Client Information window.
- The Apply Client Tax Rate option is unchecked by default:

- If you want to have the Apply Client Tax Rate option checked by default, go back to General in Account Settings, click on the Budget tax rate option in the account settings.
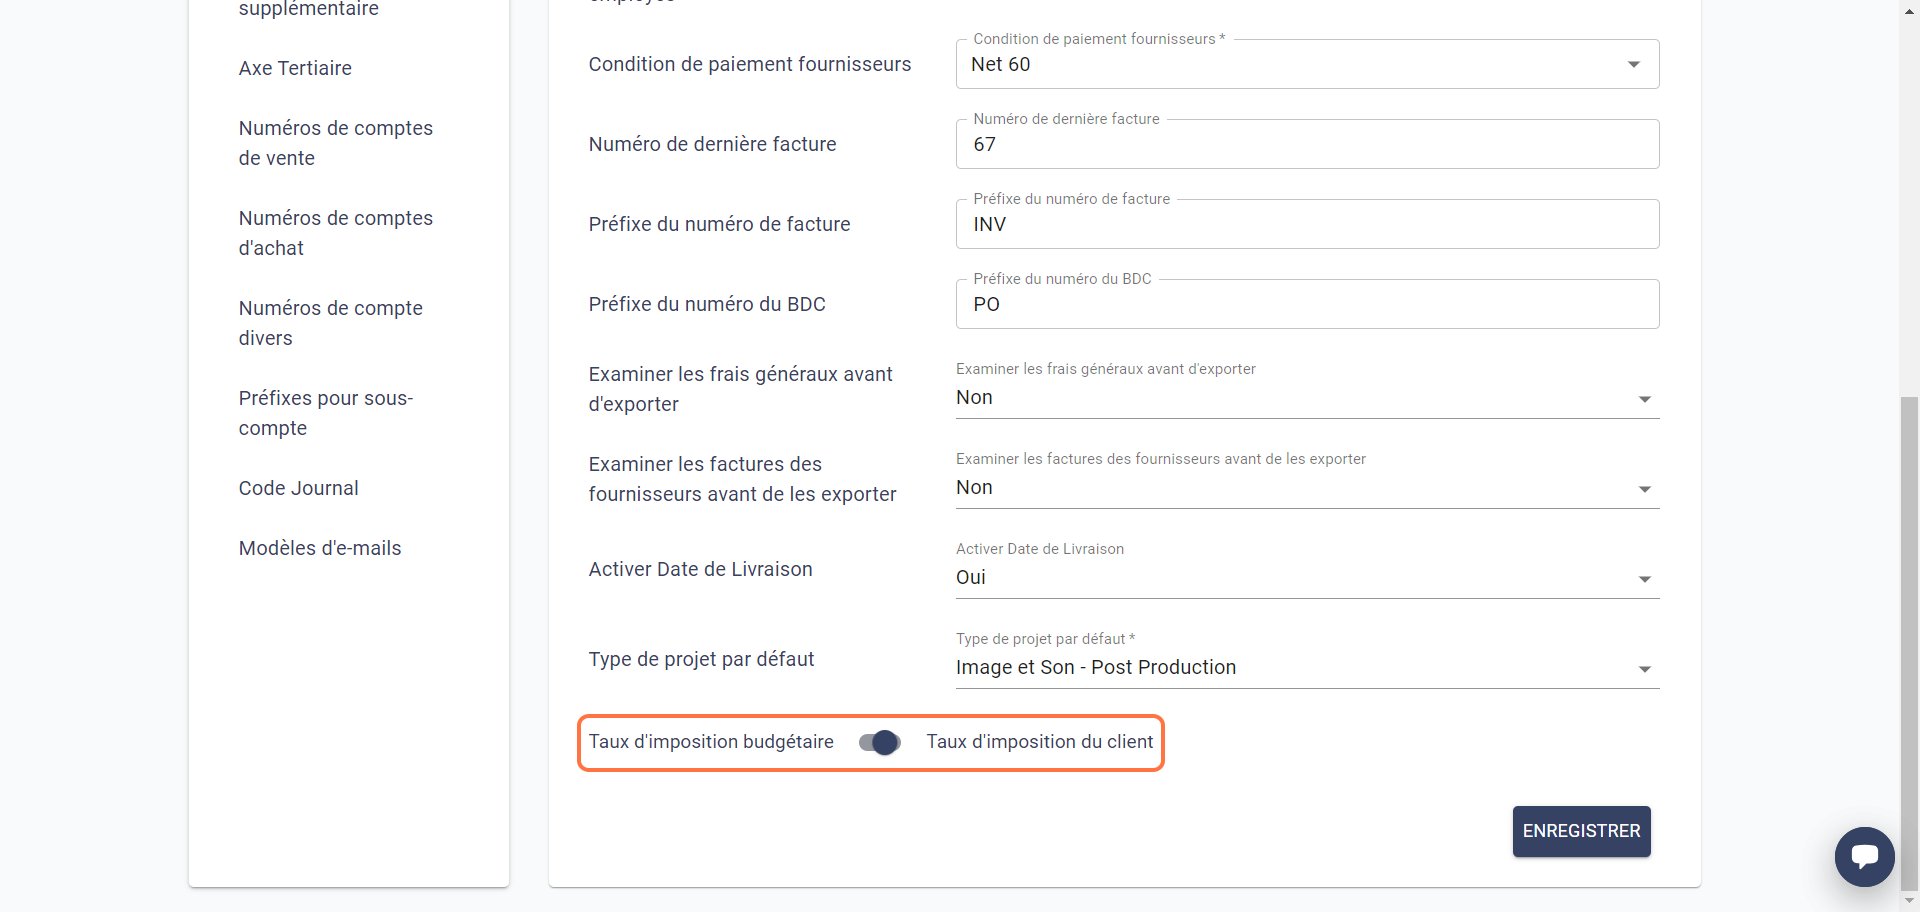
Click Save.
Go back to Draft Invoices and click on Generate without PO or Generate, then click Next in the window that appears to access the Confirm Client Information window.
The Apply Client Tax Rate option is checked by default:

You always have the possibility to check or uncheck this option in the Confirm Client Information window for the Sound Post-Production - France quote only.